Introduction
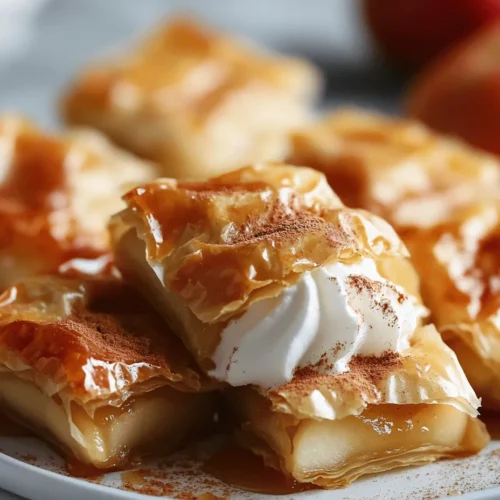
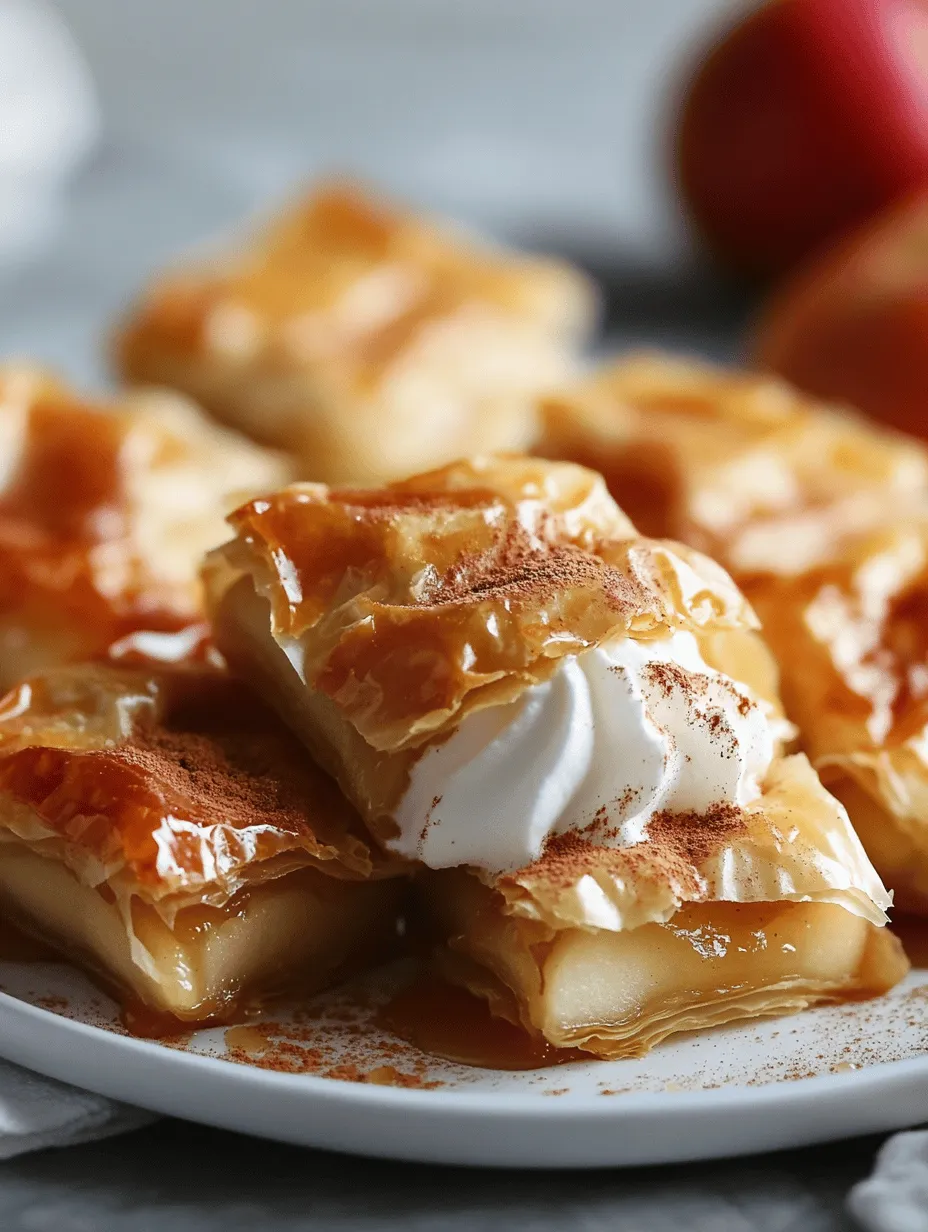
Apple desserts have a timeless allure that captivates dessert lovers around the globe. Their sweet, tart flavors and comforting textures can evoke memories of family gatherings, autumn evenings, and cozy nights in. Among the myriad of apple-based treats, the Sweet & Crunchy Apple Pie Bites stand out as a delightful twist on the traditional apple pie. These bite-sized morsels combine the familiar warmth of baked apples with the irresistible crunch of flaky pastry, making them an ideal treat for various occasions—be it a festive family gathering, a lively party, or simply a cozy night in with loved ones.
These apple pie bites offer a convenient and fun way to enjoy the classic flavors of apple pie without the hassle of slicing into a full pie. Perfectly portioned for sharing, they are also an excellent option for entertaining guests, as they can be easily passed around. Whether served warm with a scoop of vanilla ice cream or enjoyed on their own, Sweet & Crunchy Apple Pie Bites are guaranteed to be a hit.
In this article, we will delve into the details of this delightful recipe, exploring the key ingredients, preparation steps, and tips for creating the perfect apple pie bites that will impress your family and friends.
Understanding the Ingredients
Overview of Key Ingredients
To create the perfect Sweet & Crunchy Apple Pie Bites, it’s essential to understand the role of each ingredient that contributes to their wonderful flavor and texture. Let’s take a closer look at the key components that make these treats truly special.
Apples: Best Varieties for Baking
The heart of any apple dessert lies in the apples themselves, and choosing the right variety is crucial for achieving the best flavor and texture. When it comes to baking, two standout choices are Granny Smith and Honeycrisp apples.
– Granny Smith apples are known for their tartness, which provides a refreshing contrast to the sweetness of the sugar and spices used in the filling. Their firm texture also holds up well during baking, ensuring that the apple bites remain juicy without becoming mushy.
– Honeycrisp apples, on the other hand, are celebrated for their balanced sweetness and crisp texture. They add a delightful sweetness to the filling and contribute a pleasant crunch that enhances the overall experience of the bites.
Depending on your preference, you can choose either variety or even mix both for a more complex flavor profile. The combination of sweet and tart apples creates a harmonious filling that every apple lover will appreciate.
Lemon Juice: Importance in Balancing Sweetness
Lemon juice plays a pivotal role in this recipe, beyond just adding a citrusy note. The acidity of lemon juice helps to balance the natural sweetness of the apples and the sugar added to the filling. Additionally, it prevents the apples from browning, ensuring that your filling stays vibrant and visually appealing.
When combining the apples with lemon juice, be mindful to use fresh lemon juice rather than bottled varieties, as fresh juice offers a brighter flavor that enhances the overall dish. A tablespoon or two should suffice to elevate the taste.
Ground Cinnamon: A Staple Spice for Warmth and Aroma
No apple dessert is complete without the warm embrace of ground cinnamon. This aromatic spice adds depth and warmth to the filling, enhancing the natural flavors of the apples. The comforting scent of cinnamon wafting through your kitchen as the bites bake will evoke feelings of nostalgia and make your home feel inviting.
Cinnamon also pairs beautifully with the other ingredients, creating a cozy, spiced flavor that is synonymous with fall and holiday baking.
Brown Sugar: The Role of Brown Sugar in Adding Depth and Moisture
Brown sugar is another essential ingredient in these apple pie bites. Its molasses content imparts a rich, deep flavor that complements the sweetness of the apples. Unlike granulated sugar, brown sugar also contributes moisture to the filling, ensuring that the apple mixture remains succulent and tender.
For the best results, consider using light brown sugar for a milder flavor or dark brown sugar for a more pronounced molasses taste. Both will work beautifully in this recipe.
Pre-Made Phyllo or Puff Pastry: Convenience and Texture Differences
The choice between phyllo and puff pastry can significantly impact the texture of your Sweet & Crunchy Apple Pie Bites.
– Phyllo pastry is a thin, flaky dough that bakes up crisp and light. It offers a delicate crunch that contrasts nicely with the tender apple filling. While working with phyllo can be a bit tricky due to its fragility, the end result is well worth the effort.
– Puff pastry, on the other hand, is a richer dough that puffs up during baking, creating a buttery, flaky texture. This pastry provides a more substantial base for the apple bites, making them heartier.
For convenience, both options are readily available in grocery stores. Choose the one that best suits your taste and desired texture for the apple pie bites.
Preparation Steps in Detail
Creating Sweet & Crunchy Apple Pie Bites is a straightforward process, but careful attention to detail will ensure the best results. Let’s break down the preparation steps involved in crafting these delightful treats.
Preparing the Apples
The first step in this recipe is preparing the apples. Begin by peeling, coring, and slicing your chosen apples into small, uniform pieces. This not only makes for an aesthetically pleasing filling but also ensures even cooking.
Once the apples are sliced, it’s essential to marinate them with lemon juice, ground cinnamon, and brown sugar. This mixture should sit for about 10-15 minutes, allowing the flavors to meld and the apples to soften slightly. The lemon juice will work its magic in balancing sweetness while the cinnamon and brown sugar will create a deliciously fragrant filling.
Tips for Achieving the Perfect Apple Texture for Baking
To achieve the ideal texture for your apple filling, consider the following tips:
– Uniform Slices: Cut your apples into consistent sizes to ensure even cooking. Aim for pieces that are about ¼ inch thick. This size allows the apples to soften without losing their structure during baking.
– Don’t Overmarinate: While it’s important to let the apples sit in the marinade, avoid letting them sit for too long. Prolonged exposure to sugar can cause the apples to release excess moisture, which may result in a soggy filling.
Prepping the Pastry
Next, it’s time to prepare your chosen pastry. If you opt for phyllo pastry, remove it from the packaging and lay it flat on a clean work surface. Keep the sheets covered with a damp cloth to prevent them from drying out as you work.
Differences Between Phyllo and Puff Pastry
Understanding the differences between phyllo and puff pastry will help you decide which method to use:
– Phyllo pastry requires you to layer several sheets together, brushing each sheet with melted butter or oil to create a rich, flaky texture. It’s important to work quickly to prevent the sheets from drying.
– Puff pastry comes in sheets that can be rolled out and cut into desired shapes without the need for layering. This option is more forgiving for beginners and yields a buttery, flaky result.
Techniques for Layering Phyllo Pastry Effectively
If you choose to work with phyllo pastry, follow these techniques for best results:
– Layering: Use at least 4-6 sheets of phyllo, brushing each with melted butter or oil. This creates a sturdy and flaky base for the bites.
– Cutting: Once layered and brushed, cut the phyllo into squares or circles, depending on your desired shape for the bites. Ensure they are large enough to hold a generous scoop of the apple filling.
Tips on Cutting and Rolling Puff Pastry for Uniformity
For those using puff pastry, the preparation is a bit simpler:
– Roll Out: If using refrigerated puff pastry, roll it out on a lightly floured surface to about 1/8 inch thickness. This ensures even cooking and a flaky texture.
– Cutting: Use a sharp knife or pizza cutter to cut the rolled pastry into squares or circles that will encase the apple filling. Aim for uniform sizes to ensure even baking.
Filling and Shaping the Bites
Now that you have your apple filling prepared and the pastry ready, it’s time to fill and shape the bites.
Techniques for Filling the Pastry
When filling your pastry, follow these techniques to ensure each bite is perfectly packed:
– Portion Control: Use a tablespoon or small cookie scoop to measure out the apple filling. This will help you maintain consistent sizes across all bites.
– Avoid Overfilling: While it may be tempting to add more filling, be careful not to overstuff the pastry. Overfilling can lead to bursting during baking, resulting in a messy treat.
Once filled, carefully fold or pinch the edges of the pastry to seal the bites. If you’re using phyllo, you can create a small pocket by gathering the corners together, while puff pastry can be folded over and crimped with a fork for a decorative touch.
With the filling and shaping complete, you’ll be just a step away from baking these delicious bites to golden perfection. Stay tuned for the final steps of baking and serving these Sweet & Crunchy Apple Pie Bites, where we will discuss tips for achieving the best results and ways to enjoy this delightful treat.
Creative Folding Techniques to Seal the Pockets
When it comes to sealing your apple pie bites, mastering creative folding techniques can enhance not only the aesthetic appeal but also the structural integrity of each pocket. The goal is to ensure that the delicious apple filling remains securely enclosed during baking.
1. The Classic Fold: Start by placing a spoonful of the apple filling in the center of your dough square or circle. Fold one side over the filling, then the opposite side, pinching the edges together to create a sealed pocket. Use the tines of a fork to further secure the edges, which also adds a decorative touch.
2. The Crimped Edge: For a more elegant finish, you can create a crimped edge. After placing your filling, fold the dough over and then pinch it together with your fingers. Use your thumb and index finger to create a wavy effect along the edge, giving the bites a professional look.
3. The Braided Seal: For a unique presentation, consider cutting thin strips of dough from the edges after placing the filling and braiding them over the top of the apple filling. This not only secures the filling but also creates a beautiful lattice appearance.
Decorative Slits: How They Enhance Presentation and Baking
Once your apple pie bites are sealed, adding decorative slits on top can boost both their appearance and baking quality. These slits allow steam to escape while baking, preventing the filling from bubbling over.
– Simple Slits: Using a sharp knife, make two or three diagonal cuts across the top of each pocket. This classic approach ensures a beautiful reveal of the apple filling inside as it bakes.
– Artistic Designs: For a more personalized touch, consider creating small shapes, such as hearts or stars, using cookie cutters. This technique not only enhances the visual appeal but also showcases your creativity.
Creating a Beautiful Finish
The Egg Wash Process
An egg wash is a crucial step in achieving that perfect golden-brown finish on your apple pie bites. It creates a beautiful sheen and enhances the overall presentation.
1. Whisking the Egg: Beat one egg in a small bowl. For added richness, you can mix in a tablespoon of water or milk to thin it slightly.
2. Applying the Wash: Using a pastry brush, lightly coat the tops of each pocket with the egg wash before baking, being careful not to let it drip down the sides.
Importance of Egg Wash for Achieving a Golden-Brown Finish
The egg wash not only adds a glossy finish but also contributes to the browning effect during baking. The proteins in the egg help with caramelization, resulting in a beautifully baked treat that is visually appealing and inviting.
Alternative Options for Egg Wash
If you prefer not to use egg, there are several alternatives that can achieve similar results:
– Milk or Cream: Brushing the tops with milk or cream will also yield a nice color and shine. This option is excellent for those who are vegan or have egg allergies.
– Plant-Based Milk: For a vegan alternative, try using almond, soy, or oat milk with a touch of maple syrup mixed in to add sweetness and color.
Optional Brushing with Butter
Another option to enhance flavor and richness is to brush the tops of your apple pie bites with melted butter before baking. This step not only adds a delicious buttery taste but can also help in achieving an even more golden crust.
Baking the Apple Pie Bites
Ideal Baking Temperature and Time
For perfectly baked apple pie bites, preheat your oven to 375°F (190°C). This temperature ensures that the dough cooks evenly while allowing the filling to bubble without overcooking the crust.
– Baking Time: Bake the bites for about 20-25 minutes or until they are golden brown and the filling is bubbling.
Signs to Look for to Ensure Perfect Doneness
To check if your apple pie bites are done, look for:
– Color: A rich golden-brown color on the crust.
– Bubbling Filling: If you see the filling bubbling from the slits, it’s a sign that they are ready.
– Firmness: Gently tap the top of a pocket; it should feel firm to the touch.
Tips for Baking Multiple Trays Simultaneously
If you’re baking several trays of apple pie bites:
– Rotate the Trays: Halfway through the baking time, rotate your trays to ensure even baking, especially if your oven has hot spots.
– Spacing: Make sure to space your bites evenly on the baking sheets to facilitate proper heat circulation.
Serving Suggestions
Presentation Ideas for Serving the Bites
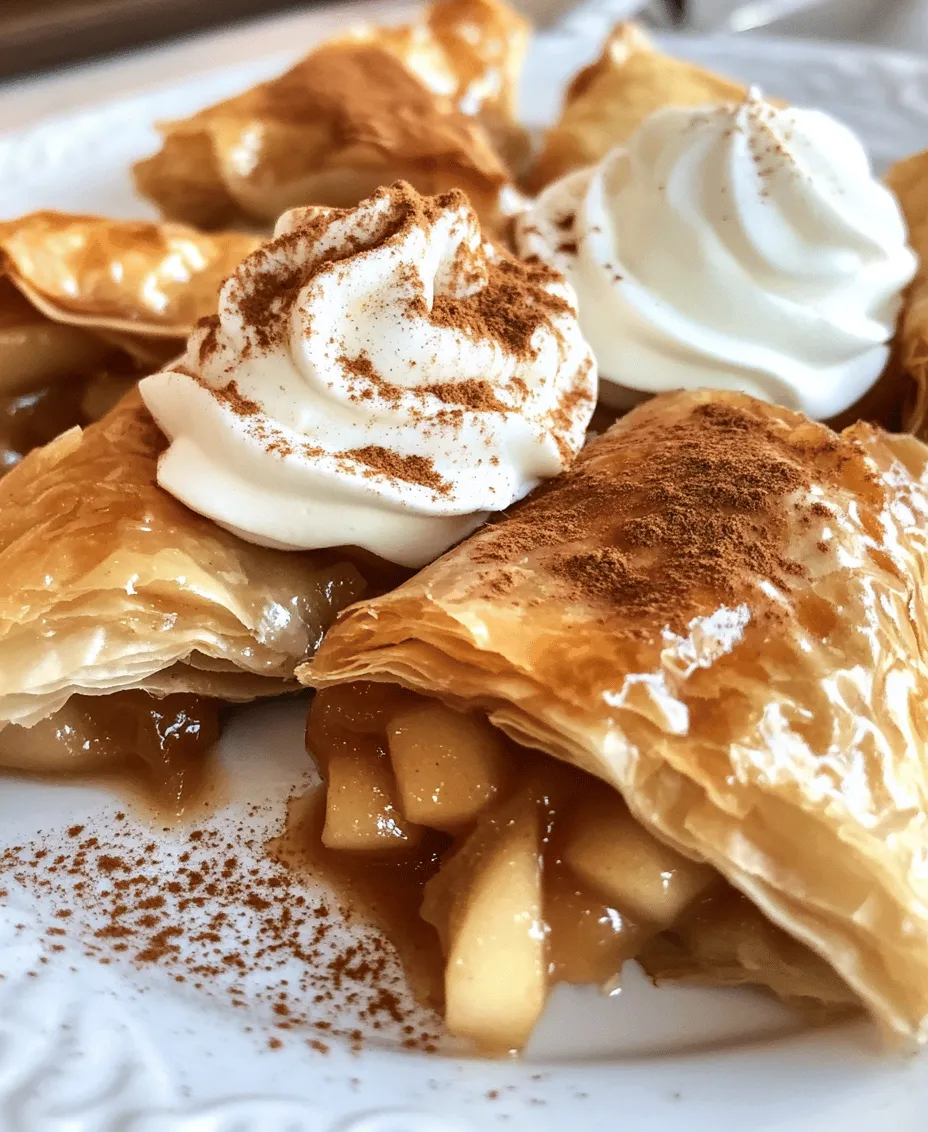
When it comes to serving your apple pie bites, presentation can elevate the dining experience. Consider arranging them on a rustic wooden board or a stylish serving platter. Dust some powdered sugar over the bites for an elegant touch, or use a vibrant fruit compote as a base.
Drizzling Caramel Sauce: Techniques for an Appealing Visual
Drizzling caramel sauce over the apple pie bites can enhance both flavor and presentation. Here’s how to make it visually appealing:
– Use a Squeeze Bottle: Fill a squeeze bottle with warm caramel sauce and drizzle it in a zig-zag pattern over the bites.
– Serve on the Side: Alternatively, serve the caramel sauce in a small bowl alongside the bites for dipping.
Pairing Options
For the ultimate dessert experience, consider pairing your apple pie bites with:
– Whipped Cream: A dollop of fresh whipped cream can add a light and creamy contrast to the sweet bites.
– Vanilla Ice Cream: The classic pairing of warm pie with cool ice cream is always a crowd-pleaser.
Nutritional Information
Overview of the Nutritional Profile
While these Sweet & Crunchy Apple Pie Bites are undeniably delicious, it’s also important to consider their nutritional values. Each bite contains a balance of carbohydrates, sugars, and fats due to the apple filling and the pastry dough.
– Calories: Approximately 150-200 calories per bite, depending on size and ingredients.
– Carbohydrates: Derived mainly from the apples and the dough.
– Protein: Minimal protein content unless enhanced by the egg wash.
Considerations for Dietary Needs
For those with specific dietary requirements, here are a few adaptations you can make:
– Gluten-Free Options: Substitute all-purpose flour with a gluten-free flour blend to accommodate gluten sensitivity.
– Sugar Substitutes: If you are watching sugar intake, consider using natural sweeteners like stevia or monk fruit sweetener in your apple filling.
Conclusion
These Sweet & Crunchy Apple Pie Bites offer a delightful, easy-to-make dessert that is sure to impress both family and friends. The combination of tender, flaky crust and spiced apple filling creates a mouthwatering treat that can be enjoyed any time of the year.
Don’t be afraid to experiment with the recipe by adding your favorite spices, nuts, or even different fruits. The beauty of homemade desserts lies in their versatility—each batch can be uniquely yours.
Creating these bites not only satisfies your sweet tooth but also brings joy and warmth to your kitchen. Homemade desserts have a way of creating cherished memories, so gather your loved ones and enjoy the process of making and sharing these delightful treats.