Introduction: The Joy of Making Bread without an Oven
Baking bread has long been a cherished tradition, often associated with the comforting aroma wafting through a kitchen filled with warmth from the oven. However, the thought of creating homemade bread without the use of an oven may seem daunting to many. But what if we told you that you could whip up a delightful, fluffy loaf right on your stovetop? Yes, you read that correctly! This article delves into the enchanting world of stovetop bread-making, featuring a simple recipe that requires minimal ingredients and time investment.
Whether you’re a seasoned baker or just starting your culinary journey, this stovetop bread recipe is designed to be accessible and enjoyable for everyone. Imagine biting into a warm slice of freshly baked bread without the hassle of preheating an oven or waiting for it to bake for an hour. With our straightforward instructions, you’ll be able to create delicious bread that will impress your family and friends, all without ever turning on the oven. So, gather your ingredients, and let’s embark on this delightful bread-making adventure together!
Understanding Stovetop Bread: A New Approach to Baking
Explaining the Concept of Stovetop Baking
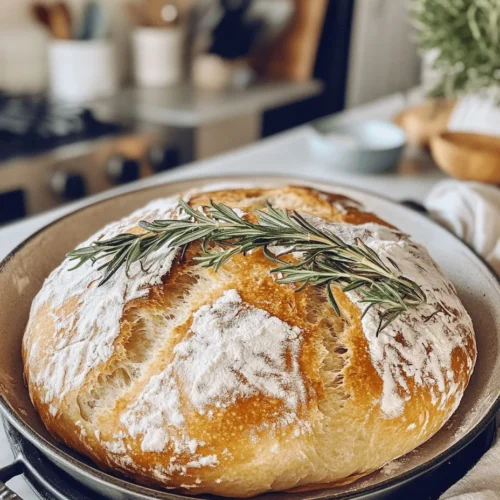
Stovetop baking is a fantastic alternative for those without an oven or for anyone seeking a quicker method of making bread. The principle behind stovetop bread-making is quite simple. Instead of relying on the hot air circulating within an oven, stovetop bread uses direct heat from your stovetop to create a warm environment for the dough to rise and bake. This method is particularly advantageous during hot weather when the last thing you want is to heat up your home with an oven.
The process typically involves using a heavy-bottomed pan or pot with a lid, which helps to trap heat and create a steaming effect similar to that of an oven. As the bread cooks, the steam helps develop a tender crumb while the direct heat browns the crust, resulting in a delicious loaf that rivals oven-baked bread.
Discussing the Benefits of Baking without an Oven
There are numerous benefits to embracing the art of stovetop baking. First and foremost, it opens up possibilities for those who may not have access to an oven, whether due to space constraints, lack of equipment, or even during camping trips. Stovetop bread is also incredibly versatile, allowing for a range of flavors and styles to suit any palate.
Another significant advantage is the time-saving aspect. Stovetop bread can often be prepared and cooked in less time than traditional oven baking. This means you can enjoy homemade bread on a whim, without the need for extensive planning or preparation. Additionally, since you’re using fewer appliances, stovetop baking can be a more energy-efficient option as well.
Highlighting the Versatility of Stovetop Bread Recipes
Stovetop bread recipes are incredibly versatile, allowing for a wide array of variations to suit different tastes and dietary preferences. From simple flatbreads to fluffy dinner rolls, the options are endless. You can infuse your bread with various herbs, spices, or even cheeses to elevate the flavor profile and create something unique each time you bake.
Moreover, stovetop bread is perfect for experimenting with different types of flour, such as whole wheat, spelt, or gluten-free options, catering to those with specific dietary needs. The adaptability of stovetop bread-making makes it an exciting culinary endeavor for anyone looking to expand their baking repertoire.
Ingredients Breakdown: What You Need for Success
Before diving into the step-by-step instructions for making stovetop bread, it’s important to understand the essential ingredients that contribute to the success of your loaf. Here’s a detailed overview of each ingredient you’ll need for this easy recipe:
All-Purpose Flour: The Foundation of Your Bread
All-purpose flour serves as the primary ingredient in this stovetop bread recipe. It provides the necessary structure and texture, allowing the bread to rise and hold its shape. If you prefer a healthier option, you can substitute part of the all-purpose flour with whole wheat flour or other alternatives, but keep in mind that this may alter the texture and flavor slightly.
Baking Powder: The Secret to Leavening
Baking powder is a crucial ingredient in this recipe, acting as a leavening agent that helps the bread rise. Unlike yeast, which requires time to ferment, baking powder works quickly, making it ideal for stovetop bread. When combined with moisture and heat, baking powder releases carbon dioxide, creating bubbles in the dough that result in a light and airy texture.
Salt: Enhancing Flavor and Structure
Salt is not just a flavor enhancer; it also plays an essential role in the structure of bread. It strengthens the gluten network, contributing to the overall texture of the loaf. Additionally, salt balances the sweetness from any added sugars and enhances the overall flavor profile, making it a vital ingredient in any bread recipe.
Sugar: Adding a Touch of Sweetness
While sugar is optional in this recipe, adding a small amount can enhance the flavor of your bread. It contributes a subtle sweetness that can complement savory toppings or spreads. Additionally, sugar helps with browning, resulting in a lovely golden crust on your stovetop bread. If you prefer a savory loaf, you may choose to omit the sugar entirely or substitute it with alternative sweeteners.
Milk and Plant-Based Alternatives: The Liquid Component
Milk is a key ingredient that adds moisture to your bread dough. It also contributes to the richness and flavor of the final product. If you have dietary restrictions or prefer a dairy-free option, feel free to use plant-based milk alternatives, such as almond, soy, or oat milk. Each type of milk will impart its own unique flavor and texture, so choose one that aligns with your taste preferences.
Vegetable Oil vs. Butter: Choosing Your Fat
The choice of fat can significantly impact the texture and flavor of your stovetop bread. Vegetable oil is a neutral option that helps keep the bread moist, while butter adds a rich flavor. You can use either depending on your preference, or even experiment with other fats like coconut oil or olive oil for different taste profiles.
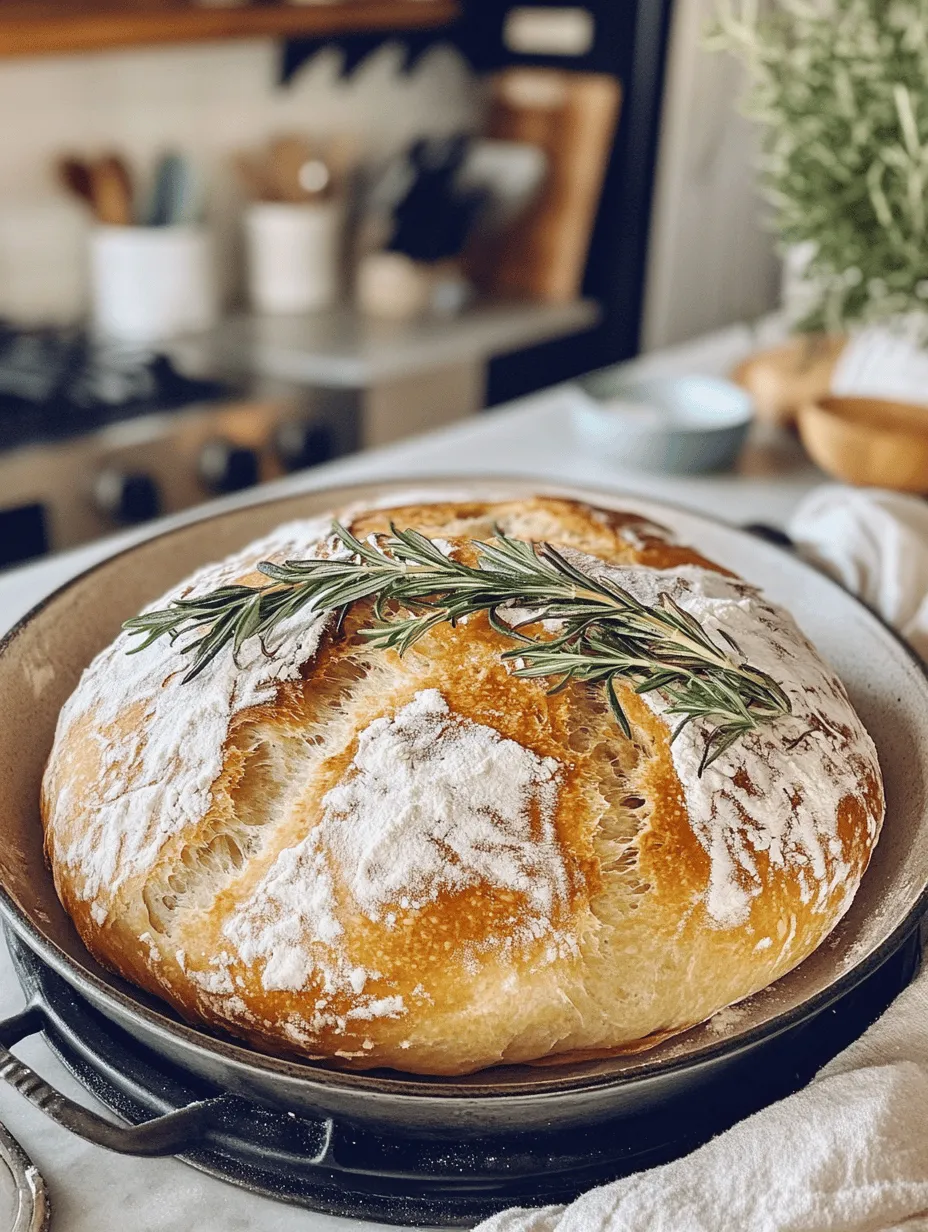
Optional Herbs: Elevating Flavor Profiles
To take your stovetop bread to the next level, consider incorporating optional herbs or spices into the dough. Fresh or dried herbs, such as rosemary, thyme, or oregano, can infuse your bread with delightful flavors. Feel free to get creative with your herb choices to customize your bread to suit your tastes.
Step-by-Step Instructions: Crafting Your Stovetop Bread
Now that you have all the ingredients gathered, it’s time to get started on making your stovetop bread! Follow these step-by-step instructions to craft a delicious loaf that will impress anyone who tries it.
Preparing Your Ingredients
Before you embark on your bread-making journey, it’s essential to prepare your ingredients properly. Measure each ingredient accurately to ensure the right balance and texture of the dough. Baking is a science, and even minor variations in measurements can impact the final result.
Make sure to assemble all necessary tools and equipment before starting. You will need a mixing bowl, a whisk or fork for combining dry ingredients, a spoon or spatula for mixing, and a heavy-bottomed pan with a lid for cooking.
Importance of Measuring Ingredients Accurately
Accurate measurements are crucial in baking, especially when it comes to creating the perfect bread. Using a kitchen scale for weighing dry ingredients can provide precise measurements, ensuring consistency in your results. If you’re using measuring cups, be sure to use the spoon-and-level method for flour—spooning the flour into the measuring cup and leveling it off with a knife—rather than scooping directly from the bag, which can lead to packing and inaccurate measurements.
Mixing the Dry Ingredients
Once your ingredients are prepared, it’s time to mix the dry components. In a large mixing bowl, combine the all-purpose flour, baking powder, salt, and sugar (if using). Using a whisk or fork, mix the dry ingredients together thoroughly to ensure even distribution of the baking powder and salt. This step is essential for achieving a uniformly baked loaf without any pockets of flour or uneven flavor.
Technique for Whisking for Even Distribution
When whisking, use a gentle but thorough motion to incorporate air into the mixture. This will help create a light and airy texture in your bread. Make sure to scrape the sides and bottom of the bowl to ensure all ingredients are well combined. An even mixture will promote consistent rising and baking, resulting in a beautifully textured loaf.
Combining Wet Ingredients
With your dry ingredients mixed, it’s time to combine them with the wet ingredients. In a separate bowl, measure out your chosen liquid—milk or plant-based alternative—and your preferred fat, whether vegetable oil or melted butter. If you’re adding any herbs, now is the time to include them in the wet mixture.
Tips for Infusing Herbs into Your Mixture
If you’re using fresh herbs, finely chop them before adding them to the liquid. This will help release their essential oils and flavors, ensuring that the herbs are evenly distributed throughout the dough. For dried herbs, simply measure and mix them directly into the liquid, allowing their flavors to infuse as the dough comes together.
By following these initial steps and preparing your ingredients correctly, you’re setting the stage for a successful stovetop bread-making experience. In the next part of this article, we will guide you through the final steps of combining your ingredients, cooking the bread, and achieving that perfect golden crust. Stay tuned for more delicious details on creating your stovetop bread masterpiece!
Forming the Dough
Recognizing the Right Dough Consistency
When forming the dough for your stovetop bread, achieving the right consistency is crucial. The dough should be soft but not overly sticky. It should hold together well and be pliable enough to shape. Start by mixing your dry ingredients—flour, yeast, salt, and sugar—in a bowl. Gradually add water, mixing until the dough begins to come together. If it feels too dry, add a little more water, a tablespoon at a time. Conversely, if it’s too wet, incorporate additional flour until you achieve a smooth, elastic texture.
Kneading: The Art of Developing Gluten
Techniques for Gentle Kneading
Kneading is a vital process that develops gluten, which provides structure and elasticity to the bread. Gently knead the dough on a floured surface for about 8-10 minutes. Use the palms of your hands to push the dough away from you, then fold it back over itself. Rotate the dough a quarter turn and repeat. If the dough sticks to your hands or the surface, sprinkle a little more flour as needed. Remember, the goal is to create a smooth surface without overworking the dough.
Signs Your Dough is Ready
You’ll know your dough is ready when it passes the “windowpane test.” Take a small piece of dough and stretch it gently between your fingers. If it stretches thin enough to let light through without tearing, you’ve developed enough gluten. Additionally, the dough should feel elastic and spring back when poked. Once ready, gather the dough into a ball and let it rest in a lightly oiled bowl, covered with a damp cloth, for about 30 minutes to an hour. This resting period allows the gluten to relax, making it easier to shape later.
Shaping the Loaves
Creative Options for Shaping (Round vs. Flat)
Once your dough has rested and risen slightly, it’s time to shape it into loaves. You can opt for a round shape, which is classic and rustic, or a flat shape for a more artisanal look. For round loaves, gently deflate the dough and form it into a ball by tucking the edges under. For flat loaves, press the dough into a disc shape, about 1-2 inches thick. The choice of shape can influence cooking times slightly, so keep that in mind as you prepare to cook.
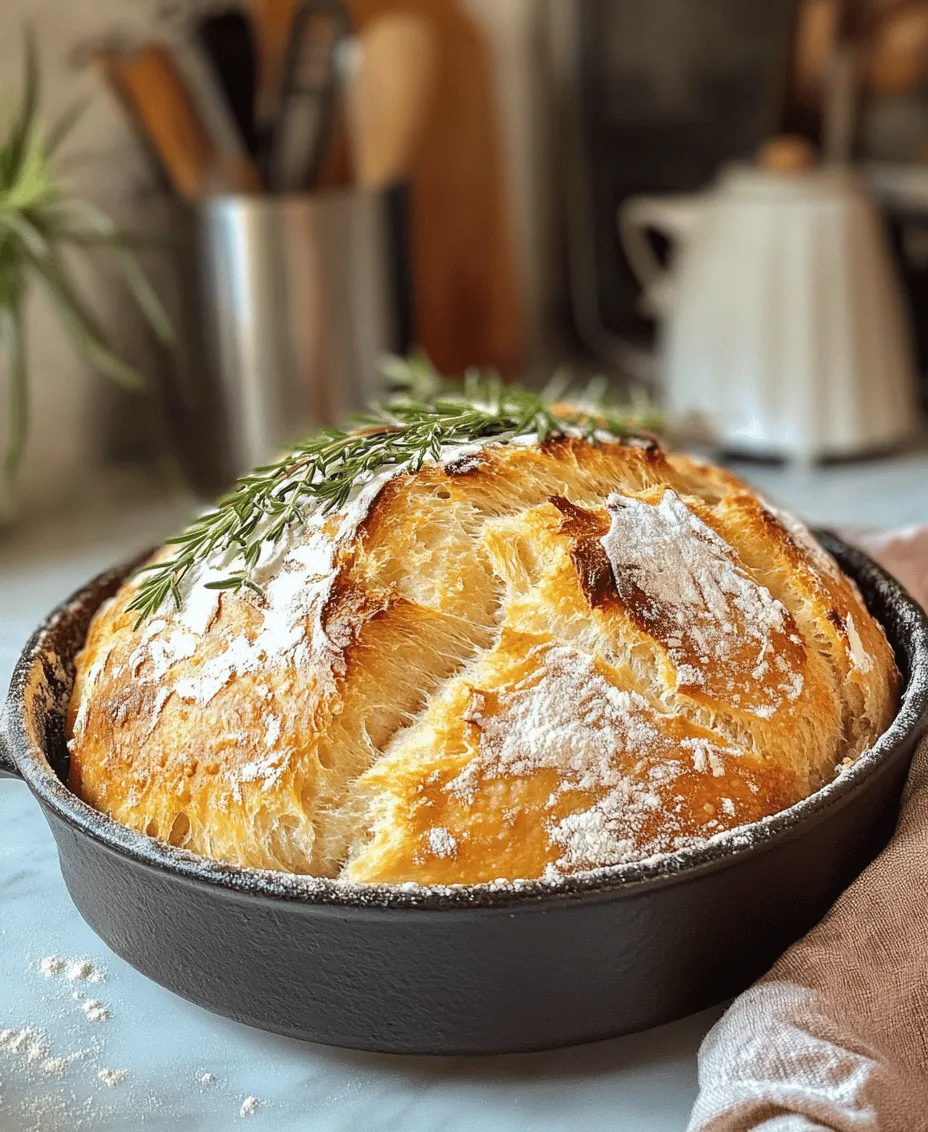
Cooking on the Stovetop
Setting the Right Temperature for Cooking
Cooking your bread on the stovetop requires a bit of attention to temperature. Heat a non-stick skillet or a cast-iron pan over medium to medium-low heat. It’s important not to rush this step; too high a temperature can burn the outside while leaving the inside doughy. A good test is to sprinkle a few drops of water in the skillet—if they sizzle and evaporate quickly, the pan is ready.
Importance of Covering the Skillet
Once the dough is in the skillet, cover it with a lid. This is crucial because it traps steam, promoting a fluffy texture and helping the bread cook evenly. If you don’t have a lid, you can use a large piece of aluminum foil, but a tight-fitting lid will yield the best results. Cook for about 10-15 minutes, checking occasionally to ensure it isn’t browning too quickly.
Flipping and Finishing the Loaves
Techniques for Safely Flipping the Bread
After the initial cooking time, it’s time to flip the bread. Using a spatula, carefully lift the bread from the skillet and turn it over. If you have shaped the bread into a round loaf, you may find it easiest to slide it onto a plate and then invert it back into the skillet. For flat loaves, simply flip it directly using the spatula. Be cautious, as the skillet will be hot, and the bread may be soft.
Checking for Doneness
To ensure your bread is fully cooked, perform a simple tapping test. Gently tap the bottom of the loaf; if it sounds hollow, it’s done. Alternatively, you can use a toothpick or skewer inserted into the center; if it comes out clean, your bread is ready. If the bread is not done, cover it again and cook for an additional few minutes, checking regularly.
Serving Suggestions: Enjoying Your Homemade Stovetop Bread
Pairing Ideas with Dips and Spreads
Once your stovetop bread is ready, the possibilities for enjoying it are endless. Serve it warm with a drizzle of olive oil and a sprinkle of sea salt for a simple yet satisfying snack. For a heartier option, pair it with dips like hummus, tzatziki, or a savory spinach-artichoke dip. If you prefer something sweeter, consider serving it alongside fruit spreads, honey, or homemade jams. The versatility of this bread allows it to complement both savory and sweet flavors beautifully.
Creative Uses for Leftover Bread
If you find yourself with leftover bread, don’t let it go to waste! Stovetop bread can be repurposed in various delicious ways. Cut it into cubes and toss it into a salad for added texture or make croutons by toasting the cubes in a skillet with a bit of olive oil and seasoning. Alternatively, you can transform leftover bread into a bread pudding or French toast for a delightful breakfast treat. For storage, keep the bread in an airtight container at room temperature for up to three days, or freeze it for longer preservation.
Nutritional Information: Understanding What’s in Your Bread
Analyzing the Nutritional Content of the Recipe
Homemade stovetop bread is not only delicious; it can also be a healthier alternative to store-bought options. By making it at home, you control the ingredients. Typically, a slice of homemade bread contains carbohydrates, fiber, and protein, depending on the type of flour used. Whole wheat flour, for instance, offers more fiber and nutrients than all-purpose flour, making it a better choice for those looking to increase their dietary fiber intake.
Discussing Health Benefits of Homemade Bread
One of the key benefits of making bread at home is the ability to avoid preservatives and additives commonly found in commercial bread. Homemade bread can be tailored to suit specific dietary needs, such as reducing sugar or using whole grains for added health benefits. Additionally, the process of kneading and baking can enhance the nutritional profile of the bread, as the fermentation process releases beneficial nutrients.
Exploring Dietary Modifications: Gluten-Free and Vegan Options
For those with dietary restrictions, this stovetop bread recipe can be easily modified. To create a gluten-free version, substitute regular flour with a gluten-free blend, ensuring it contains a binding agent like xanthan gum. For a vegan option, replace any dairy ingredients with plant-based alternatives like almond milk or coconut yogurt. These modifications make it accessible to a wider audience while still retaining the deliciousness of homemade bread.
Conclusion: Embracing the Simplicity of Homemade Bread
In conclusion, making bread on the stovetop is not just a practical solution for those without an oven; it is an enjoyable, rewarding experience that allows you to create something delicious from scratch. This no-oven bread recipe is a testament to the simplicity and satisfaction of homemade baking. Whether you enjoy it fresh, warm, or as part of a meal, this stovetop bread is sure to become a staple in your cooking repertoire. Embrace the joy of bread-making and let your culinary creativity flow!