Introduction
Banana pudding is a staple dessert that has graced tables across the United States for generations. This beloved dish is often associated with family gatherings, potlucks, and holiday celebrations, evoking warm memories of childhood and home-cooked meals. The traditional banana pudding is a simple yet delightful combination of ripe bananas, creamy custard, and fluffy whipped cream, often layered with vanilla wafers. However, in a world where culinary creativity knows no bounds, it’s time to elevate this classic dessert to new heights.
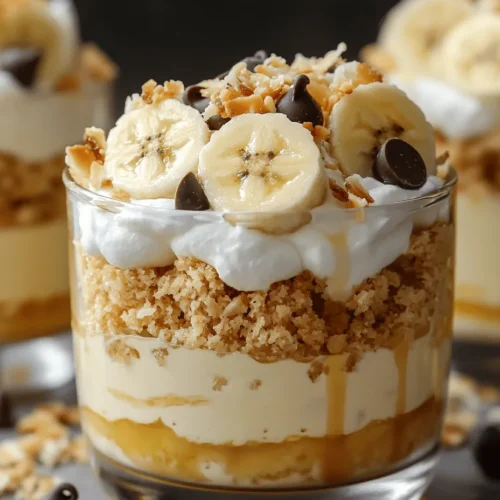
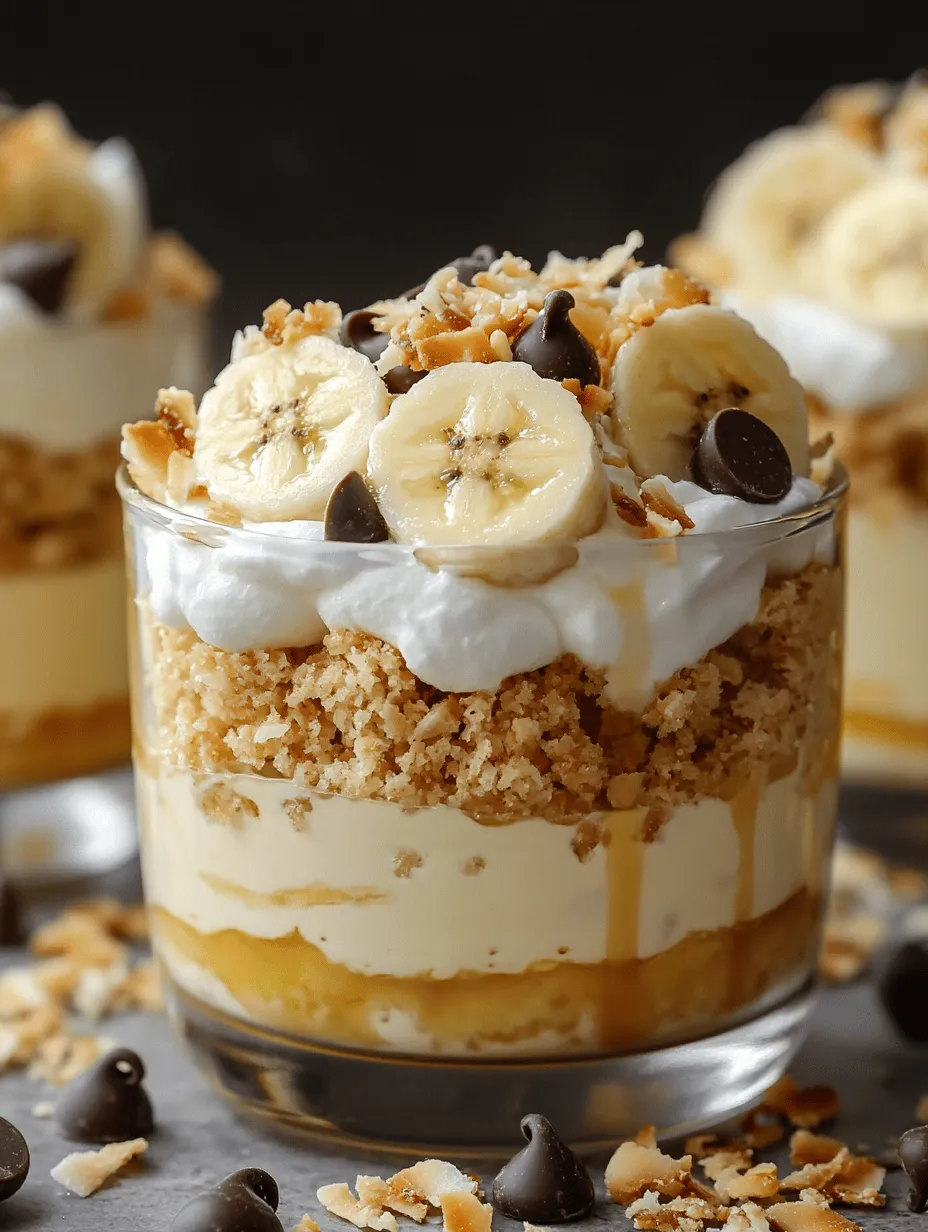
Welcome to “Not Yo Mama’s Banana Pudding Recipe with a Twist”—a modern interpretation that retains the essence of the original while introducing exciting new flavors and textures. This recipe incorporates toasted coconut, mini chocolate chips, and a drizzle of luscious caramel sauce, transforming the traditional dessert into a show-stopping treat that will impress both family and friends. The unique twist not only enhances the flavor profile but also adds visual appeal, making this banana pudding a feast for the eyes as well as the palate.
To achieve the best results, it’s essential to use high-quality ingredients. The freshness of the bananas, the richness of the custard, and the creaminess of the whipped topping all contribute to the overall taste and texture of the dish. In this article, we will explore the elements that make this banana pudding special and guide you through the preparation process step by step.
The Classic vs. The Twist: What Makes This Banana Pudding Special
When comparing traditional banana pudding to this modern version, the differences are striking and delicious. While traditional recipes typically focus on the basic components of bananas, pudding, and vanilla wafers, this innovative take introduces several key ingredients that elevate the dish to gourmet status.
One of the most notable additions is toasted coconut. This ingredient not only provides a tropical flair but also introduces a chewy texture that contrasts beautifully with the smoothness of the custard and the crunch of the graham cracker crust. The added depth of flavor from the toasted coconut enhances the overall taste, making each bite a delightful experience.
Then there are the mini chocolate chips, which add an unexpected sweetness and a pop of chocolatey goodness. The combination of bananas and chocolate is timeless, and the inclusion of these little morsels brings a new dimension to the classic dessert. They melt slightly in the warm custard, creating pockets of gooey goodness throughout the dish.
Finally, a generous drizzle of caramel sauce ties everything together, adding richness and decadence. The caramel complements the sweetness of the bananas while providing a contrasting flavor that balances the creaminess of the pudding. Together, these elements create a banana pudding that is not only more flavorful but also visually stunning, perfect for any occasion.
Ingredient Breakdown
Before diving into the step-by-step instructions for making this scrumptious banana pudding, let’s take a closer look at each ingredient and its role in the recipe.
Ripe Bananas
The star of the show, ripe bananas, are essential for this recipe. Their natural sweetness and creaminess provide the foundation for the pudding. When selecting bananas, look for ones that are slightly speckled; this indicates optimal ripeness. Overly ripe bananas may be too soft, while unripe bananas will lack the sweetness needed for the dessert.
Vanilla Custard
The vanilla custard is what gives banana pudding its rich and smooth texture. You can either make a homemade custard from scratch or opt for a quick and easy instant vanilla pudding mix. The latter option saves time without sacrificing flavor, making it a popular choice for busy cooks.
Whipped Cream
Whipped cream adds lightness and volume to the dessert. It also helps to balance the richness of the custard and the sweetness of the bananas. For the best results, use heavy whipping cream and whip it until soft peaks form. This will give the pudding a luscious, airy texture that’s irresistible.
Instant Vanilla Pudding Mix
This ingredient is a game-changer for quick preparation. Instant vanilla pudding mix allows you to skip the cooking process typically associated with traditional custards. Simply combine it with milk, and you’ll have a smooth, creamy base ready for layering with the other ingredients.
Milk
Milk is crucial for achieving the right consistency in the pudding. It hydrates the pudding mix and helps create a smooth, creamy texture. Full-fat milk or whole milk is recommended for a richer flavor, but you can also use low-fat milk if you prefer a lighter version.
Spices (Cinnamon and Nutmeg)
Adding a pinch of cinnamon and nutmeg introduces warm spices that enhance the flavor complexity of the pudding. These spices complement the sweetness of the bananas and the richness of the custard, creating a more sophisticated taste profile.
Vanilla Extract
Vanilla extract is a must-have ingredient that brings out the sweetness in the bananas and enhances the overall flavor of the pudding. Opt for pure vanilla extract for the best results, as it provides a deeper, more authentic flavor compared to imitation extracts.
Crushed Graham Crackers
Crushed graham crackers serve as the base of the pudding, adding a delightful crunch and a nod to the classic pie crust found in many desserts. The graham cracker layer also helps to absorb some of the moisture from the pudding, preventing the dish from becoming overly soggy.
Toasted Coconut Flakes
Toasted coconut flakes are a unique addition that introduces a delightful chewiness and a hint of tropical flavor. They add texture and visual appeal, making the pudding not only taste great but also look beautiful when served.
Mini Chocolate Chips
These little gems add unexpected bursts of sweetness and a satisfying crunch. The combination of chocolate and banana is a match made in dessert heaven, and the mini chocolate chips melt slightly in the warm pudding, creating pockets of deliciousness.
Caramel Sauce
A decadent finishing touch, caramel sauce elevates this banana pudding to new heights. Drizzling caramel over the top not only enhances the visual appeal but also adds a rich, buttery flavor that complements the sweetness of the bananas and the creaminess of the custard. Whether you use homemade or store-bought sauce, it’s sure to take your banana pudding to the next level.
Step-by-Step Instructions for Perfect Banana Pudding
Now that we’ve covered the ingredients and their roles, let’s dive into the step-by-step instructions for creating your very own Not Yo Mama’s Banana Pudding with a Twist. This process is straightforward and enjoyable, making it perfect for both novice and experienced bakers.
Step 1: Prepare the Ingredients
Before you begin assembling your banana pudding, gather all your ingredients and tools. You will need mixing bowls, a whisk, a spatula, and a serving dish or individual cups for layering your pudding. Having everything ready will make the process smoother and more enjoyable.
Step 2: Make the Vanilla Custard
If you’re using instant vanilla pudding mix, combine it with the required amount of milk in a large mixing bowl. Whisk vigorously until the mixture thickens, typically about 2 minutes. If you prefer to make a traditional custard from scratch, follow your favorite recipe, ensuring it comes to a gentle boil and thickens before removing it from the heat.
Step 3: Whip the Cream
In a separate mixing bowl, pour in the heavy whipping cream. Using an electric mixer, whip the cream on medium speed until soft peaks form. Be careful not to overwhip; you want it to be fluffy and light, not grainy. Once whipped, gently fold the cream into the vanilla custard using a spatula. This will create a light, airy mixture that enhances the overall texture of the pudding.
Step 4: Prepare the Base Layer
Take your serving dish or individual cups and create the first layer with crushed graham crackers. Spread an even layer across the bottom, ensuring it covers the surface completely. This layer will add crunch and help absorb some of the moisture from the pudding, preventing it from becoming too soggy.
Step 5: Layer the Pudding
Now, spoon a generous amount of the vanilla custard mixture over the graham cracker layer. Use the spatula to spread it evenly. Next, slice your ripe bananas and layer them on top of the custard. Make sure the bananas are evenly distributed, as they are the star of this dessert.
Step 6: Add Toasted Coconut and Chocolate Chips
Sprinkle a layer of toasted coconut flakes over the bananas, followed by a handful of mini chocolate chips. The coconut and chocolate will add delightful textures and flavors that elevate the dish from traditional to extraordinary.
Step 7: Repeat the Layers
Repeat the layering process: add another layer of the custard mixture, followed by sliced bananas, toasted coconut, and mini chocolate chips. You can continue layering until you run out of ingredients, but aim for at least two layers for optimal flavor.
Step 8: Drizzle with Caramel Sauce
Once you’ve completed your layers, it’s time for the finishing touch. Drizzle caramel sauce over the top of your assembled banana pudding. Feel free to add as much or as little as you like, depending on your sweet tooth.
Step 9: Chill and Serve
Cover the dish with plastic wrap and refrigerate for at least 2 to 4 hours, or overnight if possible. This chilling time allows the flavors to meld together and ensures the pudding firms up slightly, making it easier to serve. When you’re ready to serve, garnish with additional whipped cream, toasted coconut, and a sprinkle of mini chocolate chips for a beautiful presentation.
With these steps, you’ll create a stunning and flavorful Not Yo Mama’s Banana Pudding with a Twist that’s sure to be the highlight of any gathering. Stay tuned for the next part of this article, where we will delve into tips for achieving the perfect banana pudding and answer some common questions!
Preparing the Pudding
The heart of Not Yo Mama’s Banana Pudding Recipe with a Twist lies in the pudding itself. To create a rich and creamy custard, start by combining your milk, sugar, and egg yolks in a medium saucepan over medium heat. Stir continuously to prevent the eggs from scrambling. This step is crucial; the pudding must be whisked properly to achieve that velvety texture. The key to perfect pudding is patience. As you whisk, you’re looking for a gradual thickening of the mixture. This process should take about 8 to 10 minutes. You’ll know it’s ready when the custard coats the back of a spoon and holds a line when you run your finger through it.
Once the pudding reaches the desired thickness, remove it from the heat and whisk in the vanilla extract and a pinch of salt. This enhances the flavor profile, balancing the sweetness with a hint of savory. Allow the custard to cool slightly before moving on to the next step.
Combining Custard and Whipped Cream
To lighten the richness of the custard, we’ll be folding in freshly whipped cream. This is where the magic happens, transforming your pudding into an airy delight. First, make sure your heavy cream is chilled. In a separate bowl, whip the cream until soft peaks form. Be careful not to over-whip, as this can lead to a grainy texture.
When combining the custard and whipped cream, it’s essential to use gentle folding techniques. Start by adding a small amount of whipped cream to the custard, stirring gently to loosen it up. Then, gradually fold in the remaining whipped cream using a spatula. This method helps maintain the fluffiness of the whipped cream, ensuring your pudding is light and creamy rather than dense.
Layering the Ingredients
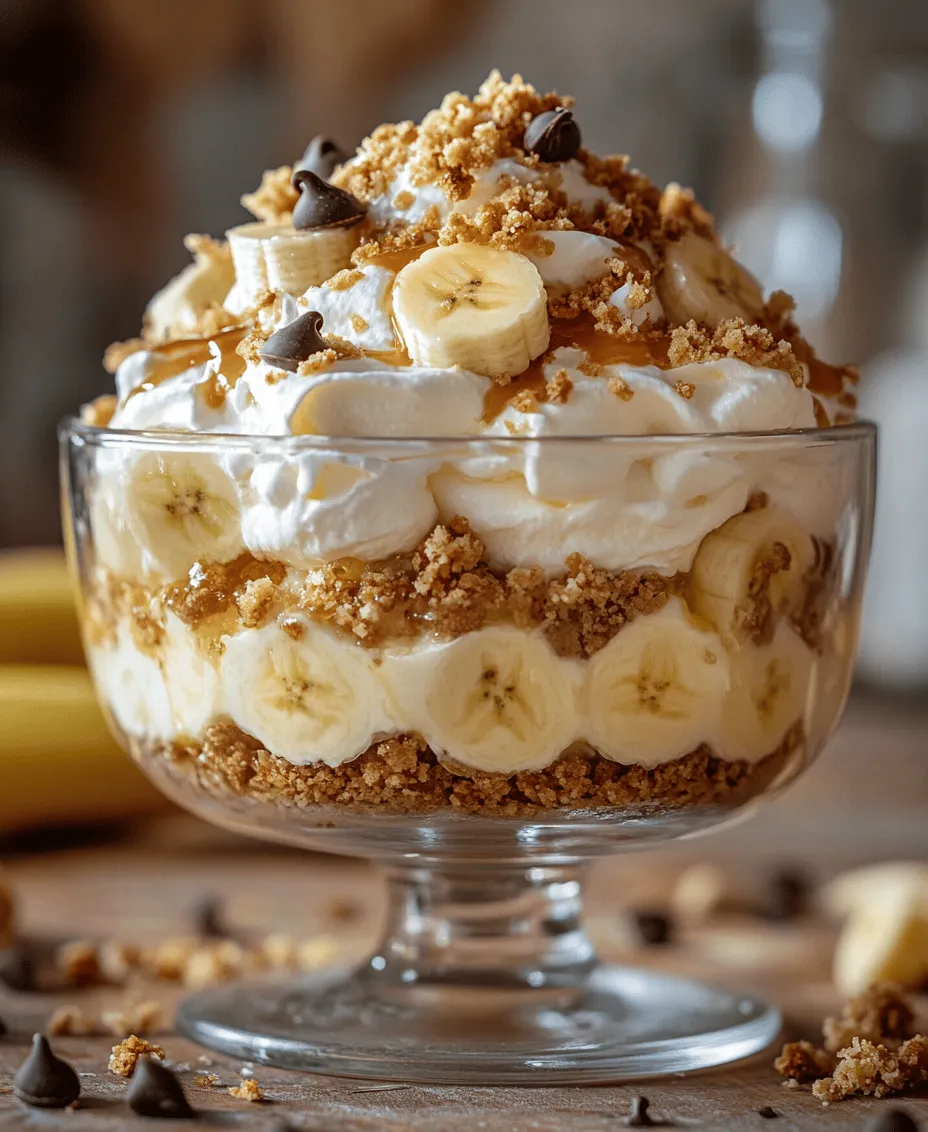
Now comes the fun part: assembling your dessert. For a stunning presentation, consider using a trifle dish or individual serving cups. If you go with a trifle dish, alternate layers of pudding, cookies, and sliced bananas. This creates a beautiful visual effect that showcases each component. Start with a base of cookies, followed by a layer of pudding, then a layer of banana slices. Repeat this process until your dish is filled, finishing with a layer of pudding on top.
If you prefer individual servings, layer the ingredients in clear cups or jars. This not only looks inviting but also makes it easy for guests to serve themselves. Regardless of your choice, be sure to leave the top layer of pudding smooth and clean for adding your delightful toppings later.
Adding the Twist
What makes this banana pudding special are the final toppings that elevate it beyond the classic version. Here, you have the opportunity to personalize your dessert. Consider adding crushed vanilla wafers on top for a delightful crunch or drizzling caramel sauce for a hint of sweetness. Other options include toasted coconut, chocolate shavings, or even a sprinkle of cinnamon for a warm, cozy flavor. These final touches not only enhance the visual appeal but also contribute to the overall experience, making each bite a celebration of flavors and textures.
Chilling and Serving
Once assembled, it’s time for the pudding to chill. Chilling is a vital step that allows flavors to meld together while the pudding firms up. Cover your dish with plastic wrap or a lid and place it in the refrigerator. For optimal results, chill for at least four hours, although overnight is even better. This extended chilling time allows the cookies to soften and absorb some of the pudding, creating that signature creamy texture.
When you’re ready to serve, remove the dessert from the refrigerator and garnish it with your chosen toppings right before serving. This keeps the toppings fresh and adds a pop of color to your dish.
Serving Suggestions and Presentation Ideas
This banana pudding can shine at any gathering, whether casual or formal. For casual events, serve the pudding in individual cups, allowing guests to help themselves. If you’re hosting a more formal affair, consider presenting the trifle dish as a centerpiece on the dessert table.
Garnishing options are plentiful. Fresh banana slices and a sprinkle of crushed cookies make for a simple yet elegant touch. For special occasions, consider adding mint leaves for a pop of green or edible flowers for a stunning visual.
Pairing your banana pudding with beverages can enhance the experience. A cold glass of sweet tea or a light sparkling wine can complement the flavors beautifully. For a cozy evening, serve with a warm cup of coffee or hot chocolate, balancing the sweetness of the dessert with a touch of bitterness from the drink.
Nutritional Information and Dietary Considerations
When preparing any dessert, it’s essential to consider its nutritional content. A typical serving of Not Yo Mama’s Banana Pudding contains approximately 300 calories, with 10g of fat, 45g of carbohydrates, and 3g of protein. While this dessert is indulgent, it can be enjoyed in moderation.
For those with dietary restrictions, several substitutions can be made. To create a dairy-free version, replace the whole milk with almond milk or coconut milk, and opt for a dairy-free whipped cream alternative. For a lower-sugar option, consider using monk fruit sweetener or stevia, ensuring to adjust the quantities according to taste. These adjustments allow everyone to enjoy this delicious treat without compromising their dietary needs.
Conclusion
Not Yo Mama’s Banana Pudding Recipe with a Twist is a delightful dessert that brings comfort and joy to any occasion. Its creamy texture, layered with fresh bananas and crunchy cookies, makes it a standout choice for gatherings. The joy of preparing this dish lies not only in the cooking process but also in the smiles it brings to family and friends as they indulge in each spoonful.
Encouraging creativity, this recipe invites you to explore variations and make it your own. Whether you stick to the classic flavors or experiment with different toppings and presentations, the possibilities are endless. So gather your ingredients, whip up this delightful pudding, and share the sweetness with those you love.