Introduction
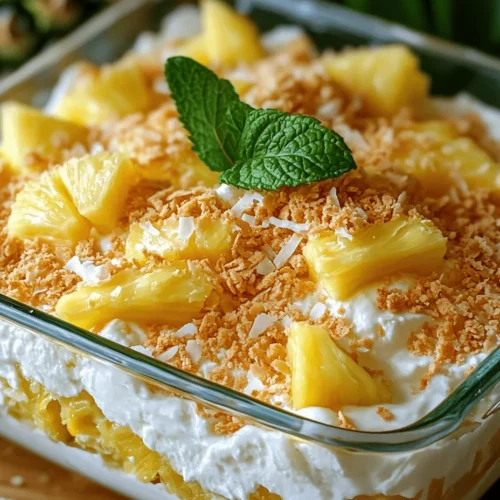
If you’re on the lookout for a dessert that perfectly balances lightness and flavor, look no further than the No Bake Pineapple Cream Dessert. This delightful treat is not only incredibly easy to make, but it also offers a refreshing taste that is perfect for warm weather gatherings or special occasions. Imagine indulging in a creamy, fruity dessert that requires no oven time, allowing you to enjoy your culinary creation without the heat of baking.
This recipe showcases the delightful combination of sweet, crushed pineapple and rich cream cheese, all layered atop a crunchy graham cracker crust. It’s a dessert that appeals to both novice and experienced cooks, making it an excellent addition to your culinary repertoire. The best part? You can whip it up in no time, with minimal effort and equipment.
The Allure of No Bake Desserts
No bake desserts have surged in popularity over the years, and for good reason. They offer a myriad of benefits that make them an attractive option for home bakers. Firstly, they are incredibly time-saving. With no need to preheat the oven or wait for baked goods to cool, you can prepare a delicious dessert in a fraction of the time it takes to bake.
Moreover, no bake recipes are perfect for those sweltering summer days when the last thing you want to do is turn on the oven. By opting for a no bake dessert, you can keep your kitchen cool while still impressing your guests with a stunning treat.
These desserts are also ideal for various occasions. Whether you’re hosting a picnic, throwing a birthday party, or simply looking for a sweet treat to enjoy with family, no bake desserts fit the bill. They are versatile enough to cater to any gathering, ensuring that everyone leaves with satisfied sweet tooth cravings.
Ingredients Breakdown
To create the No Bake Pineapple Cream Dessert, you’ll need a handful of key ingredients, each contributing to the overall flavor, texture, and appeal of the dish. Here’s a detailed breakdown of each component:
Crushed Pineapple
At the heart of this dessert lies crushed pineapple. Its natural sweetness and vibrant flavor provide the perfect contrast to the creamy components. Not only does it add a burst of tropical goodness, but pineapple is also packed with nutrients, including vitamin C and manganese. The moisture from the pineapple helps keep the dessert light and refreshing.
Cream Cheese
Cream cheese serves as the foundation of the dessert’s creamy texture. It brings richness and a slight tang that balances out the sweetness of the pineapple and powdered sugar. For those with dietary restrictions, alternatives such as dairy-free cream cheese or Greek yogurt can be used without compromising the overall flavor profile.
Powdered Sugar
Powdered sugar is used primarily for sweetening the cream cheese mixture. Its fine texture allows it to blend smoothly without leaving any graininess, ensuring a velvety mouthfeel. Adjusting the amount of powdered sugar can help cater to your personal taste preferences, allowing you to create a dessert that is just the right level of sweetness.
Vanilla Extract
A splash of vanilla extract enhances the flavors of the other ingredients. This aromatic addition provides depth and complexity to the dessert, making each bite more enjoyable. Opt for pure vanilla extract for the best flavor, but imitation vanilla can work in a pinch.
Heavy Whipping Cream
To achieve the light and airy texture characteristic of this dessert, heavy whipping cream is whipped until it forms soft peaks before being folded into the cream cheese mixture. This step is crucial, as it brings volume and a cloud-like consistency that makes the dessert feel indulgent without being overly heavy.
Graham Crackers
The base of the dessert is made from crushed graham crackers, which lend a delightful crunch and sweetness to the dish. This crust is easy to prepare and can be customized; for those with gluten sensitivities, gluten-free graham crackers are a fantastic alternative.
Coconut Flakes
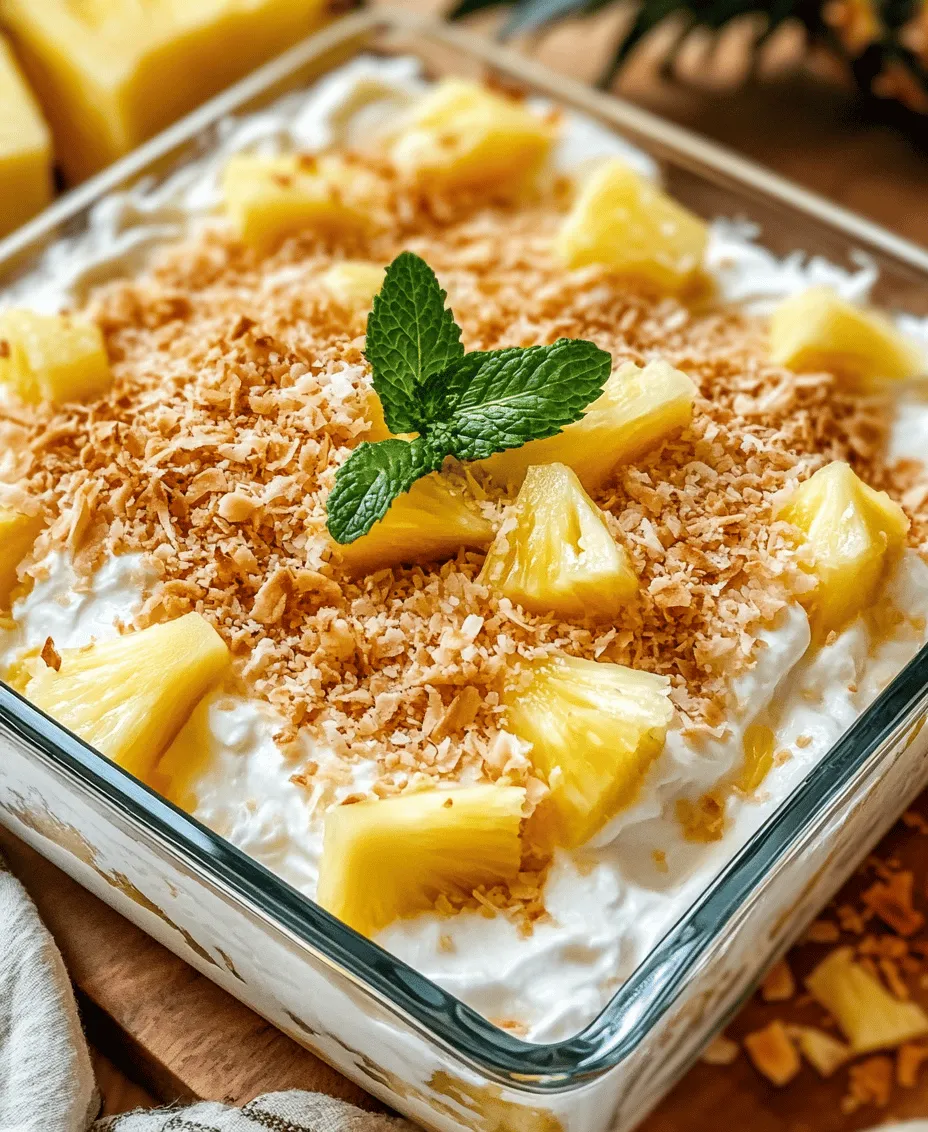
Coconut flakes add an extra layer of flavor and texture to the dessert. They provide a tropical twist that complements the pineapple beautifully. Toasting the coconut flakes before adding them to the dessert can amplify their flavor, making the dessert even more enticing.
Suggestions for Ingredient Substitutions
While the traditional ingredients create a classic No Bake Pineapple Cream Dessert, feel free to experiment with substitutions to cater to various dietary needs. For instance, you can use low-fat cream cheese or yogurt for a lighter version, or swap out the heavy whipping cream for coconut cream for a dairy-free alternative.
Step-by-Step Instructions
Preparation of the Base
Creating the crust is the first step in assembling your No Bake Pineapple Cream Dessert. To start, gather your graham crackers and crush them into fine crumbs. This can be done by placing the crackers in a zip-top bag and rolling over them with a rolling pin, or using a food processor for a more efficient method.
Once you have your crumbs, transfer them to a mixing bowl and combine them with melted butter. This mixture will bind the crumbs together and create a flavorful base for your dessert.
Importance of Texture in Crust Formation
When forming the crust, the texture is paramount. You want a firm yet crumbly crust that holds its shape once set. The key is to ensure that the butter is evenly distributed throughout the crumbs. If the mixture appears too dry, add a bit more melted butter, a tablespoon at a time, until it reaches the desired consistency.
Tips for Pressing the Crust Evenly
Transfer the graham cracker mixture into a 9×9-inch (or similar-sized) baking dish. Use the back of a measuring cup or your fingers to press the mixture firmly and evenly into the bottom of the dish. This step is crucial; a well-pressed crust will provide a sturdy base that won’t crumble when you slice into the dessert later. Take your time to ensure that the base is level and packed tightly.
After pressing the crust, place it in the refrigerator to set while you prepare the creamy filling. This chilling time will help the crust firm up, ensuring it holds its shape when the dessert is served.
With your crust ready, you’re well on your way to creating a delicious No Bake Pineapple Cream Dessert that will impress your family and friends. Keep an eye out for the next part of this article, where we will delve into crafting the creamy filling and assembling this delightful treat.
Crafting the Cream Mixture
Creating the perfect cream mixture is essential for the success of your No Bake Pineapple Cream Dessert. To begin, you’ll need to ensure that your cream cheese is softened to room temperature. This step is crucial as it enables a smooth blend without lumps. Here’s how to achieve a luscious cream cheese mixture:
Techniques for Achieving a Smooth and Fluffy Cream Cheese Blend
1. Soften the Cream Cheese: Take your cream cheese out of the refrigerator at least 30 minutes before starting. If you’re short on time, cut it into small chunks and microwave it for about 10-15 seconds—just enough to soften but not melt.
2. Mixing Method: In a mixing bowl, beat the softened cream cheese with an electric mixer on medium speed until it is creamy and smooth. This process helps incorporate air, which adds fluffiness to the mixture.
3. Incorporating Sugar and Vanilla: Gradually add your powdered sugar and vanilla extract to the cream cheese while continuing to mix. This will enhance the flavor and sweetness without creating graininess.
Explanation of the Folding Method for Incorporating Whipped Cream
Once your cream cheese mixture is smooth, it’s time to fold in the whipped cream. The folding technique is vital as it maintains the airiness of the whipped cream, which contributes to the light texture of the dessert.
1. Whip the Cream: In a separate bowl, whip your heavy cream until stiff peaks form. Be careful not to over-whip, as this can result in a grainy texture.
2. Folding Technique: Using a spatula, take a scoop of the whipped cream and gently add it to the cream cheese mixture. With a gentle motion, fold the whipped cream into the mixture by scraping around the edges and folding it over itself. Repeat this process until the whipped cream is fully incorporated. The goal is to maintain that airy lightness for a creamy dessert.
Incorporating Pineapple
The pineapple is the star ingredient in this dessert and must be incorporated correctly to enhance flavor while maintaining the desired texture.
Importance of Draining Pineapple to Avoid Excess Moisture
When using canned pineapple, it’s essential to drain it thoroughly. Excess moisture can lead to a watery dessert that doesn’t set correctly. To do this:
1. Drain the Pineapple: Pour the pineapple into a fine mesh strainer and let it sit for a few minutes. Gently press the pineapple with a spatula to extract as much juice as possible.
2. Pat Dry: For extra assurance, you can pat the pineapple pieces dry with a paper towel to further remove any lingering moisture.
Tips for Evenly Distributing Pineapple Within the Cream Mixture
To achieve a delightful pineapple flavor in every bite, evenly distribute the drained pineapple within the cream mixture:
1. Cut into Small Pieces: If the pineapple chunks are too large, cut them into smaller pieces. This ensures they incorporate seamlessly into the cream.
2. Gentle Mixing: Fold the pineapple into the cream mixture using the same folding technique mentioned earlier. This prevents the pineapple from sinking to the bottom and ensures that every layer has the perfect balance of flavor.
Layering the Dessert
The layering of your No Bake Pineapple Cream Dessert not only enhances its aesthetic appeal but also contributes to the overall taste experience.
Suggestions for Creating Visually Appealing Layers
1. Use a Clear Dish: Opt for a clear glass dish or parfait cups to showcase the beautiful layers of cream and pineapple. This also allows your guests to see the dessert before they indulge.
2. Layering Technique: Start with a layer of the cream mixture at the bottom, followed by a layer of crushed graham crackers. Repeat this process, alternating layers of cream and crushed crackers, until you reach the top of your dish.
3. Final Layer: Your last layer should be the cream mixture, creating a smooth top that you can decorate later.
The Significance of the Final Topping Layer in Presentation and Flavor
The final topping layer is not just for decoration; it plays a significant role in the overall flavor profile of the dessert:
1. Garnishing: Use a spatula to create a smooth finish with the last layer of cream. This gives a polished look and serves as a base for your garnishes.
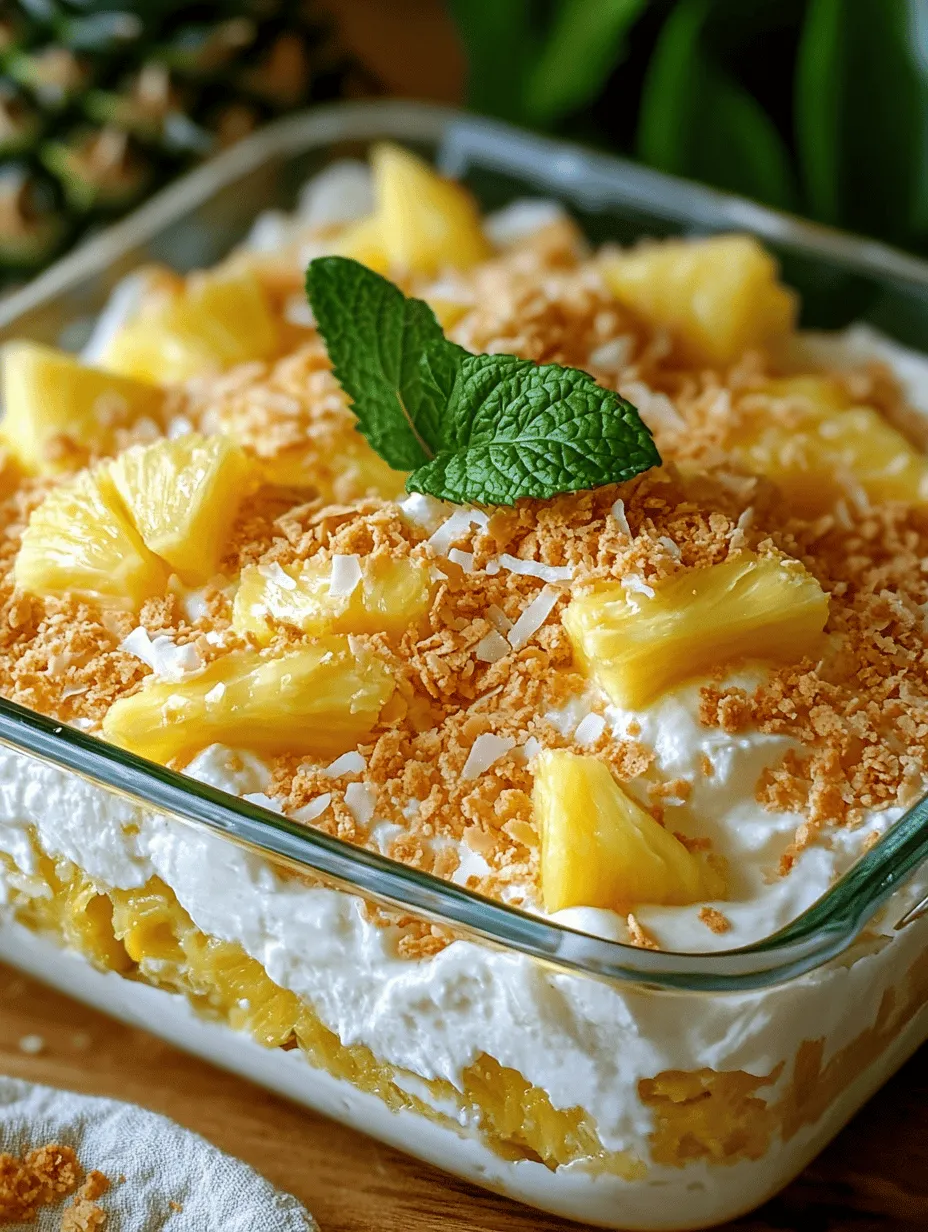
2. Flavor Boost: Consider topping it with additional crushed pineapple or a sprinkle of toasted coconut for an extra flavor punch. A squeeze of lime juice can also elevate the tropical taste.
Chilling the Dessert
Chilling is a critical step that transforms your layered creation into a firm, sliceable dessert.
Explanation of Why Chilling is Critical for Set Texture
Chilling allows the flavors to meld and the cream mixture to set properly. The proteins in the cream cheese and whipped cream need time to firm up, ensuring that your dessert holds its shape when served.
Recommended Chilling Times for Best Results
1. Minimum Chill Time: Ideally, let the dessert chill for at least 4 hours. However, for the best results, overnight chilling is recommended. This allows the layers to firm up and enhances the overall flavor.
2. Serving Temperature: Before serving, take the dessert out of the refrigerator for about 10-15 minutes. This will make slicing easier and enhance the creamy texture as it slightly softens.
Serving Suggestions
Presenting your No Bake Pineapple Cream Dessert creatively can elevate its appeal and make it a standout dish at any gathering.
Creative Ways to Present the Dessert
1. Garnishing: Top each serving with fresh pineapple slices and a sprig of mint for a vibrant contrast. You can also sprinkle some toasted coconut or crushed nuts for added texture.
2. Serving Ideas: Pair this dessert with tropical drinks like piña coladas or a refreshing iced tea. It complements the flavors beautifully and enhances the overall experience.
3. Portion Sizes: Consider serving the dessert in individual cups for easy handling during gatherings. This not only makes it more appealing but also helps with portion control.
Discussing Portion Sizes and Serving Tips for Gatherings
When serving at gatherings, aim for smaller portions. This allows guests to enjoy the dessert without feeling overwhelmed, especially after a hearty meal. A small scoop or slice is all that’s needed, as the rich flavors will satisfy your guests.
Nutritional Information
Understanding the nutritional aspects of your No Bake Pineapple Cream Dessert can help you enjoy it mindfully.
Breakdown of Calories and Nutrients Per Serving
On average, a serving of this dessert contains approximately:
– Calories: 250
– Fat: 12g
– Carbohydrates: 32g
– Protein: 3g
– Sugar: 15g
Discussion on the Health Aspects of the Dessert, Including Balanced Indulgence
While this dessert is indulgent, it can be part of a balanced diet. The use of cream cheese provides a source of protein and calcium, while the pineapple adds vitamins and minerals. Enjoying this dessert in moderation can satisfy your sweet cravings without derailing your health goals.
Conclusion
The No Bake Pineapple Cream Dessert is a delightful and easy-to-make treat that brings the tropical flavors of summer to any occasion. Its simplicity lies in the ease of preparation, yet it delivers a refreshing, creamy satisfaction that is sure to impress your family and friends.
We encourage you to try making this recipe, as there’s a special joy in creating homemade treats that can be shared with loved ones. Whether for a summer picnic, a holiday gathering, or simply a sweet ending to a weeknight dinner, this dessert can become a staple in your recipe collection.
Incorporate this No Bake Pineapple Cream Dessert into your culinary repertoire, and watch as it becomes a favored choice for celebrations and casual get-togethers alike. The combination of rich creaminess and vibrant pineapple flavors will undoubtedly leave a lasting impression on anyone who takes a bite. Enjoy the process and the delightful results!