
Introduction
In recent years, the culinary world has witnessed a remarkable surge in the popularity of homemade pizza. As more individuals seek comfort in cooking and the joy of creating their own meals, the allure of crafting the perfect pizza at home has never been stronger. There is something deeply satisfying about sliding a homemade pizza into the oven, the anticipation of its aroma filling your kitchen, and the delight of sharing it with family and friends. At the heart of this pizza-making experience lies one crucial element: the dough.
A great pizza dough is more than just a vehicle for toppings; it is the foundation of a delicious pizza. The right dough can elevate your homemade pizza from ordinary to extraordinary, providing a chewy, crispy, and flavorful crust that complements your chosen ingredients. This is where artisan pizza dough comes into play. This versatile recipe offers a rewarding experience for home cooks looking to master the art of pizza making.
Whether you’re a seasoned chef or a novice in the kitchen, learning how to create artisan pizza dough can be a transformative and enjoyable journey. With a few simple ingredients and some basic techniques, you can craft a dough that not only tastes fantastic but also impresses anyone who takes a bite. In this guide, we will explore the essential ingredients that make up artisan pizza dough, followed by a detailed, step-by-step approach to making your own homemade pizza base.
Understanding the Ingredients
To create the perfect artisan pizza dough, you must first familiarize yourself with the essential ingredients that contribute to its flavor, texture, and overall success. Each component plays a vital role in the dough’s development, and understanding their functions will help you achieve the best results.
All-Purpose Flour
The backbone of any pizza dough is flour, and for artisan-style pizzas, all-purpose flour is often the preferred choice. The type of flour you select significantly impacts the final texture of your crust. All-purpose flour has a moderate protein content, typically ranging between 10-12%, which is ideal for developing gluten. Gluten is the protein that gives dough its structure and elasticity, allowing it to rise and hold its shape during baking. When mixed with water and kneaded, gluten forms a network that traps air bubbles produced during fermentation, resulting in a light and chewy texture.
For an even more elevated artisan experience, consider experimenting with bread flour, which has a higher protein content (around 12-14%). This can yield an even chewier crust, perfect for those who appreciate a bit more bite in their pizza.
Sea Salt
Salt is a crucial ingredient in artisan pizza dough, serving multiple purposes. Firstly, it enhances the overall flavor of the dough, balancing the sweetness from other ingredients. Additionally, salt plays a key role in dough development. It strengthens the gluten structure, helping the dough maintain its shape and rise properly. Furthermore, salt acts as a natural preservative, extending the shelf life of your dough.
When selecting salt for your artisan pizza dough, opt for sea salt or kosher salt for the best flavor. Avoid table salt, as it often contains additives that can affect the dough’s texture and taste.
Sugar
Sugar may seem like an unconventional addition to pizza dough, but it serves several important functions. Primarily, sugar acts as food for the yeast, promoting fermentation and helping the dough to rise. As the yeast consumes the sugar, it produces carbon dioxide, creating the air pockets that give your pizza crust its light texture.
In addition to aiding fermentation, sugar also contributes to the browning of the crust during baking. The Maillard reaction, which occurs at high temperatures, transforms sugars and proteins into a beautifully golden-brown crust. A teaspoon or two of sugar is sufficient; it doesn’t make the dough sweet but rather enhances the overall flavor complexity.
Instant Yeast
When it comes to leavening your artisan pizza dough, instant yeast is a superb choice. Unlike active dry yeast, which requires proofing in warm water before use, instant yeast can be added directly to the dry ingredients. This can save you time and streamline the dough-making process. Instant yeast is also known for its quick activation, allowing your dough to rise faster.
Using instant yeast ensures a reliable rise, yielding a light and airy crust. If you prefer, you can substitute active dry yeast; just remember to activate it in warm water with a pinch of sugar before adding it to the flour mixture.
Warm Water
Water is another vital ingredient in artisan pizza dough, as it hydrates the flour and activates the yeast. The temperature of the water is crucial; it should be warm but not hot, ideally around 100°F to 110°F (37°C to 43°C). This temperature range encourages yeast activity without killing it.
Using filtered water can also improve the flavor of your dough, as it eliminates any chlorine or impurities present in tap water.
Olive Oil
The addition of olive oil to your artisan pizza dough serves both flavor and texture purposes. Olive oil enriches the dough, resulting in a softer and more tender crust. It also helps to create a golden-brown exterior when baked, adding a delightful crunch.
You can also personalize your dough by incorporating optional ingredients, such as garlic powder or dried herbs, into the olive oil. This not only enhances the flavor but can also infuse your dough with delicious notes that complement your pizza toppings.
Step-by-Step Instructions for Artisan Pizza Dough
Now that you understand the essential ingredients for artisan pizza dough, let’s dive into the detailed process of making your own. Follow these step-by-step instructions to create a dough that will serve as the perfect base for your culinary creations.
Mixing the Dough
To begin, gather all your ingredients: all-purpose flour, sea salt, sugar, instant yeast, warm water, and olive oil. In a large mixing bowl, combine the dry ingredients: 4 cups of all-purpose flour, 1 teaspoon of sea salt, and 1 teaspoon of sugar. Whisk these together to ensure even distribution.
Once the dry ingredients are well combined, create a well in the center of the mixture. This well will hold the wet ingredients, allowing for easier mixing.
Next, pour in 1½ cups of warm water and 2 tablespoons of olive oil into the well. Use a wooden spoon or spatula to gradually incorporate the flour into the wet ingredients, stirring until a shaggy dough begins to form. It’s important to mix just until the flour is incorporated; over-mixing at this stage can lead to a dense crust.
Forming the Dough
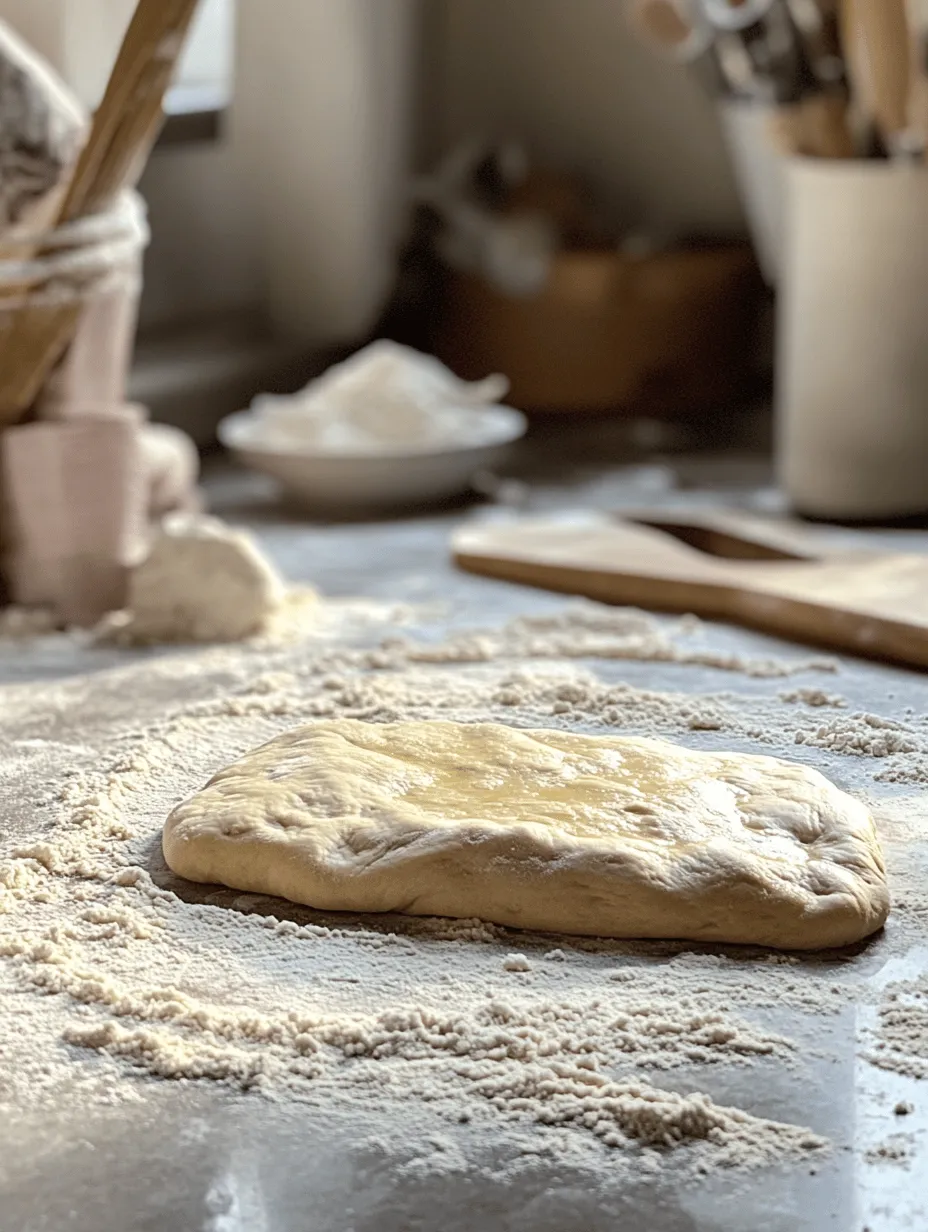
Once the dough starts to come together, it’s time to use your hands to bring it into a cohesive ball. Lightly flour your work surface to prevent sticking and transfer the dough onto the floured surface. Begin folding and pressing the dough gently, forming it into a shaggy ball.
At this point, the dough may still feel a bit sticky, which is perfectly normal. Avoid adding too much extra flour, as this can lead to a dry dough. Instead, continue to knead gently until it comes together.
Kneading Techniques
Kneading is a crucial step in developing the gluten structure of your dough, leading to the desired chewy texture. To knead your dough, use the heel of your hand to push the dough away from you, then fold it back over itself. Rotate the dough a quarter turn and repeat the process.
Knead the dough for about 8-10 minutes, or until it becomes smooth and elastic. You can test its readiness by performing the “windowpane test.” Take a small piece of dough and stretch it between your fingers; if it stretches thin enough to see light without tearing, it’s ready for the next step.
First Rise
Once kneaded, shape the dough into a ball and place it in a lightly oiled bowl, turning it to coat the surface with oil. This will help prevent the dough from drying out as it rises. Cover the bowl with a clean kitchen towel or plastic wrap, and place it in a warm, draft-free area to rise.
Allow the dough to rise for about 1 to 1.5 hours, or until it has doubled in size. This fermentation process is key to developing flavor and texture. As the yeast consumes the sugar, it produces carbon dioxide, creating air pockets that will give your crust its light and airy quality.
Punching Down and Shaping
Once the dough has risen, it’s time to degas it. Gently punch down the dough to release the accumulated gas. This step is essential for redistributing the yeast and allowing for a more even texture in the final crust.
After punching the dough down, transfer it to a lightly floured surface and divide it into two or more equal portions, depending on the size of pizzas you wish to make. Shape each portion into a tight ball by tucking the edges under and rolling it gently against the surface.
Resting the Dough
After shaping, it’s important to let the dough rest for at least 30 minutes. Cover the dough balls with a damp cloth or plastic wrap and allow them to relax. This resting period is crucial for gluten relaxation, making it easier to stretch and shape the dough into your desired pizza crust.
With these foundational steps complete, you’re well on your way to mastering artisan pizza dough. In the next part of our comprehensive guide, we will explore techniques for stretching and shaping the dough into perfect pizza bases, as well as tips for baking your pizzas to perfection. Stay tuned!
Preparing for Baking
Oven Preparation
To achieve the perfect artisan pizza, proper oven preparation is essential. The ideal temperature for baking pizza is between 475°F to 500°F (245°C to 260°C). This high temperature mimics traditional pizza ovens, ensuring a crispy crust while keeping the toppings deliciously moist. Preheat your oven for at least 30 minutes before baking to ensure that the heat is evenly distributed throughout the oven. If you have a convection setting, consider using it; it circulates air, leading to a more evenly baked pizza.
Using a Pizza Stone
A pizza stone is a fantastic tool for baking artisan pizza. It absorbs moisture from the dough and creates a crispy crust that you would typically find in a pizzeria. To use a pizza stone effectively, place it in the oven during the preheating phase, allowing it to heat up thoroughly. Aim for at least 30 minutes of preheating time, but longer is often better.
When you’re ready to bake, dust the stone lightly with flour or cornmeal to prevent the dough from sticking. To transfer your prepared pizza onto the stone, use a pizza peel or a flat cutting board dusted with the same flour or cornmeal. Carefully slide the pizza onto the stone, ensuring it doesn’t touch the sides of the oven.
Shaping the Dough
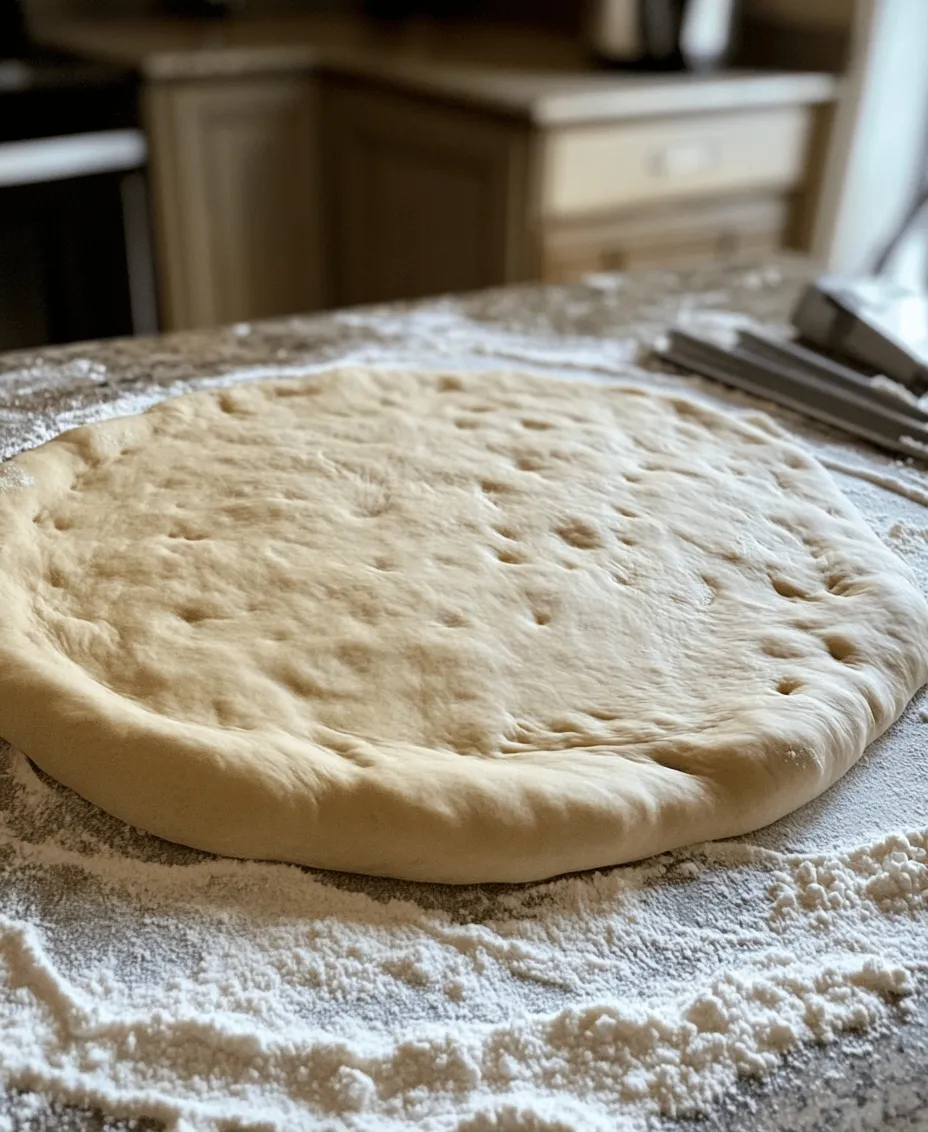
Shaping your artisan pizza dough correctly is key to achieving the desired thickness and shape. Start by lightly flouring your work surface and your hands to prevent sticking. For best results, handle the dough gently to preserve the air bubbles created during fermentation.
1. Dividing the Dough: If you’ve made a large batch, divide the dough into individual portions, typically around 8 ounces for personal pizzas or 12 ounces for larger pies.
2. Forming Balls: Gently shape each portion into a ball. You can do this by tucking the edges into the center and rolling it on the surface to create a smooth top.
3. Resting the Dough: Allow the dough balls to rest for about 20-30 minutes, covered with a clean cloth. This resting period relaxes the gluten, making it easier to stretch.
4. Stretching or Rolling: For a classic pizza shape, use your hands to gently stretch the dough from the center outwards, rotating as you go. If you prefer, you can also use a rolling pin, but be cautious not to roll out all the air. Aim for a thickness of about ¼ inch for a crispy crust.
5. Creating a Crust: If you like a thicker crust, leave the edges slightly thicker to create a nice border.
Topping Your Artisan Pizza
The toppings you choose can elevate your artisan pizza from good to extraordinary. Here are some classic and innovative topping ideas:
Classic Toppings
– Margherita: Fresh mozzarella, tomatoes, basil, and a drizzle of olive oil.
– Pepperoni: Spicy pepperoni slices with mozzarella and a rich tomato sauce.
– Four Cheese: A blend of mozzarella, gorgonzola, parmesan, and ricotta.
Innovative Toppings
– BBQ Chicken: Grilled chicken, BBQ sauce, red onions, and cilantro.
– Mediterranean: Feta cheese, olives, sun-dried tomatoes, and artichokes.
– Pesto Veggie: Pesto sauce base topped with seasonal vegetables like zucchini, bell peppers, and olives.
When selecting toppings, consider balancing flavors and textures. A good pizza will have a mix of creamy, salty, and fresh elements. For instance, pairing a rich cheese with fresh herbs can create a delightful contrast.
Avoid Overloading
While it may be tempting to pile on toppings, be cautious. Overloading can lead to a soggy crust, preventing the dough from achieving the crispiness you desire. Aim for 2-3 ounces of toppings for a personal pizza to maintain the ideal balance.
Baking Your Pizza
Baking Time and Techniques
Once your pizza is topped, it’s time to bake. If you’re using a pizza stone, slide the pizza onto the preheated stone. Bake times can vary based on your oven and thickness of the crust, but generally:
– Thin crust: 8-10 minutes
– Thicker crust: 10-12 minutes
Keep an eye on your pizza as it cooks. The cheese should be bubbling and slightly browned, and the crust should be a golden brown.
Visual Cues
Knowing when your pizza is done requires some attention to visual cues. Look for:
– Golden Brown Crust: The edges should be nicely browned.
– Bubbly Cheese: The cheese should be melted and have a few brown spots.
– Toppings Cooked: Any meats should be cooked through, and vegetables should appear tender.
Pizza Stone vs. Baking Sheet
Using a pizza stone offers significant advantages over a baking sheet. A stone allows for better heat retention and moisture absorption, resulting in a crispier crust. Conversely, baking sheets can lead to a softer bottom crust. If you must use a baking sheet, preheat it in the oven for a few minutes before placing the pizza on it to help achieve better results.
Storing and Freezing Leftover Dough
Storing Unused Dough
If you have leftover dough, it can be stored in the refrigerator for up to three days. Wrap the dough tightly in plastic wrap, or place it in an airtight container to prevent it from drying out. When you’re ready to use it, let the dough come to room temperature, which usually takes about 30 minutes before you shape it again.
Freezing Dough for Future Use
For longer storage, freezing is an excellent option. Prepare the dough as usual, and after the first rise, divide it into portions. Wrap each portion tightly in plastic wrap and place them in a freezer-safe bag. This way, you can keep the dough for up to three months.
Thawing and Reactivating Frozen Dough
When you’re ready to use your frozen dough, transfer it to the refrigerator overnight to thaw. If you’re in a hurry, you can let it sit at room temperature for about two hours. Once thawed, reintroduce some life into the dough by gently kneading it for a minute or two before shaping.
Conclusion
Creating your artisan pizza dough is a rewarding process that sets the foundation for delicious homemade pizzas. This recipe cultivates a flavorful, versatile dough that can be used for a variety of styles and toppings, allowing you to explore your culinary creativity. Whether you prefer classic combinations or innovative flavors, the possibilities are endless.
Encouraging experimentation with flavors, cooking techniques, and toppings can transform a simple pizza night into an exciting culinary adventure. So gather your favorite ingredients, invite friends or family, and enjoy the satisfaction of crafting a delicious artisan pizza from scratch. Your pizza night will never be the same!
