Introduction
The art of creating exquisite desserts often lies in the delicate balance of flavors and presentation. One such delightful treat is the Ghee-Infused Petit Fours Delight, a charming addition to any gathering or celebration. These petite, elegant cakes are not only visually appealing but also tantalizingly delicious, offering a sophisticated indulgence that is sure to impress your guests. Infused with the rich, nutty flavor of ghee—a traditional clarified butter known for its health benefits and aromatic qualities—these petit fours bring a unique twist to a classic dessert.
The history of petit fours dates back to 18th-century France, where they were originally baked in small ovens (four means “oven” in French). These bite-sized confections were crafted as a way to showcase a pastry chef’s skills, often decorated with intricate details. Today, petit fours have evolved into a beloved dessert enjoyed around the world, and the Ghee-Infused Petit Fours Delight combines modern culinary techniques with traditional flavors.
In this article, we will guide you through each step of crafting these petite delights, from the essential ingredients to the final decorative touches. Whether you’re preparing for a special occasion or just looking to treat yourself, this recipe will elevate your dessert game to new heights.
Understanding the Ingredients
Before diving into the baking process, it’s crucial to understand the essential components that make up the Ghee-Infused Petit Fours Delight. Each ingredient plays a significant role in achieving the perfect cake base, smooth fondant coating, and eye-catching decorations.
The Cake Base: A Closer Look at the Ingredients
The foundation of any good dessert begins with its cake base. Here are the key ingredients you’ll need to create the perfect ghee-infused cake:
– All-Purpose Flour: This common baking staple serves as the backbone of the cake, providing structure and stability. The right flour ensures your petit fours hold their shape while remaining tender and fluffy.
– Ghee: As the star ingredient, ghee offers a unique flavor profile that sets this dessert apart. The rich, buttery taste enhances the overall flavor of the cake, while its high smoke point makes it an excellent fat choice for baking. Ghee also contributes to a moist texture, ensuring that each bite melts in your mouth.
– Sugar: Balancing sweetness is essential in any dessert, and sugar plays a vital role in enhancing the cake’s flavor. It not only sweetens the batter but also contributes to the cake’s moistness and texture.
– Eggs: Acting as a binding agent, eggs enrich the cake and help it rise. They provide necessary moisture and stability, helping the cake maintain its structure during baking.
– Milk: Adding moisture to the batter, milk helps to create a tender crumb. It also contributes to the cake’s flavor and can be adjusted based on dietary preferences (such as using almond or coconut milk).
– Vanilla Extract: For added aromatic depth, vanilla extract is a must. It enhances the overall flavor profile of the cake, making every bite more enjoyable.
– Baking Powder: This leavening agent is crucial for ensuring that your cake rises perfectly. It creates air pockets in the batter, resulting in a light and airy texture.
– Salt: A small amount of salt enhances the overall flavor of the cake, balancing the sweetness and enriching the other flavors.
The Fondant: Creating a Smooth and Flavorful Coating
Once your cake base is prepared, the next step is to create a beautiful fondant coating that adds a layer of sweetness and a polished appearance. Here’s what you’ll need:
– Water and Corn Syrup: These ingredients form the base for a smooth fondant. The water hydrates the powdered sugar, while corn syrup adds elasticity and helps the fondant adhere to the cake.
– Powdered Sugar: The key ingredient in fondant, powdered sugar provides sweetness and texture. Its fine consistency allows for a smooth finish that is essential for a professional-looking dessert.
– Vanilla Extract: Just like in the cake, adding vanilla extract to the fondant enhances its flavor, making it more than just a sweet coating.
– Food Coloring: Personalizing your petit fours is easy with food coloring. You can create vibrant hues or soft pastels to match the theme of your event.
The Decorations: Elevating Presentation with Finishing Touches
The final step in creating your Ghee-Infused Petit Fours Delight is the decorations that will elevate their presentation. Here are some ideas for adding those finishing touches:
– Edible Glitter: For a touch of elegance, consider adding edible glitter to your petit fours. It catches the light beautifully and adds a celebratory feel to your dessert.
– Chocolate Ganache or Melted Chocolate: A rich flavor enhancement, chocolate ganache or melted chocolate can be drizzled over the fondant for added depth and a touch of decadence.
– Fresh Berries or Edible Flowers: Natural beauty and color can be achieved by garnishing your petit fours with fresh berries or edible flowers. These not only enhance the visual appeal but also add a burst of flavor that complements the sweetness of the cake.
Step-by-Step Guide to Making Ghee-Infused Petit Fours Delight
Now that you have an understanding of the ingredients, we can move on to the step-by-step guide to crafting these delightful petit fours. Follow these detailed instructions to ensure your dessert turns out beautifully:
Step 1: Prepare Your Ingredients
Before you begin baking, gather all your ingredients and ensure they are at room temperature. This is particularly important for ghee, eggs, and milk, as it helps with the mixing process and ensures a uniform batter.
Step 2: Preheat the Oven
Preheat your oven to 350°F (175°C). This allows the cake to bake evenly from the moment it goes into the oven.
Step 3: Grease and Line Your Baking Pan
Prepare a baking pan (preferably a rectangular shape, around 9×13 inches) by greasing it with ghee and lining the bottom with parchment paper. This will make it easier to remove the cake from the pan once it’s baked.
Step 4: Mix the Dry Ingredients
In a medium-sized bowl, whisk together the all-purpose flour, baking powder, and salt. This step ensures that the leavening agent is evenly distributed, contributing to a uniform rise.
Step 5: Cream the Ghee and Sugar
In a large mixing bowl, combine the ghee and sugar. Using an electric mixer, cream the two together on medium speed until the mixture is light and fluffy. This process incorporates air into the batter, helping the cake to rise.
Step 6: Add the Eggs and Vanilla
With the mixer still running, add the eggs one at a time, allowing each one to fully incorporate before adding the next. Follow this with the vanilla extract, mixing until smooth.
Step 7: Alternate Adding Dry and Wet Ingredients
Gradually add the dry flour mixture to the creamed ghee and sugar, alternating with the milk. Start by adding one-third of the flour mixture, followed by half of the milk, and continue this pattern until all ingredients are combined. Mix until just combined, being careful not to over-mix, as this can lead to a dense cake.
Step 8: Bake the Cake
Pour the batter into the prepared baking pan, smoothing the top with a spatula. Bake in the preheated oven for 25-30 minutes, or until a toothpick inserted into the center comes out clean. Once baked, allow the cake to cool in the pan for about 10 minutes, then transfer it to a wire rack to cool completely.
Step 9: Prepare the Fondant
While the cake cools, prepare the fondant. In a large bowl, combine water and corn syrup, then gradually add powdered sugar, mixing until a smooth dough forms. Knead the fondant on a clean surface dusted with powdered sugar until it is pliable. Add a few drops of food coloring and continue kneading until the desired hue is achieved.
Step 10: Assemble the Petit Fours
Once the cake is completely cooled, trim any uneven edges and cut it into small squares or rectangles, about 1.5 inches in size. Place each piece on a wire rack and begin to coat them with fondant, ensuring each petit four is covered evenly.
Step 11: Decorate Your Petit Fours
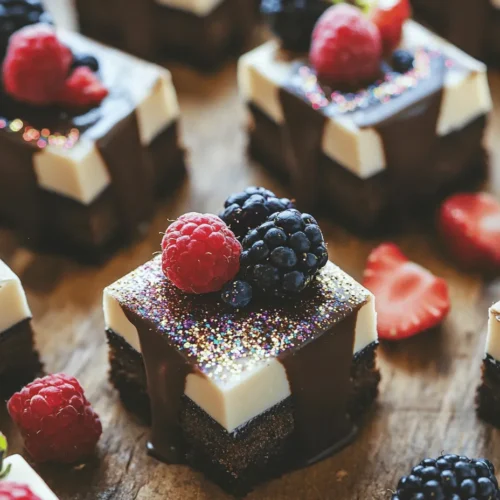
Now comes the fun part—decorating your ghee-infused petit fours! Drizzle with chocolate ganache or melted chocolate, sprinkle with edible glitter, and top with fresh berries or edible flowers for a stunning presentation.
With these steps, you are well on your way to creating a show-stopping dessert that will impress your guests and leave them craving more. The Ghee-Infused Petit Fours Delight is not just a treat for the palate but a feast for the eyes, making it the perfect centerpiece for any occasion. Stay tuned as we delve deeper into expert tips and common questions related to this delightful dessert.

Preparing the Cake: Crafting the Perfect Base
To create the ultimate Ghee-Infused Petit Fours Delight, the foundation lies in the cake itself. Let’s walk through the steps necessary to ensure your cake is moist, flavorful, and perfectly textured.
Prepping Your Baking Tools and Ingredients
Before diving into baking, it’s essential to gather all your ingredients and tools. Here’s a quick checklist:
– Ingredients:
– 1 cup ghee, melted and cooled
– 1 cup sugar
– 4 large eggs
– 1 teaspoon vanilla extract
– 2 cups all-purpose flour
– 1 tablespoon baking powder
– ½ teaspoon salt
– 1 cup milk
– Baking Tools:
– 9×13 inch baking pan
– Mixing bowls
– Whisk
– Rubber spatula
– Sifter
– Cooling rack
Make sure to prepare your baking pan by greasing it lightly and lining the bottom with parchment paper for easy removal after baking.
Whisking the Wet Ingredients for a Smooth Batter
Begin by whisking together the melted ghee and sugar in a large mixing bowl. The ghee should be cool enough not to cook the eggs as they are added, so ensure it has cooled slightly after melting. Mix until the mixture is smooth and creamy, which should take about 2-3 minutes. Next, add the eggs one at a time, whisking well after each addition. This method helps to incorporate air into the mixture, leading to a fluffier cake.
Incorporate the vanilla extract into the wet mixture to enhance the flavor profile. Set this aside while you prepare the dry ingredients.
Combining Dry Ingredients for a Well-Balanced Mix
In a separate bowl, sift together the all-purpose flour, baking powder, and salt. Sifting not only removes clumps but also aerates the flour, which is crucial for achieving a light cake. Gradually add this dry mixture to the wet ingredients, alternating with the milk. Begin and end with the flour mixture, mixing until just combined. Overmixing can lead to a dense texture, so be gentle, using a rubber spatula to fold the ingredients together until no dry flour remains visible.
Baking and Cooling the Cake for the Right Texture
Preheat your oven to 350°F (175°C). Pour the batter into the prepared baking pan, spreading it evenly with the spatula. Bake for approximately 25-30 minutes, or until a toothpick inserted into the center comes out clean.
Once baked, remove the cake from the oven and allow it to cool in the pan for about 10 minutes. Then, carefully transfer it to a cooling rack to cool completely. This cooling step is crucial as it prevents the fondant from melting when applied later.
Making the Fondant: Achieving a Silky Finish
Fondant is key to giving your petit fours that professional finish. Here’s how to create a smooth, pourable fondant that will coat your tiny cakes beautifully.
Heating the Water and Corn Syrup for Optimal Blending
In a medium saucepan, combine 1 cup of water with 1/4 cup of corn syrup. Heat this mixture over low heat, stirring until combined and warm, but do not let it boil. The warm syrup will help to dissolve the powdered sugar more easily, creating a silky texture.
Mixing Powdered Sugar to Achieve a Lump-Free Consistency
In a large mixing bowl, sift 2 pounds of powdered sugar to ensure there are no lumps. Gradually pour the warm syrup mixture over the powdered sugar, stirring continuously with a spatula. You may need to switch to your hands as the mixture thickens, kneading it gently until fully combined.
Adjusting for the Perfect Pourable Texture
The goal is to achieve a fondant that is smooth and pourable, similar to a thick syrup. If the mixture feels too dry, you can add a teaspoon of water at a time until you reach the desired consistency. Conversely, if it’s too runny, add more powdered sugar gradually until it thickens appropriately.
Once your fondant is ready, set it aside to cool slightly before using it on your petit fours.
Assembling the Petit Fours: Bringing It All Together
Now that your cake and fondant are prepared, it’s time to assemble your delightful creations.
Trimming and Cutting the Cooled Cake into Neat Squares
Once the cake has completely cooled, use a sharp knife to trim the edges, creating a clean, even surface. Then, cut the cake into squares, around 2 inches by 2 inches, ensuring each piece is uniform in size. This step is essential for both aesthetics and even fondant coverage.
Pouring Fondant Over the Cake Squares for Full Coverage
Place the cake squares on a wire rack set over a baking sheet to catch any excess fondant. Carefully pour the warm fondant over each square, allowing it to drape over the sides and create a smooth coating. You can use a spatula to guide the fondant for even coverage, ensuring that each petit four is enveloped in a silky layer.
Allowing the Fondant to Set for a Polished Finish
Let the fondant-coated petit fours sit for at least 30 minutes to set. This resting period allows the fondant to firm up, creating a glossy and polished finish that enhances the visual appeal of your treats.
Decorating the Petit Fours: Adding the Final Touches
The decoration is where your creativity can shine through. Here are some techniques to elevate your petit fours.
Techniques for Drizzling Chocolate Ganache and Dipping
To add a rich chocolate flavor, consider making a simple chocolate ganache. Heat 1 cup of heavy cream until just boiling, then pour it over 8 ounces of chopped dark chocolate. Let it sit for a few minutes, then stir until smooth.
Once your ganache is slightly cooled but still pourable, you can either drizzle it over the petit fours using a spoon or dip the tops of each square into the ganache for an indulgent finish. Allow the ganache to set for an additional 30 minutes before moving on to the next decoration step.
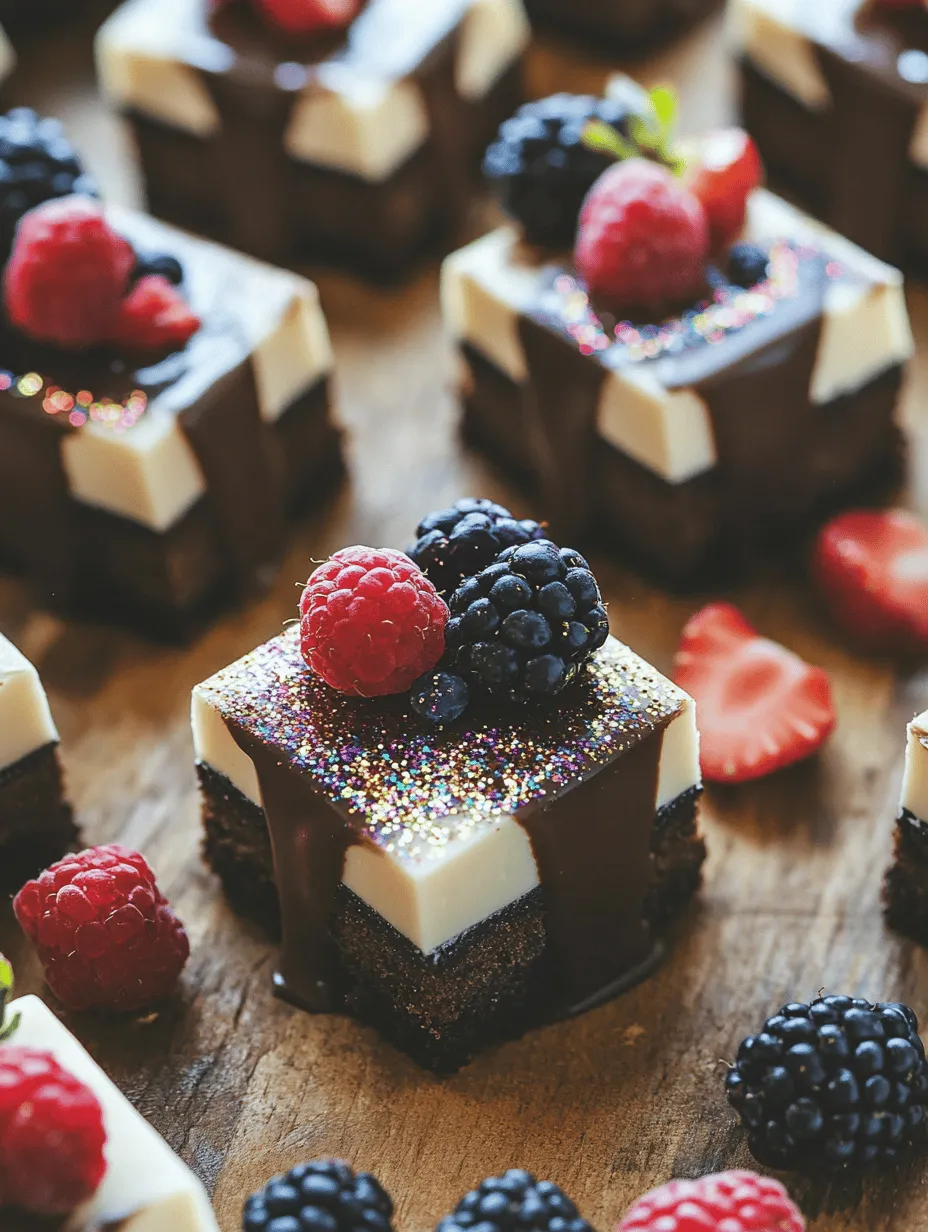
Creative Ideas for Garnishing with Edible Glitter and Fresh Fruits
To add a whimsical touch, consider garnishing your petit fours with edible glitter for a sparkling effect. Fresh fruits, such as raspberries or strawberries, can also be used to brighten up your presentation. Place a small piece of fruit on top of each petit four for a burst of color and flavor that complements the richness of the ghee and chocolate.
Serving Suggestions for Ghee-Infused Petit Fours Delight
Now that your petit fours are beautifully decorated, it’s time to consider how to serve them.
Pairing the Petit Fours with Beverages
Pairing your ghee-infused petit fours with the right beverages can enhance the overall experience. Consider serving them alongside a fragrant cup of Earl Grey tea, which complements the sweetness with its citrus notes. Alternatively, a rich espresso or a velvety cappuccino can provide a lovely contrast to the sweet, decadent flavors of the petit fours.
Creative Serving Platter Ideas for an Appealing Display
Presentation is key when serving these delightful treats. Use a tiered cake stand to create an eye-catching display that allows guests to easily reach the petit fours. For a more rustic approach, arrange them on a wooden board with sprigs of mint or edible flowers for a touch of elegance.
Conclusion
The Ghee-Infused Petit Fours Delight is more than just a dessert; it is an expression of creativity and culinary skill. This recipe not only showcases the rich flavors of ghee but also invites you to experiment with your own decorating techniques. Whether served at a formal gathering or a casual tea party, these petite cakes are bound to impress your guests and leave a lasting impression. Embrace the process of making these delightful treats and enjoy the rewards of your efforts with family and friends. The joy of creating and sharing such a unique dessert is the true essence of cooking, and these petit fours are a wonderful way to celebrate that joy.