Introduction
French crullers are a beloved pastry that holds a special place in the hearts of dessert enthusiasts and pastry chefs alike. With their unique shape, airy texture, and a delicate glaze, crullers are a delightful treat that often adorns pastry shops and cafes worldwide. They are characterized by their twisted, ring-like form and are traditionally made from a choux pastry dough, which results in a light and crispy exterior with a soft, tender inside.
The allure of homemade crullers lies in the ability to experience the perfect blend of crispiness and softness right from your kitchen. The satisfaction of biting into a freshly made cruller, adorned with a sweet glaze, is incomparable to store-bought alternatives. This article aims to provide you with a detailed, step-by-step guide to making delightful French crullers at home. Whether you are a novice in the kitchen or an experienced baker, this recipe will walk you through each stage of the process, ensuring that your crullers turn out perfectly every time.
Understanding Crullers
To truly appreciate the art of making French crullers, it is essential to understand what they are and how they differ from other types of pastries. The term “cruller” originates from the Dutch word “krullen,” which means “to curl.” This name reflects the distinctive twisted shape of the pastry. Crullers can be found in various forms across cultures, from the classic yeast-based crullers found in American bakeries to the lighter, airy French version made from choux pastry.
The primary distinction between French crullers and their yeast-based counterparts lies in their preparation and texture. While yeast-based crullers rely on fermentation to achieve their rise, French crullers utilize a unique technique involving choux pastry, where the dough is cooked before it is piped into shape. This method creates a light and airy texture that contrasts beautifully with the crisp exterior. The combination of a delicate crunch followed by a soft, almost creamy interior is what makes French crullers so appealing to many.
When it comes to flavor and texture, French crullers excel. The lightness of the choux pastry allows for a variety of flavor profiles, and they can be enhanced with various glazes and toppings. The subtle sweetness and richness of the dough, paired with the sweet glaze, create a delightful balance that makes crullers a favorite for breakfast or as a sweet snack any time of day.
Ingredients Breakdown
Creating delightful French crullers requires a careful selection of ingredients, each playing a crucial role in achieving the perfect pastry. Here’s a breakdown of the essential ingredients you’ll need:
– Water: Water is fundamental in dough formation, as it helps to create steam during the cooking process. This steam is responsible for the rise and airy texture of the crullers. Using the right amount of water ensures that your dough maintains the proper consistency.
– Unsalted Butter: Unsalted butter is the preferred choice for baking because it allows for better control over the salt content in the recipe. The richness of butter adds flavor and contributes to the flaky texture of the crullers.
– Salt: A small amount of salt enhances the flavor profile of the crullers, balancing the sweetness and highlighting the other ingredients. It is an essential component that should not be overlooked.
– All-Purpose Flour: This is the backbone of the dough. All-purpose flour provides the necessary structure and stability to the crullers. It is important to measure the flour correctly to avoid a dense pastry.
– Eggs: Eggs play a vital role in providing structure and moisture to the dough. They help bind the ingredients together and contribute to the overall richness and flavor of the crullers.
– Vanilla Extract: Adding a splash of vanilla extract enhances the flavor of the crullers, giving them a warm, aromatic quality. It complements the sweetness of the glaze and elevates the overall taste experience.
– Powdered Sugar and Milk: These ingredients are used to create the sweet glaze that coats the crullers. Powdered sugar dissolves easily and provides a smooth, glossy finish, while milk helps achieve the desired consistency of the glaze.
– Vegetable Oil: Choosing the right oil for frying is crucial. Vegetable oil has a high smoke point, making it ideal for frying crullers to a perfect golden brown without imparting any unwanted flavors.
When preparing to make French crullers, it’s essential to select high-quality ingredients for the best results. Fresh eggs, unsalted butter, and pure vanilla extract can significantly impact the flavor and texture of your final product. By investing in quality ingredients, you set the stage for delicious crullers that will impress family and friends.
Step-by-Step Guide to Making French Crullers
Preparing the Dough
To embark on your cruller-making journey, you’ll begin with the preparation of the dough. This step is crucial, as it lays the foundation for the texture and flavor of your crullers.
1. Start with Temperature Control: Begin by measuring out your water and unsalted butter. In a medium saucepan, combine the water and butter over medium heat. It’s essential to watch the temperature; you want the butter to melt completely without boiling the water too rapidly. This controlled approach helps to ensure that the mixture combines well.
2. Stirring Technique: As the butter begins to melt, stir the mixture gently. This helps incorporate the butter into the water and ensures that it does not separate. The goal is to create a unified mixture that will serve as the base for your dough.
3. Visual Cues: Keep an eye on the mixture as it heats. You will know it’s ready when the butter has fully melted and the mixture starts to bubble gently. This boiling point is critical, as it indicates that the liquid is hot enough to cook the flour when added.
Adding Flour
Once your butter and water mixture is boiling, it’s time to incorporate the flour, which is a pivotal moment in the cruller-making process.
1. Incorporating Flour: Remove the saucepan from heat and quickly add the all-purpose flour. It’s important to do this step efficiently; the heat from the liquid will create steam, which is essential for the dough. Using a wooden spoon, stir vigorously to combine the flour into the liquid. This will create a thick paste-like dough.
2. Cooking the Dough: Return the saucepan to low heat and continue to stir the dough for about one to two minutes. This step helps to dry out the dough slightly, which is essential for achieving the right texture. The dough should start to pull away from the sides of the pan and form a cohesive ball.
3. Cooling the Dough: Once you’ve cooked the dough, transfer it to a mixing bowl and allow it to cool for a few minutes. It’s important not to skip this step, as adding eggs to a hot mixture can cause them to scramble. Allowing the dough to cool ensures that it will incorporate the eggs smoothly, resulting in a light and airy pastry.
By following these initial steps, you are well on your way to creating delightful French crullers. The careful attention to detail in the preparation of the dough will set the stage for the crispy, tender pastries that you will soon enjoy. As you continue with the recipe, you’ll discover how to shape and fry your crullers, bringing you closer to that perfect homemade pastry experience.
Signs of a Well-Formed Dough
When making French crullers, understanding when your dough is just right is crucial. A well-formed dough should be smooth, glossy, and slightly sticky, yet it should hold its shape when piped. You’ll know your dough is ready when it pulls away cleanly from the sides of the saucepan and forms a cohesive ball when stirred. If the dough is too dry, it may crack while piping, while overly wet dough will spread too thin and lack structure during frying.
Cooling the Dough
Before adding eggs to your dough, it’s essential to cool it adequately. This step prevents the eggs from cooking when they come into contact with the hot mixture, which could lead to an undesirable texture in your crullers.
Why Cooling is Essential Before Adding Eggs
Cooling the dough allows for the right temperature balance, ensuring that the eggs will blend smoothly without scrambling. If the dough is too hot, you’ll not only end up with a lumpy mixture, but you may also compromise the final texture of the crullers, resulting in a dense pastry instead of the light, airy cruller you desire.
Ideal Cooling Duration and How to Test if the Dough is Ready
Typically, you should allow the dough to cool for about 10-15 minutes after removing it from the heat. To test if it’s cool enough, place your finger in the dough; it should feel warm but not hot. You can also use a thermometer to check that it has cooled to around 140°F (60°C) before proceeding to the next step.
Incorporating Eggs
Now that your dough has cooled, it’s time to incorporate the eggs. This process is vital for achieving the right texture and structure in your crullers.
Step-by-Step Method for Adding Eggs
1. Add the Eggs One at a Time: Begin by cracking the first egg into the cooled dough mixture. Using a wooden spoon or a sturdy spatula, mix it in thoroughly until fully incorporated.
2. Mixing Thoroughly: After the first egg is fully mixed in, add the second egg. Continue to mix until the dough appears shiny and smooth. Repeat this process for the remaining eggs, ensuring each one is well incorporated before adding the next.
3. Achieving Desired Texture: The final dough should be smooth, glossy, and somewhat elastic. If it appears too thick, you may add an additional egg, but do so cautiously, as you want to maintain the balance of moisture in the dough.
Piping the Crullers
With your dough ready, it’s time to shape your crullers through piping.
Tools Needed: Piping Bags and Star Tips
You will need a large piping bag fitted with a star tip, ideally a 1M or 2D tip, which creates the characteristic ridged shape of crullers. Make sure your piping bag is sturdy enough to hold the thick dough without tearing.
Techniques for Piping Perfect Rings
1. Size and Shape Considerations: Pipe circular shapes onto parchment paper, ensuring that they are uniform in size. A good diameter is approximately 3 inches; this allows the crullers to puff up nicely without being too large to cook through.
2. Preparing Parchment Paper: Cut your parchment paper into squares or rectangles and place them on a baking sheet. To prevent the paper from moving while you pipe, you can lightly grease the corners with a bit of oil or batter.
Frying the Crullers
Frying is where the crullers become truly delightful.
Importance of Oil Temperature and How to Test It
The ideal frying temperature for crullers is around 350°F (175°C). Use a kitchen thermometer to accurately gauge the oil temperature. If you don’t have a thermometer, you can test the oil by dropping a small piece of dough into the oil; if it sizzles and rises to the surface, the oil is ready.
Techniques for Safely Frying in Batches
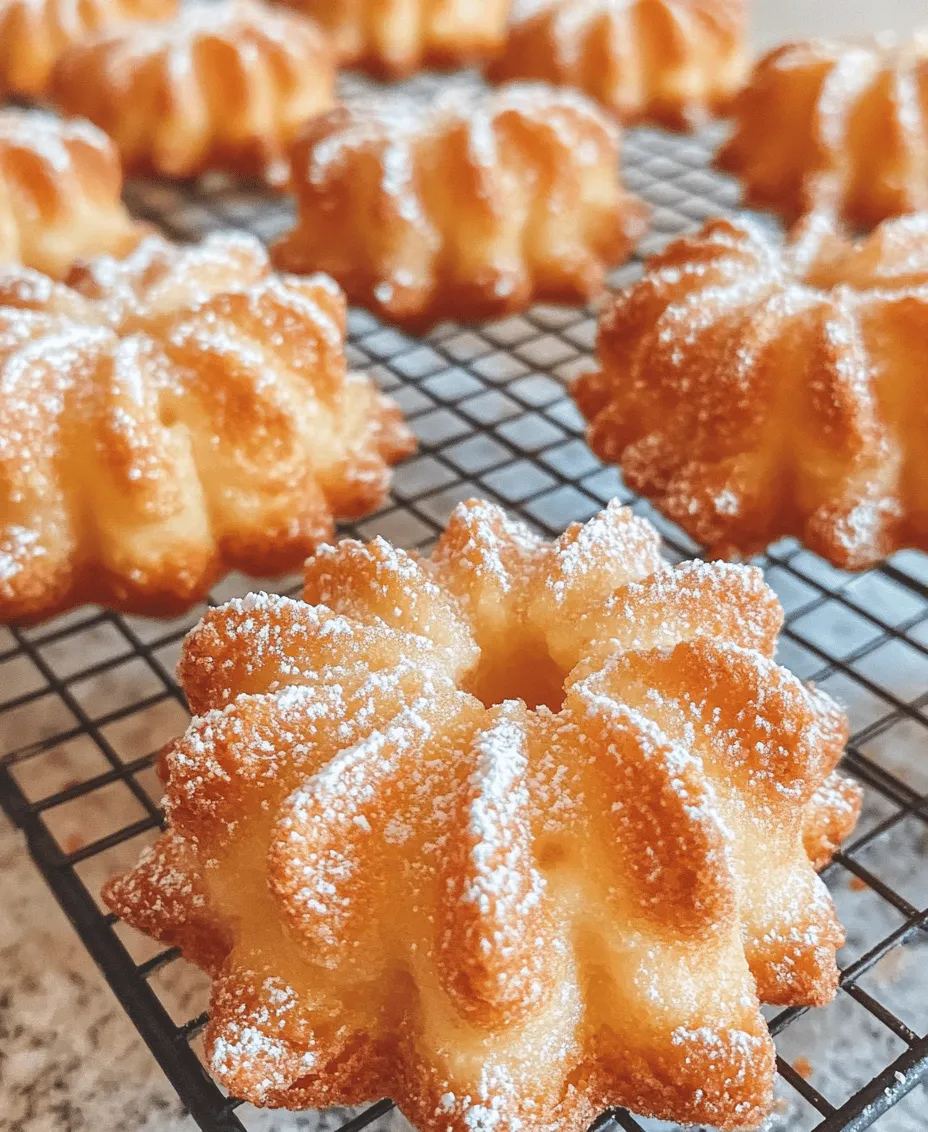
Carefully slide the piped crullers off the parchment paper and into the hot oil, ensuring not to overcrowd the pot. Fry in small batches of 2-3 crullers at a time, allowing enough room for them to expand as they cook. Fry for about 3-4 minutes on each side until they are golden brown.
Visual Indicators for Determining Doneness
You’ll know the crullers are done when they are a deep golden color and have puffed up significantly. Use a slotted spoon to remove them from the oil and drain on a paper towel-lined plate.
Preparing the Glaze
While your crullers cool, you can prepare a simple glaze to elevate their flavor.
Step-by-Step Instructions for Creating the Glaze
1. In a medium bowl, combine 2 cups of powdered sugar with 2-3 tablespoons of milk or water.
2. Whisk until smooth, ensuring there are no lumps. The glaze should be pourable but thick enough to coat the back of a spoon.
Adjusting Consistency for the Perfect Coating
If the glaze is too thick, add more liquid, one teaspoon at a time, until you reach the desired consistency. Conversely, if it’s too thin, add more powdered sugar to thicken it.
Flavor Variations for the Glaze
For a twist, consider adding vanilla extract, almond extract, or even a splash of citrus juice for a refreshing flavor. You can also experiment with different colored glazes using food coloring.
Glazing and Serving
Now that your crullers are fried and your glaze is ready, it’s time to put it all together.
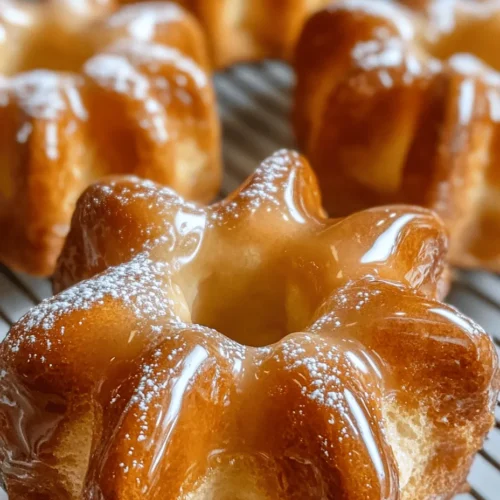
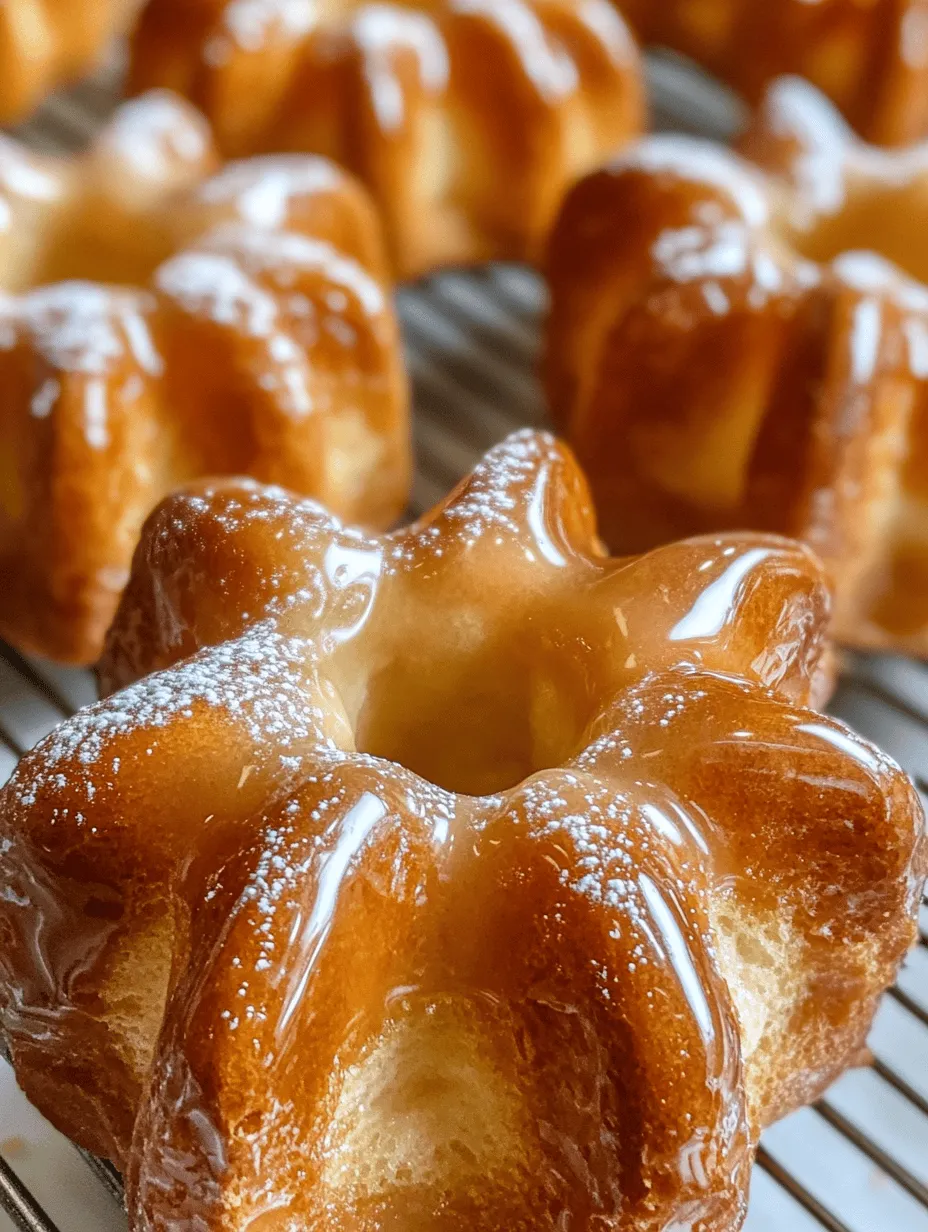
Techniques for Glazing the Crullers Effectively
Dip the top of each cruller into the glaze, allowing any excess to drip off. For a thicker coating, you can drizzle the glaze over the crullers using a spoon or a piping bag with a small tip.
Recommendations for Cooling and Setting the Glaze
After glazing, place the crullers on a wire rack to allow the glaze to set. This prevents them from becoming soggy and ensures a beautiful finish.
Presentation Ideas for Serving Crullers
Serve your crullers on a decorative plate or cake stand for an impressive display. Pair them with a hot cup of coffee or tea, and consider garnishing with a sprinkle of powdered sugar or chocolate shavings for an extra touch.
Conclusion
Making delightful French crullers may seem daunting, but the satisfaction of creating these airy, sweet pastries at home is well worth the effort. Each step, from preparing the dough to frying and glazing, contributes to the final product that is not only visually appealing but also deliciously satisfying. Whether enjoyed with family at breakfast or shared with friends over coffee, these homemade treats are sure to impress. Embrace the joy of baking and treat yourself and your loved ones to the deliciousness of freshly made crullers; the smiles they bring are the sweetest reward.