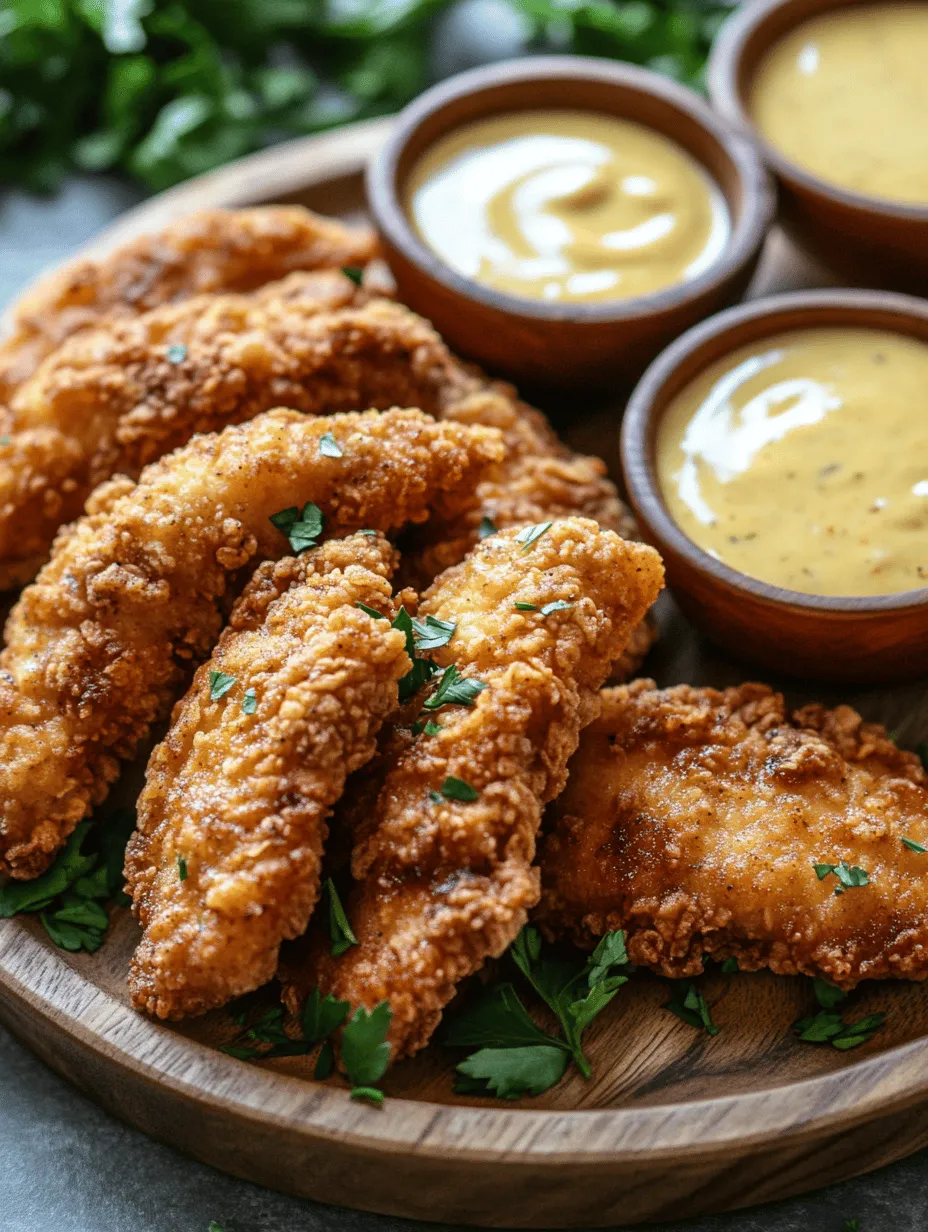
When it comes to comfort food that pleases both kids and adults alike, Crunchy Bliss Chicken Strips are a standout choice. These delightful strips are not just a meal; they are an experience, boasting a perfect balance of crispy texture and juicy chicken that’s hard to resist. Whether you’re preparing a family dinner, hosting a party, or simply craving a casual snack, these chicken strips fit the bill. The best part? This recipe is simple to follow, allowing you to create restaurant-quality chicken strips right in your own kitchen. In this article, we will guide you through the essentials of making Crunchy Bliss Chicken Strips, including the ingredients, preparation steps, and expert tips to ensure your culinary adventure is a success.
Understanding the Ingredients
To create the most delectable Crunchy Bliss Chicken Strips, it’s essential to understand the role each ingredient plays in achieving that perfect blend of flavor and texture. Let’s dive into the components that make these chicken strips truly irresistible.
Boneless, Skinless Chicken Breasts
The foundation of any great chicken strip recipe is, of course, the chicken itself. Boneless, skinless chicken breasts are ideal for frying due to their lean and tender meat. This cut of chicken not only cooks quickly but also absorbs flavors beautifully. When properly marinated, it remains juicy and moist even after frying, ensuring that each bite is tender and satisfying. Opting for boneless and skinless pieces also cuts down on excess fat, making your chicken strips a healthier choice without sacrificing taste.
Buttermilk
Buttermilk is a secret weapon in many fried chicken recipes, and for good reason. Marinating the chicken in buttermilk is crucial as it serves two primary purposes. First, the acidity in buttermilk helps to tenderize the chicken, breaking down protein fibers and resulting in a juicier final product. Second, it adds a subtle tangy flavor that enhances the overall taste of the chicken strips. To maximize the benefits, it’s best to allow the chicken to soak in the buttermilk for at least an hour, or even overnight if you have the time. This simple step sets the stage for a truly delicious dish.
Spices and Seasoning
Flavor is paramount when it comes to chicken strips, and the right combination of spices can elevate your dish from good to extraordinary. In this recipe, we incorporate garlic powder, onion powder, paprika, salt, and pepper. Garlic powder adds a savory depth, while onion powder contributes a hint of sweetness. Paprika not only lends a beautiful color to the chicken but also infuses a mild smokiness that complements the other spices. Finally, a sprinkle of salt and pepper rounds out the seasoning, enhancing the natural flavors of the chicken. Feel free to adjust the proportions to suit your taste preferences, or even experiment with additional spices for a unique twist.
Breading Components
The breading is what transforms plain chicken into crunchy, golden strips that are impossible to resist. In our Crunchy Bliss Chicken Strips, we utilize a combination of all-purpose flour, eggs, and panko breadcrumbs.
– Flour: This initial coating helps the egg adhere to the chicken, creating a solid base for the breadcrumb layer.
– Eggs: Beaten eggs act as a binding agent, allowing the breadcrumbs to stick seamlessly to the chicken.
– Panko Breadcrumbs: Panko is a Japanese-style breadcrumb that is coarser and lighter than traditional breadcrumbs. This results in an extra-crispy coating that adds texture and crunch to each bite. The unique shape of panko allows for more air pockets during frying, which means a crunchier finish.
Optional Heat
For those who enjoy a little kick in their chicken strips, consider adding a dash of cayenne pepper to the spice mix. This optional ingredient brings a subtle heat that enhances the overall flavor profile without overpowering the dish. Adjust the amount based on your heat tolerance, or leave it out entirely for a milder version that’s perfect for family-friendly meals.
Step-by-Step Instructions for Preparation
Now that we’ve covered the essential ingredients, it’s time to dive into the preparation process. Making Crunchy Bliss Chicken Strips involves several straightforward steps. By following these instructions closely, you’ll be on your way to creating a dish that is sure to impress.
Marinating the Chicken
Begin by cutting your boneless, skinless chicken breasts into strips of your desired size. Once you have your chicken prepared, it’s time to marinate. Place the chicken strips in a bowl or resealable plastic bag and pour enough buttermilk over them to fully submerge the pieces. For added flavor, mix in your chosen spices into the buttermilk before adding the chicken. Seal the bag or cover the bowl and refrigerate for at least one hour. If you have the luxury of time, allowing the chicken to marinate overnight will yield even more tender and flavorful results.
Setting Up Breading Stations
While the chicken marinates, it’s important to set up an organized workspace for the breading process. This will not only streamline your cooking but also keep your hands from getting too messy. Set up three shallow bowls: one for flour, one for the beaten eggs, and the third for panko breadcrumbs mixed with the remaining spices.
1. Flour Station: Add a generous amount of flour to one bowl. This will serve as the first layer of coating.
2. Egg Station: In the second bowl, beat a few eggs until well combined. This mixture will help the breadcrumbs adhere to the chicken.
3. Breadcrumb Station: In the third bowl, combine panko breadcrumbs with any additional spices you wish to include, such as salt, pepper, and cayenne pepper.
Arrange these bowls in a line to create an efficient breading assembly line: flour → egg → breadcrumbs.
Coating the Chicken
Once your chicken has marinated, it’s time to coat it. Remove each strip from the buttermilk, allowing any excess to drip off. Begin with the flour station, ensuring each piece is evenly coated. Shake off any extra flour before dipping the chicken strip into the beaten eggs, making sure it is thoroughly covered. Finally, transfer the chicken to the panko breadcrumb mixture, pressing down gently to ensure an even coating. This step is crucial; you want to make sure that the breadcrumbs adhere well for maximum crunchiness. Repeat this process for all the chicken strips, placing them on a wire rack or plate as you go.
Heating the Oil
Before frying, it’s essential to heat your oil to the right temperature to achieve that ideal crispy texture. Use a deep skillet or heavy-bottomed pot and fill it with about an inch of vegetable oil or canola oil. Heat the oil over medium heat until it reaches approximately 350°F (175°C). If you don’t have a thermometer, you can test the oil by dropping in a small piece of bread; if it sizzles and bubbles immediately, the oil is ready for frying.
When frying, be sure not to overcrowd the pan, as this can cause the temperature of the oil to drop and result in soggy chicken strips. Instead, cook in batches, allowing each piece enough space to fry evenly.
With the ingredients prepared and the cooking process outlined, you’re well on your way to mastering the art of Crunchy Bliss Chicken Strips. The combination of juicy chicken, flavorful spices, and a satisfying crunch will undoubtedly make this recipe a favorite at your dining table. Stay tuned for the next part of this article, where we’ll delve into cooking techniques, tips for achieving the perfect fry, and serving suggestions that will elevate your chicken strips to new heights!
Frying the Chicken Strips
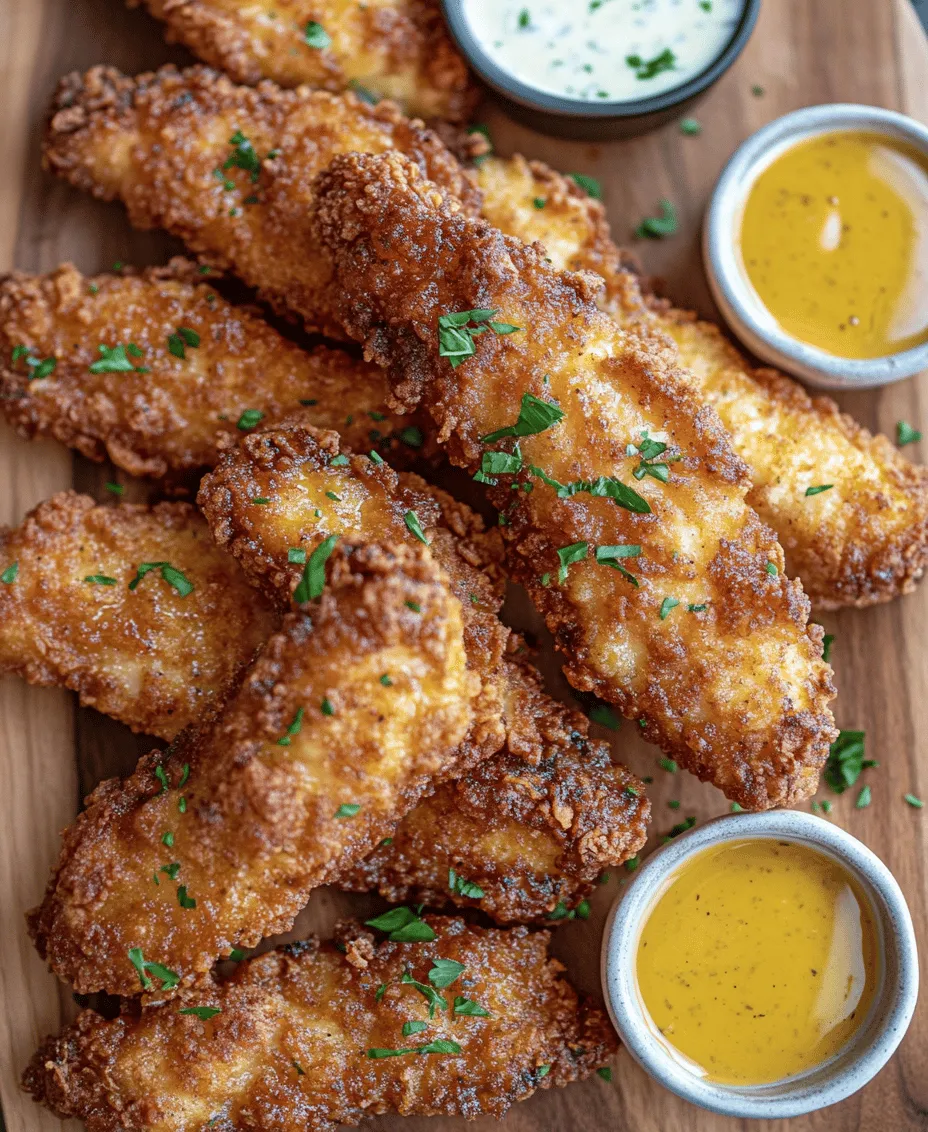
Frying is where the magic happens, transforming your seasoned chicken strips into golden, crunchy delights. To achieve that perfect golden brown color and a satisfying crunch, follow these steps carefully.
1. Heat the Oil: In a large, deep skillet or a deep fryer, pour enough oil to submerge the chicken strips (about 2-3 inches deep). Heat the oil to 350°F (175°C). To check if the oil is ready, you can drop a small piece of bread into the oil. If it sizzles and turns golden brown in about 60 seconds, your oil is ready for frying.
2. Fry in Batches: Avoid overcrowding the pan, as this can lower the oil temperature and lead to soggy chicken. Fry the strips in batches, usually about 4-6 at a time, depending on the size of your skillet.
3. Frying Duration: Cook the chicken strips for about 4-6 minutes, turning occasionally until they are golden brown and cooked through. The internal temperature of the chicken should reach 165°F (75°C). Using a meat thermometer can help ensure accuracy.
4. Draining Excess Oil: Once cooked, remove the chicken strips using a slotted spoon and place them on a plate lined with paper towels to absorb excess oil. This step is crucial for keeping your chicken strips crispy.
5. Maintaining Oil Temperature: Keep an eye on the oil temperature throughout the frying process. If it drops below 350°F, the coating may not crisp properly. Adjust the heat as needed, allowing the oil to regain temperature between batches.
Serving Suggestions
Crunchy Bliss Chicken Strips are incredibly versatile and can be served in a variety of delightful ways. Here’s how to take your meal to the next level.
Dipping Sauces
The right dipping sauce can elevate your Crunchy Bliss Chicken Strips. Here are some popular choices:
– Honey Mustard: A sweet and tangy sauce made from equal parts honey and mustard. For a homemade version, mix 1/4 cup of Dijon mustard with 1/4 cup of honey.
– Ranch Dressing: Creamy and herby, ranch dressing is a classic choice. You can easily whip up a homemade ranch by blending 1 cup of sour cream, 1/2 cup of mayonnaise, and a mix of dried herbs (dill, parsley, garlic powder, and onion powder).
– BBQ Sauce: Smoky and slightly sweet, BBQ sauce adds a rich flavor. Opt for a store-bought version or make your own by combining ketchup, apple cider vinegar, brown sugar, and spices.
– Spicy Mayo: For those who enjoy a kick, mix mayonnaise with sriracha or your favorite hot sauce to create a spicy mayo dip.
Accompaniments
To make your meal more satisfying, consider pairing your Crunchy Bliss Chicken Strips with delicious sides. Here are some ideas:
– Coleslaw: A refreshing side that complements the crunch of the chicken. The creaminess of coleslaw balances the savory flavors beautifully.
– French Fries: Crispy fries are a classic side that never disappoints. Consider sweet potato fries for a healthier twist.
– Salad: A light, fresh salad can balance out the richness of the chicken strips. A simple green salad with a lemon vinaigrette is an excellent choice.
Presentation Ideas
A well-presented dish can enhance the dining experience. Here are some tips for plating your Crunchy Bliss Chicken Strips:
– Use a Large Platter: Arrange the chicken strips in a single layer on a large platter. This allows guests to see the golden color and crispy texture.
– Garnish: Add fresh herbs like parsley or cilantro for a pop of color. Lemon wedges can also be included for a fresh squeeze of citrus just before eating.
– Dipping Stations: Create a small dipping station with various sauces in small bowls, allowing everyone to customize their experience.
Nutritional Information and Benefits
Crunchy Bliss Chicken Strips can be a part of a balanced diet when enjoyed in moderation. Here’s a breakdown of their nutritional profile:
– Protein: Chicken is a fantastic source of lean protein, essential for muscle repair and growth.
– Fats: While frying adds fats, using high-quality oils can mitigate health risks.
– Carbohydrates: The breading adds carbohydrates, providing energy.
For an approximate serving of three chicken strips, you can expect around 300 calories, 15 grams of protein, and 20 grams of fat.
Healthier Cooking Options
If you’re looking to reduce calories or fat, consider these alternatives:
– Baking: Preheat your oven to 425°F (220°C). Place the breaded chicken strips on a baking sheet lined with parchment paper and spray them lightly with cooking oil. Bake for 20-25 minutes, flipping halfway through, until golden and cooked through.
– Air Frying: For a healthier crispy result, use an air fryer. Coat the chicken strips lightly with oil and arrange them in a single layer in the air fryer basket. Cook at 400°F (200°C) for about 10-12 minutes, flipping halfway through.
Portion Control
While Crunchy Bliss Chicken Strips are undeniably delicious, practicing portion control is key. Consider serving sizes of about 3-4 strips per person, especially if you’re pairing them with sides. This approach allows for enjoying the flavors without overindulgence.
The Joy of Homemade Fried Chicken
Homemade fried chicken holds a special place in culinary traditions worldwide. For many, recipes like Crunchy Bliss Chicken Strips evoke nostalgia and memories of family gatherings, celebrations, and comfort food.
Culinary Traditions
Fried chicken has its roots in many cultures, from Southern American traditions to Asian-influenced fried chicken dishes. It often symbolizes comfort, warmth, and togetherness. Sharing a plate of chicken strips can bring people closer, creating shared experiences and memories that last a lifetime.
Personal Touch
Encourage creativity in the kitchen! Experiment with the seasoning in the breading or try different marinades for the chicken. Adding personal touches like a hint of cayenne for spice or incorporating unique herbs can make this recipe your own.
Conclusion: The Ultimate Comfort Food
Crunchy Bliss Chicken Strips are not just a meal; they represent a sense of comfort and joy in cooking and sharing food. This recipe is straightforward, allowing home cooks of all skill levels to enjoy the satisfaction of creating a dish that is both delicious and fulfilling.
By incorporating various dipping sauces, sides, and presentation ideas, you can elevate a simple dish into a memorable meal. The joy of homemade cooking lies in the ability to share hearty dishes with loved ones, creating connections through shared experiences and flavors.
I encourage you to try this recipe, indulge in the delightful crunch and flavor of your homemade chicken strips, and relish the moments shared around the table. Enjoy the process, savor the results, and create lasting memories with every bite!