Introduction to Crumbl Red Velvet Cupcake Cookies
Indulging in the rich, decadent flavors of Crumbl Red Velvet Cupcake Cookies is an experience that transcends the ordinary. This delightful recipe marries the classic attributes of red velvet cake with the comforting familiarity of a cookie, resulting in a treat that’s not only visually stunning but also bursting with flavor. The cookies are characterized by their soft, chewy texture, which is perfectly complemented by a luscious cream cheese frosting and a hint of white chocolate.
Whether you’re gearing up for a holiday gathering, celebrating a special birthday, or simply craving a sweet treat at home, these cookies promise to impress your family and friends alike. The vibrant red hue and delightful taste make them a standout dessert option for any occasion. In this article, we will explore the essential ingredients that come together to create these scrumptious cookies, step-by-step preparation instructions, and tips for perfecting your baking experience.
Understanding the Ingredients
To create the Crumbl Red Velvet Cupcake Cookies, it’s essential to understand the role each ingredient plays in achieving the perfect flavor and texture. Below, we break down the key components of this recipe:
– All-Purpose Flour: This is the foundation of the cookies, providing the necessary structure and chewiness. It should be measured accurately to ensure the right balance of dry and wet ingredients.
– Cocoa Powder: While red velvet cake is often associated with its vibrant color, cocoa powder is crucial for adding depth of flavor. It contributes a subtle chocolatey taste that enhances the overall profile of the cookies.
– Baking Soda and Salt: These are essential leavening agents. Baking soda helps the cookies rise while the salt enhances the sweetness and balances the flavors.
– Unsalted Butter: Butter is a key player in any cookie recipe, providing moisture, richness, and a delicious buttery flavor. Using unsalted butter allows you to control the saltiness of the dough.
– Sugar and Brown Sugar: The combination of granulated and brown sugar brings balance to the sweetness and contributes to the cookie’s chewy texture. Brown sugar, in particular, adds a hint of caramel flavor.
– Egg: An important binding agent, the egg helps hold the cookie together while also contributing to its moistness.
– Vanilla Extract: A staple in many baking recipes, vanilla extract enhances the overall flavor profile of the cookies, adding a warm and inviting aroma.
– Red Food Coloring: The signature element of red velvet, food coloring gives these cookies their iconic hue. It’s important to use a good quality gel or liquid food coloring for maximum impact.
– Buttermilk: This ingredient is not only crucial for the signature tang of red velvet but also contributes to the cookies’ tenderness. It reacts with the baking soda to create a light and fluffy texture.
– White Chocolate Chips: These sweet morsels add bursts of flavor and creaminess, providing a delightful contrast to the red velvet base.
– Cream Cheese Frosting: The crowning glory of these cookies, a smooth and rich cream cheese frosting elevates the cookie experience, offering a perfect balance of tanginess and sweetness.
Preparation Steps for Crumbl Red Velvet Cupcake Cookies
Now that we’ve covered the essential ingredients, let’s dive into the preparation steps necessary to create these delightful cookies. Each step is designed to ensure that the flavors meld beautifully and the texture is just right.
Preparing the Baking Environment
Before you start mixing your ingredients, it’s crucial to set up your baking environment. First, preheat your oven to 350°F (175°C). This ensures that the cookies bake evenly and rise properly. While the oven is heating, take a moment to line your baking sheets with parchment paper. This not only prevents the cookies from sticking but also makes for easy cleanup after baking.
Mixing Dry Ingredients
The first step in preparing your cookie dough is to mix the dry ingredients. In a medium-sized bowl, combine the all-purpose flour, cocoa powder, baking soda, and salt. Using a whisk, mix these ingredients thoroughly. Proper whisking is essential, as it aerates the flour and ensures that the leavening agents are evenly distributed throughout the mixture. This step prevents clumping and guarantees that every cookie rises uniformly.
Creaming Butter and Sugars
Next, in a large mixing bowl, use an electric mixer to cream together the unsalted butter, granulated sugar, and brown sugar. This process is key to achieving the right texture for your cookie base. Creaming incorporates air into the mixture, creating a light and fluffy consistency. Beat the ingredients together on medium speed until the mixture is pale and fluffy, which typically takes about 3-4 minutes.
Once the butter and sugars are well combined, it’s time to add the egg and vanilla extract. Beat these into the mixture until fully incorporated. The egg will add richness and moisture, while the vanilla will enhance the flavor profile of the cookies.
Now, it’s time to incorporate the previously prepared dry ingredients into the wet mixture. Gradually add the dry mixture to the creamed butter and sugars, mixing on low speed until just combined. Be cautious not to overmix, as this can lead to tough cookies.
After the dough comes together, stir in the buttermilk until it’s fully incorporated. This will ensure that the dough has the right consistency and will keep the cookies moist and tender.
Finally, fold in the red food coloring until the dough reaches your desired shade of red. Remember, a little goes a long way, so start with a small amount and adjust as needed.
To complete the dough, gently fold in the white chocolate chips, distributing them evenly throughout the mixture.
With the dough prepared, you’re now ready to scoop and bake your cookies, but we’ll detail those steps in the following sections.
In this part of the article, we have established a solid foundation for creating Crumbl Red Velvet Cupcake Cookies. From understanding the ingredients that contribute to their unique flavor to the initial preparation steps that set the stage for baking, you are well on your way to enjoying these delightful treats. Stay tuned for the next section, where we will continue with the baking process and tips for achieving the perfect cookie.
Incorporating Wet Ingredients: Techniques for Ensuring Even Mixing
When it comes to creating the perfect Crumbl Red Velvet Cupcake Cookies, the way you incorporate your wet ingredients plays a crucial role in achieving the desired texture and flavor. Start by ensuring that your eggs and butter are at room temperature. This step is essential because it allows for an even blend, resulting in a smooth batter.
In a large mixing bowl, combine your room-temperature butter and sugar using a hand mixer or stand mixer. Mix until the mixture is light and fluffy, which typically takes about 3-5 minutes. This process not only incorporates air into the mixture but also helps to dissolve the sugar, leading to a tender cookie. Once the butter and sugar are well-combined, add in your eggs one at a time, making sure to beat well after each addition. This gradual incorporation helps maintain the structure of the cookie dough. Finally, mix in your buttermilk and vanilla extract, ensuring everything is thoroughly combined before moving to the next step.
Combining Mixtures: The Art of Alternating Dry and Wet Ingredients
After your wet ingredients are perfectly blended, it’s time to bring the dry ingredients into play. This step is critical as it influences the overall texture of your cookies. Begin by sifting together the dry ingredients in a separate bowl, including flour, cocoa powder, baking soda, and salt. Sifting helps to aerate the flour and ensures that there are no clumps in your mixture.
To combine the mixtures, adopt the technique of alternating between the dry and wet ingredients. Start by adding about one-third of the dry mixture to the wet ingredients, and gently mix using a spatula or wooden spoon until just combined. This keeps the gluten from developing too much, which can lead to tough cookies. Follow this with half of the remaining wet ingredients, mixing gently but thoroughly. Repeat this process until all dry and wet ingredients are incorporated, finishing with the last addition of the dry mixture. Always remember, the key here is to mix until just combined to maintain a soft and tender cookie.
Adding White Chocolate Chips: Tips for Gentle Folding
Now that your cookie dough is coming together nicely, it’s time to add those delicious white chocolate chips. You can use either regular or mini chips, depending on your preference. To incorporate the chips, use a gentle folding technique. This helps to evenly distribute the chips throughout the dough without overworking it.
Using a spatula, carefully fold the white chocolate chips into the mixture until they are evenly spaced. Avoid stirring vigorously, as this can lead to a denser cookie. Instead, use a gentle motion to ensure that the chips are well-distributed while retaining the lightness of your cookie dough.
Scooping and Spacing: Ensuring Even Baking and Optimal Cookie Shape
With your dough prepared, it’s time to scoop and shape your cookies. For uniform cookies, use a cookie scoop or tablespoon to portion out the dough. This will give you evenly sized cookies that bake at the same rate. Place the cookie dough balls on a baking sheet lined with parchment paper or a silicone mat.
When placing your dough on the baking sheet, ensure that there is enough space between each cookie. A good rule of thumb is to leave about 2 inches between each ball of dough. This spacing allows the cookies to spread as they bake without merging into one another, ensuring they maintain their distinct shape.
Baking: Understanding the Ideal Baking Time and Indicators for Doneness
Baking times can vary depending on your oven and the size of your cookies, but a good starting point is to preheat your oven to 350°F (175°C) and bake the cookies for 10-12 minutes. Keep an eye on them towards the end of the baking time. The cookies are done when the edges are set and the centers look slightly underbaked; they will continue to cook as they cool on the baking sheet.
For an extra tip, consider using an oven thermometer to ensure your oven is at the correct temperature, as many home ovens can be off by several degrees. Additionally, if you notice that your cookies are browning too quickly, you can rotate your baking sheet halfway through the baking time for an even bake.
Cooling: Importance of Letting Cookies Rest Before Frosting
After baking, allow your cookies to cool on the baking sheet for about 5 minutes before transferring them to a wire rack. This resting period is essential as it allows the cookies to firm up slightly, making them easier to handle when you move them. If you frost them while they are still warm, the frosting may melt and slide off, compromising the aesthetic appeal of your cookies.
Once the cookies have cooled completely on the wire rack, you can proceed to frost them with your delicious cream cheese frosting.
The Joy of Cream Cheese Frosting
Creating the Perfect Topping
Cream cheese frosting is the perfect pairing for your Crumbl Red Velvet Cupcake Cookies, adding a tangy sweetness that complements the rich flavors of the cookie.
Ingredients for Cream Cheese Frosting: A Simple Yet Delicious Blend
To make the frosting, you will need the following ingredients:
– 8 oz cream cheese, softened
– ½ cup unsalted butter, softened
– 4 cups powdered sugar
– 1 teaspoon vanilla extract
– A pinch of salt
This combination yields a creamy, rich frosting that is easy to spread and full of flavor.
Techniques for Making Frosting: Achieving the Right Consistency
To create your cream cheese frosting, begin by beating the softened cream cheese and butter together in a mixing bowl until smooth and creamy. This step is crucial for a lump-free frosting. Gradually add in the powdered sugar, mixing on low speed to prevent a sugary cloud from forming. Once the sugar is incorporated, add in the vanilla extract and a pinch of salt, then increase the speed to medium-high and beat until the frosting is light and fluffy. The consistency should be spreadable but not runny; if it seems too thick, you can add a teaspoon of milk at a time to reach your desired consistency.
Frosting Application: Best Practices for Topping the Cookies
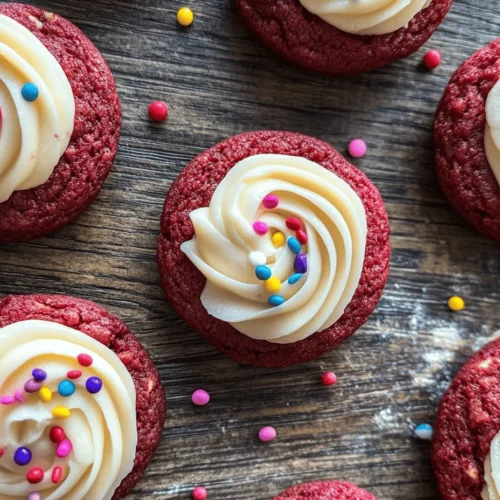
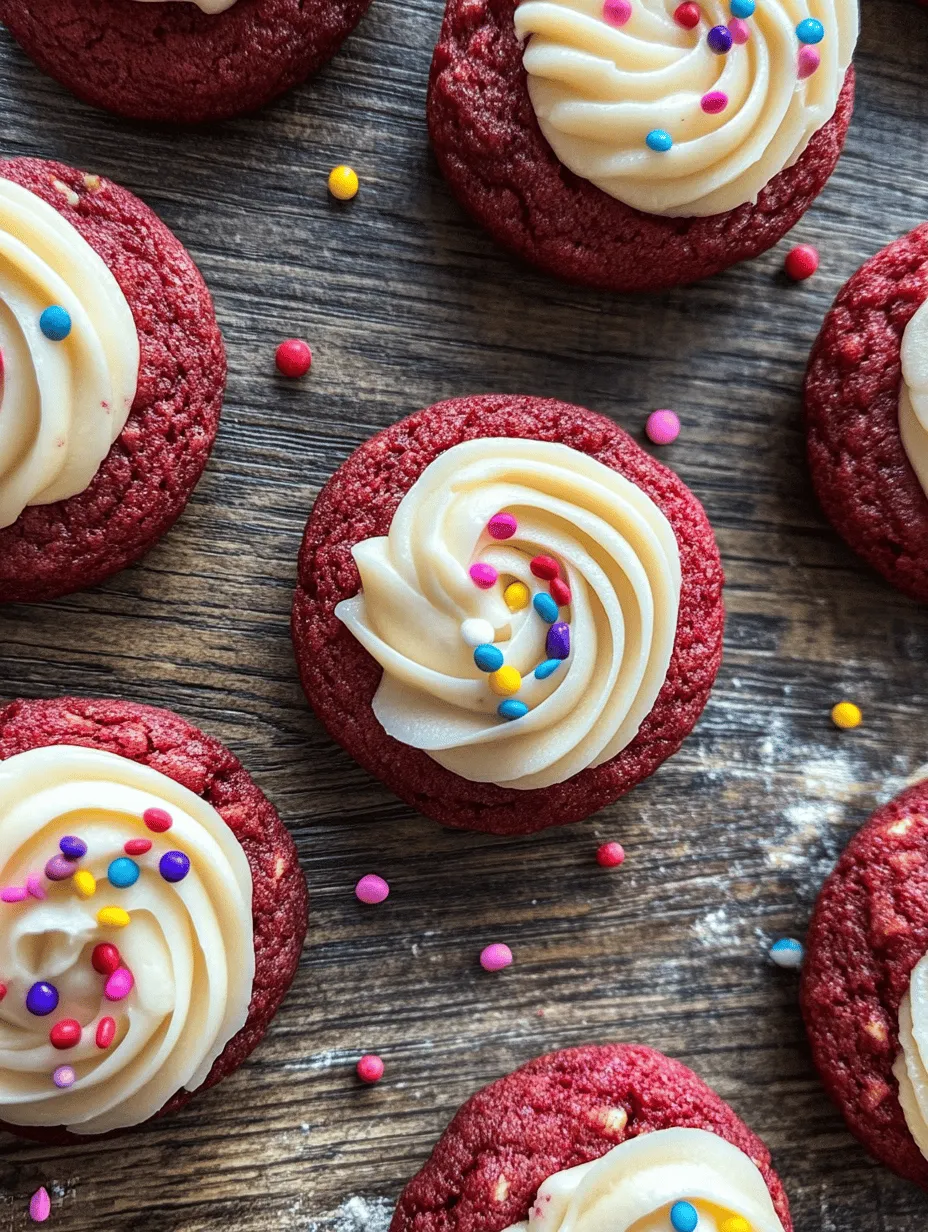
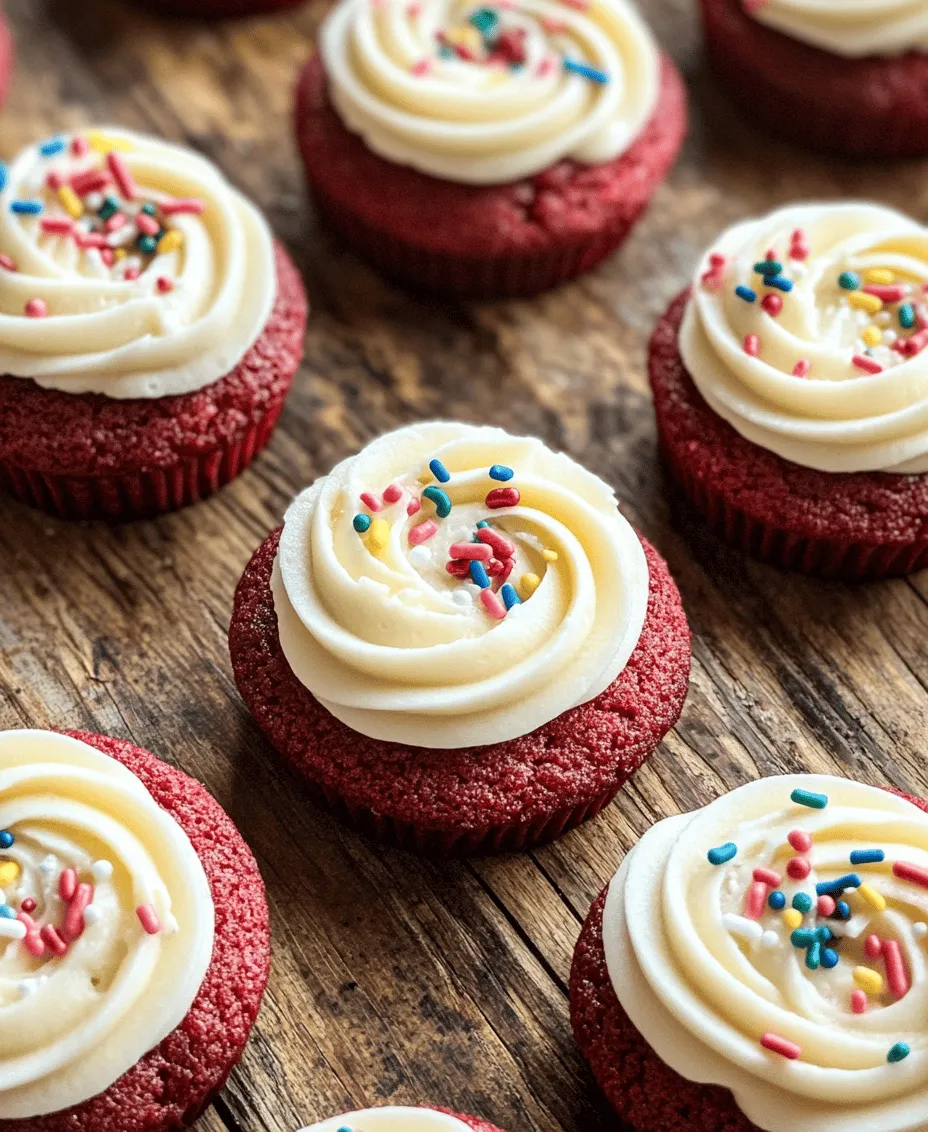
When it comes to frosting your cookies, there are a few techniques to ensure an appealing finish. Using a knife or offset spatula, spread a generous layer of frosting on each cookie. For a more decorative finish, consider using a piping bag fitted with a star tip to create beautiful swirls or rosettes on top of each cookie. This not only enhances the presentation but also adds an extra layer of frosting, making each bite even more delicious.
Garnishing Your Cookies: The Finishing Touches
The Role of Sprinkles: Adding Color and Fun to Your Cookies
To elevate your cookie presentation, consider adding sprinkles on top of the cream cheese frosting. Colorful sprinkles can transform your cookies from simple to festive, making them perfect for birthdays or special occasions. Just sprinkle them on immediately after frosting to ensure they adhere well.
Alternative Garnishes: Exploring Other Creative Options
If sprinkles aren’t your style, you can get creative with other garnishes. Consider drizzling melted white chocolate over the frosted cookies for an elegant touch, or adding finely chopped nuts for a crunchy contrast to the soft cookie. Fresh raspberries or strawberries can also serve as a beautiful and delicious garnish, enhancing both flavor and presentation.
Storing and Serving Suggestions: Maximizing Freshness and Enjoyment
Best Practices for Storing Cookies: Keeping Them Soft and Delicious
To keep your Crumbl Red Velvet Cupcake Cookies soft and fresh, store them in an airtight container at room temperature for up to a week. If you need to store them for a longer period, consider freezing them. Place the un-frosted cookies in a single layer in a freezer-safe container with parchment paper between layers to prevent sticking. They can be frozen for up to three months. When you’re ready to enjoy them, simply thaw them at room temperature and frost as desired.
Creative Serving Ideas: Pairing with Beverages or Themed Dessert Tables
These cookies are versatile and can be served in a variety of settings. Pair them with a glass of cold milk for a classic treat, or serve them alongside a hot cup of coffee or tea for a cozy afternoon snack. If you’re hosting a gathering, consider creating a dessert table featuring a variety of cookies and treats, including your Crumbl Red Velvet Cupcake Cookies, to impress your guests.
Conclusion: Enjoying Your Crumbl Red Velvet Cupcake Cookies
In conclusion, Crumbl Red Velvet Cupcake Cookies offer a delightful experience for both the baker and the consumer. With their rich flavor profile, soft texture, and beautiful presentation, these cookies are sure to become a favorite in your dessert repertoire. Whether you share them with loved ones or indulge in them yourself, these cookies bring joy and sweetness to any occasion. Embrace the baking process and enjoy the scrumptious results of your efforts! Whether it’s a holiday gathering, a birthday party, or simply a treat for yourself, these cookies are bound to impress and satisfy. Happy baking!