Introduction
Crispy Spiced Bread Balls are a delightful snack that captures the essence of comfort food with a twist. Whether served at a lively gathering, a casual family dinner, or even as a midday treat, these savory bites are sure to impress. Their unique combination of textures and flavors makes them an appealing choice for anyone looking to elevate their appetizer game.
What sets these bread balls apart is their versatility; they can be customized to suit various occasions and personal tastes. You can serve them as a standalone snack, pair them with tangy dips, or include them as part of a larger buffet spread. The key ingredients—fresh bread, spiced potatoes, vibrant peas, and rich cheese—meld beautifully to create a dish that is both satisfying and bursting with flavor.
As we delve deeper into this recipe, you’ll discover the essential ingredients that lend these bread balls their irresistible appeal. From the crunch of the outer layer to the soft, savory filling, each component plays a vital role in bringing this dish to life.
Understanding the Appeal of Crispy Spiced Bread Balls
The allure of Crispy Spiced Bread Balls lies in their delightful contrast of textures. The outer layer boasts a satisfying crunch, achieved through frying or baking, while the interior remains soft and packed with flavorful ingredients. This combination makes each bite a delightful experience, enticing you to reach for just one more.
Crispy bread-based snacks have a rich cultural significance across various cuisines. From the Italian arancini to the Indian aloo tikki, the concept of combining bread with flavorful fillings is a beloved tradition. In many cultures, bread is a staple, and incorporating it into snacks not only adds texture but also utilizes leftover bread creatively, reducing waste in the kitchen.
Nutritionally, the primary ingredients in Crispy Spiced Bread Balls contribute to their overall appeal. Potatoes provide a creamy texture, peas add a pop of color and sweetness, and cheese brings richness and depth. Each ingredient not only enhances the flavor profile but also packs in valuable nutrients. Potatoes are high in potassium and vitamin C, peas are an excellent source of protein and fiber, and cheese contributes calcium and essential fats.
Ingredients Breakdown
Understanding the ingredients that go into your Crispy Spiced Bread Balls is crucial for achieving the best results. Here’s a detailed breakdown of each component:
Bread
The foundation of this recipe is, of course, the bread. While white bread is commonly used, opting for whole wheat or multigrain varieties can add extra flavor and nutritional benefits. Whole wheat bread is rich in fiber and can contribute to a heartier texture, making it a great option for those looking to enhance the health quotient of the dish. When choosing bread, ensure it is fresh; stale bread can be used too, as it will soak up the flavors of the filling better.
Potatoes
Potatoes play a pivotal role in providing the creamy, comforting base for the filling. For this recipe, it’s best to use starchy varieties like Russet or Yukon Gold, as they mash easily and give a light, fluffy texture. Boiling the potatoes until tender is essential, as this ensures they can be easily mixed with other ingredients. Their neutral flavor also allows them to absorb the spices and seasonings, making each bite incredibly flavorful.
Peas
Adding peas to the mixture not only brings a burst of color but also enhances the nutritional profile of the dish. Peas are a good source of vitamins A, C, and K, as well as protein and fiber. Their slight sweetness complements the spices and potatoes beautifully, creating a well-rounded flavor. Fresh peas are ideal, but frozen peas work just as well and save on prep time.
Cheese
Cheese is the secret ingredient that elevates the flavor of your bread balls. Different types of cheese can be used depending on your preference. Paneer, a fresh Indian cheese, adds a mild creaminess and works beautifully in this recipe. Alternatively, mozzarella provides a gooey texture, while cheddar introduces a sharp flavor. For those with dietary restrictions, vegan cheese options are available that melt well and can substitute traditional cheese without compromising the dish’s integrity.
Spices
The spices used in this recipe are what truly make the bread balls shine. Cumin and garam masala are staples in Indian cuisine, providing a warm, aromatic flavor profile. Cumin offers a nutty, earthy taste, while garam masala adds complexity with its blend of spices, including cardamom, cinnamon, and cloves. Adjusting the spice levels according to your palate is encouraged; if you prefer a milder flavor, reduce the amounts, or if you enjoy a spicier kick, feel free to add a pinch of chili powder.
Ingredient Substitutions
For those with specific dietary needs or preferences, there are several substitutions available. If you’re looking to make the recipe gluten-free, opt for gluten-free bread or breadcrumbs. For a vegan version, replace the cheese with a plant-based alternative and consider using mashed avocado or silken tofu as a creamy filling. These adjustments allow everyone to enjoy the deliciousness of Crispy Spiced Bread Balls, regardless of dietary restrictions.
Step-by-Step Guide to Making Crispy Spiced Bread Balls
Preparing the Mixture
The first step in crafting these delightful bread balls is preparing the filling. Start by peeling and boiling the potatoes until they are fork-tender, which typically takes about 15 minutes. Once cooked, drain and let them cool slightly before mashing them into a smooth consistency. It’s crucial that the potatoes are adequately cooked; undercooked potatoes will disrupt the texture of your filling.
Next, add the cooked peas—if using frozen peas, make sure they are thawed and drained. Mash them together with the potatoes, ensuring a uniform mix. The key to a successful filling is achieving the right consistency: it should be moist enough to hold together but not too wet, as excess moisture can make the bread balls soggy.
Season the mixture with salt, pepper, cumin, and garam masala. Taste the filling and adjust the spices according to your preference. This is where you can let your creativity shine; consider adding chopped herbs like cilantro or mint for an extra layer of flavor.
Incorporating cheese into the mixture enhances the creaminess and adds depth. Mix in your choice of cheese until evenly distributed throughout the potato and pea mixture. If the mixture feels too loose, you can add a little breadcrumbs to help bind it together.
Bread Preparation
While the filling is resting, it’s time to prepare the bread. If using whole slices, trim off the crusts to ensure a smooth texture when shaping the balls. Then, gently flatten each slice with a rolling pin or your hands. This step helps the bread wrap around the filling more easily and creates a thinner layer that crisps up nicely during cooking.
Depending on your recipe’s scale, cut the flattened bread into squares or circles, large enough to encase a spoonful of the filling without tearing. The goal is to create a pocket that will hold the filling securely while frying or baking.
Once the bread is ready, it’s time to assemble your Crispy Spiced Bread Balls. Take a piece of bread, place a spoonful of the filling in the center, and carefully fold the bread over the filling. Pinch the edges to seal, ensuring the filling is completely enclosed. Repeat this process until all the filling and bread are used up.
Stay tuned for the next part of this article, where we will cover the cooking method, tips for achieving the perfect crispiness, and serving suggestions that will make your Crispy Spiced Bread Balls a hit at any gathering!

Techniques for Soaking and Handling Bread to Prevent Sogginess
When preparing crispy spiced bread balls, the handling of bread is crucial to achieving the perfect texture. Start by selecting the right type of bread. Stale bread is often ideal because it has lost moisture, making it easier to handle without getting soggy. If you only have fresh bread, lightly toasting it in the oven for a few minutes can help reduce its moisture content.
To soak the bread effectively, you should use a mixture of milk or water combined with spices and seasonings. This will infuse the bread with flavor without making it overly wet. Tear the bread into small pieces rather than soaking whole slices, as smaller pieces absorb moisture more evenly. Allow the torn pieces to soak for just a few minutes. The goal is to moisten the bread enough to meld with your spices while keeping it sturdy enough to hold its shape when forming balls.
After soaking, gently squeeze the bread to remove any excess moisture. This step is essential; too much liquid will lead to soggy bread balls that fall apart during frying. You want the bread to be moist but not dripping wet, ensuring it binds well with other ingredients.
Suggestions for Using Leftover Crusts Creatively
Rather than discarding leftover crusts, consider incorporating them into your next batch of crispy bread balls. Crusts can add texture and flavor, enhancing the overall dish. If you have a mix of crusts from different types of bread, blend them together to create a unique flavor profile for your bread balls.
Another creative use for leftover crusts is to make breadcrumbs. Simply dry them out in the oven and then pulse them in a food processor. You can season these homemade breadcrumbs to use as a coating for your bread balls or save them for future recipes like meatballs or casseroles. This not only minimizes waste but also adds depth to your cooking repertoire.
Forming the Balls
Once you have soaked and prepared your bread, it’s time to form the balls. Take a small handful of the soaked bread mixture and mold it into a round shape. Aim for a size slightly larger than a golf ball. This size will ensure even cooking while providing a satisfying bite.
To prevent leakage during frying, make sure the mixture is compact. If you find the mixture is too loose, you can add a small amount of flour or breadcrumbs to help bind it together. A good visual cue for proper shaping is to ensure that the balls hold together without crumbling when squeezed gently in your hand.
Once shaped, lay the balls on a tray lined with parchment paper. This will not only prevent them from sticking but also make it easier to transport them to the frying pan later.
Tips for Achieving the Perfect Size and Sealing Techniques
As you form your bread balls, consistency in size is key for even frying. Use a measuring spoon or your hands to gauge the amount of mixture for each ball. Aim for about 2 tablespoons of the mixture per ball.
To seal the balls properly, ensure that the edges are well-pressed together. If the mixture feels too moist, dust your hands with a bit of flour to help prevent sticking. After shaping each ball, roll it gently between your palms to create a smooth surface, which will help prevent them from breaking apart during frying.
Coating the Balls
Coating your bread balls not only adds flavor but also contributes to their crispy texture. Begin by preparing a station with flour, beaten eggs, and breadcrumbs. Roll each shaped ball in flour first, ensuring it is covered evenly. This will help the egg adhere better.
Next, dip the floured ball into the beaten egg, allowing any excess to drip off. Finally, roll it in breadcrumbs, pressing gently to ensure an even coating. For an extra crunch, consider using panko breadcrumbs. These larger flakes create a superior crispy texture and add visual appeal to your finished dish.
If you want to add even more flavor, you can season your breadcrumbs with herbs or spices such as garlic powder, paprika, or Italian seasoning. This extra step elevates the overall taste and makes your crispy bread balls even more enticing.
Frying Techniques
Frying is where the magic happens, turning your prepared bread balls into golden, crispy bites. The key to perfect frying is maintaining the right oil temperature. Heat your oil in a deep pan or a heavy skillet over medium-high heat. You can test the temperature by dropping in a small piece of bread; if it sizzles and bubbles immediately, the oil is ready.
Fry your bread balls in batches, making sure not to overcrowd the pan. This step is crucial as overcrowding can lower the oil temperature, resulting in greasy and unevenly cooked balls. Fry each batch for about 4-5 minutes, or until they are golden brown and crispy all around.
When frying, safety is paramount. Use a slotted spoon to carefully lower the balls into the hot oil, and avoid splashing. Keep a close eye on the oil temperature, and adjust the heat as necessary to ensure consistent frying. Once cooked, remove the bread balls and place them on a paper towel-lined plate to absorb any excess oil.
Serving Suggestions
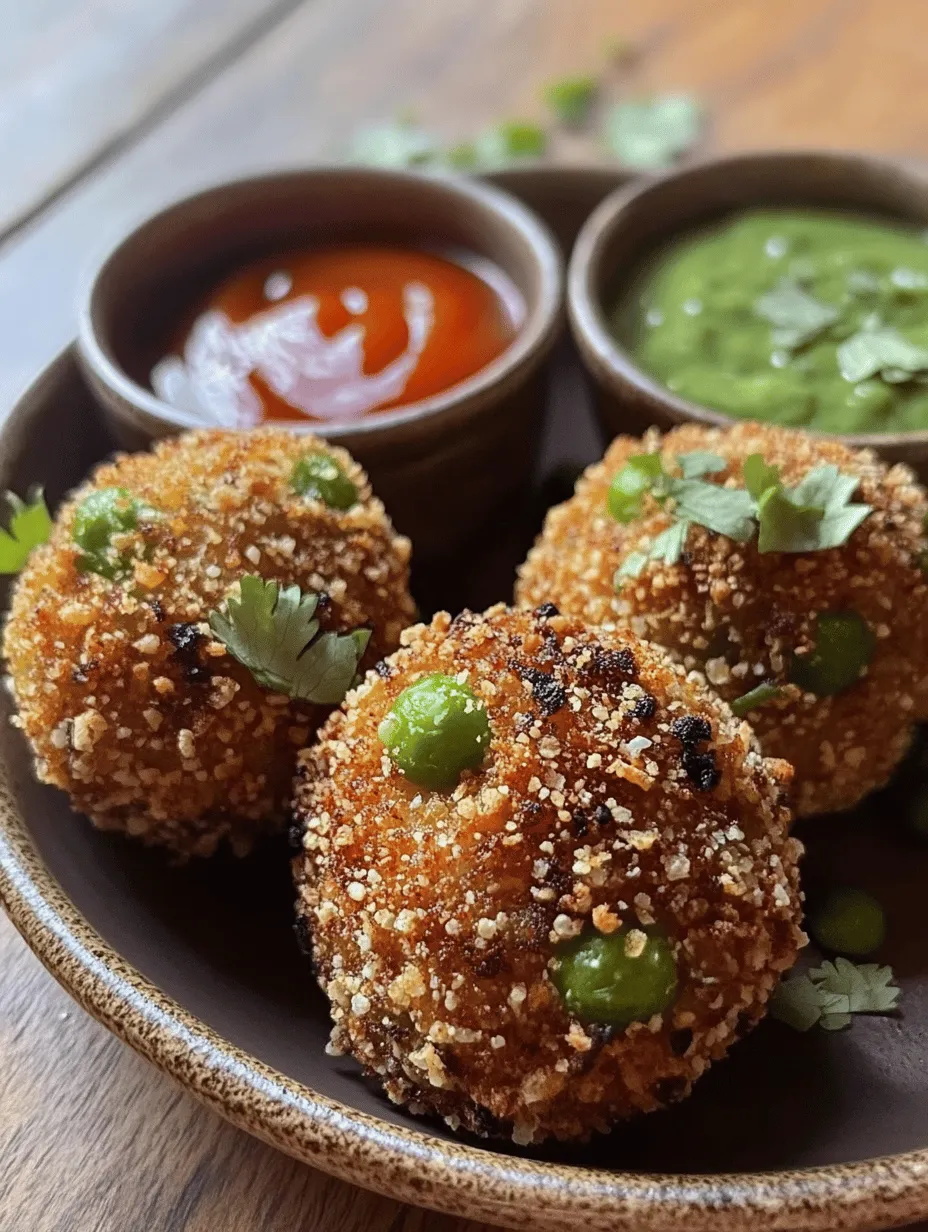
Presentation is key when serving your crispy bread balls. Arrange them on a large platter, garnishing with fresh herbs such as parsley or cilantro for a pop of color. You can also sprinkle a pinch of paprika or chili powder over the top for added visual appeal.
Pair your bread balls with complementary dips and sauces. Classic choices include ketchup and green chutney, which provide a tangy contrast to the savory flavor of the balls. For a creamier option, consider serving them with a yogurt sauce made by mixing plain yogurt with herbs and spices.
To elevate the experience further, you can set up a small dipping station with several sauces. This not only adds variety but also makes the dish interactive for guests, encouraging them to experiment with different flavor combinations.
Nutritional Information
When it comes to enjoying crispy spiced bread balls, it’s essential to balance indulgence with nutrition. Each serving (about 3-4 balls) provides an average of 200-250 calories, depending on the size and the specific ingredients used. The nutritional profile typically includes carbohydrates from the bread, protein from the egg, and healthy fats from the frying oil.
To make this snack feel less indulgent, you can experiment with baking instead of frying. Baking them at a high temperature with a light spray of oil can still yield a crispy texture while significantly reducing the calorie count.
Additionally, consider filling your bread balls with nutrient-rich ingredients such as spinach, lentils, or grated vegetables. This not only enhances the flavor but also boosts the nutritional value, making your crispy bread balls a guilt-free treat.
Conclusion
Crispy spiced bread balls are an easy-to-make snack that’s perfect for gatherings or casual munching. With their delightful crunch and savory flavor, they can appeal to a wide range of palates. The versatility of this recipe allows you to experiment with different fillings and spices, making each batch unique.
As you try your hand at these delicious bites, we encourage you to share your experiences and variations with others. Whether you add your own twist to the filling or explore different dipping sauces, fostering a sense of community around food can make cooking even more enjoyable. So gather your ingredients, invite some friends over, and get ready to indulge in these crispy delights!