Introduction
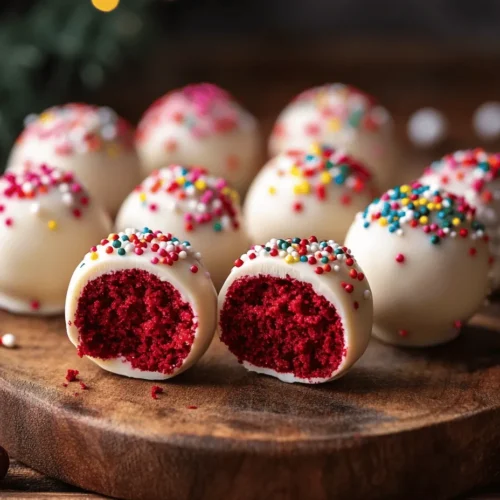
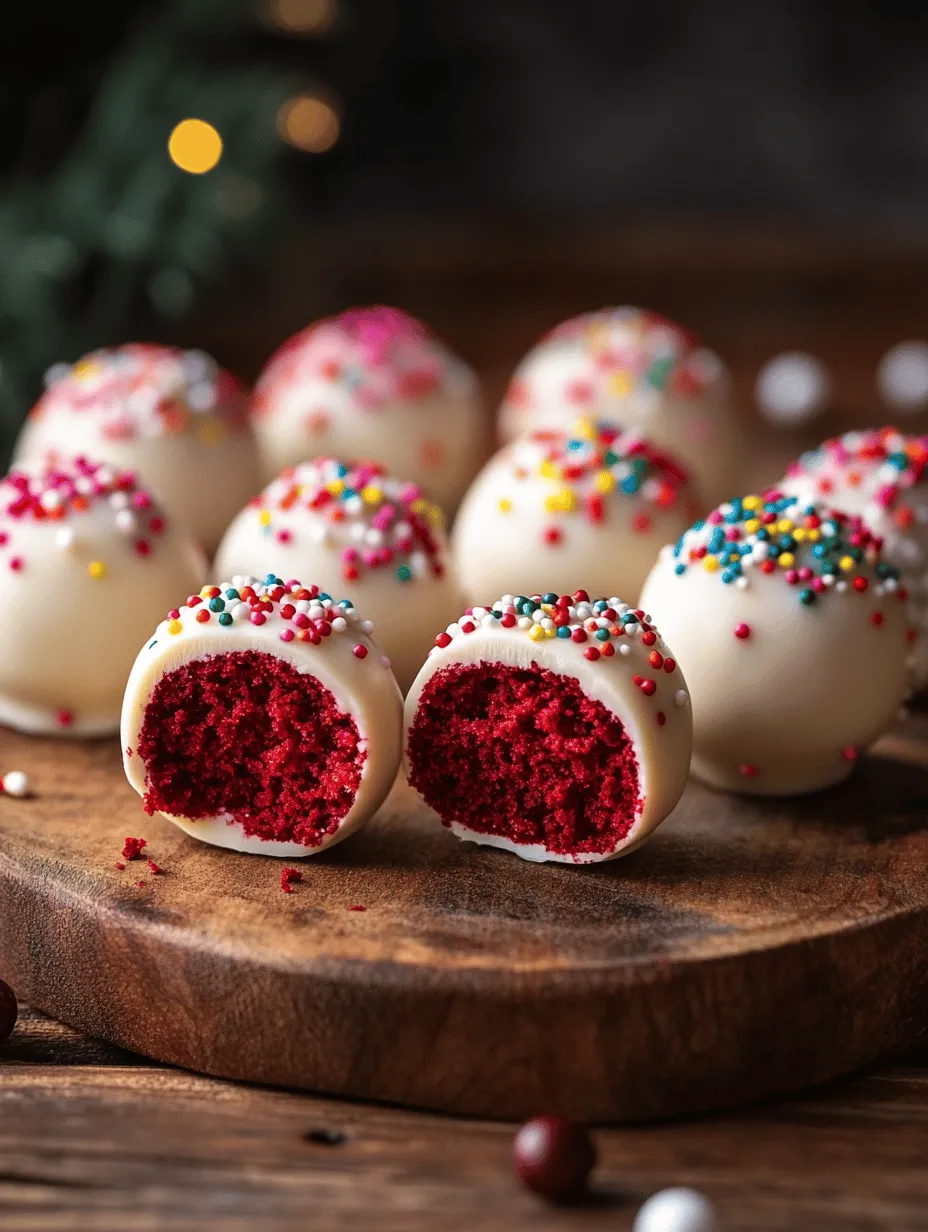
Red velvet desserts have skyrocketed in popularity over the past few years, captivating dessert lovers with their striking appearance and delectable taste. The deep crimson hue, velvety texture, and rich flavor make red velvet cake a staple at celebrations ranging from birthdays to holidays. Among the many iterations of this classic cake, the Crimson Delight Red Velvet Cake Balls stand out as a delightful fusion of flavor and aesthetics. These bite-sized treats not only encapsulate the essence of traditional red velvet cake but also offer a fun and festive way to enjoy it.
These cake balls are incredibly versatile, making them an ideal choice for various occasions, whether you’re hosting a birthday bash, a holiday gathering, or a casual get-together with friends. Their convenient size allows for easy serving and sharing, while their beautiful red hue and creamy coating make them a stunning centerpiece for any dessert table. Let’s dive deeper into the rich history and unique characteristics of red velvet cake, before we embark on the journey of making our Crimson Delight Red Velvet Cake Balls.
Understanding the Essence of Red Velvet
Historical Background of Red Velvet Cake
The origins of red velvet cake are somewhat shrouded in mystery, with various stories attempting to explain its inception. Some accounts suggest that the cake emerged in the early 20th century in the United States, particularly in the southern states. It was famously popularized by the Waldorf Astoria Hotel in New York City during the 1920s, where it was served as a luxurious dessert. The cake’s name is attributed to its soft, velvety texture and its striking red color, which was initially achieved through the use of cocoa powder and buttermilk.
Over the years, the recipe evolved, incorporating food coloring to enhance its vivid hue, ultimately leading to the iconic red velvet cake we know today. The cake’s allure lies not only in its history but also in its ability to evoke feelings of nostalgia and celebration, making it a cherished dessert for many.
The Unique Flavor Profile and Texture of Red Velvet
Red velvet cake is distinctive in both taste and texture. The cake has a soft, moist crumb that is both tender and rich, thanks to the unique combination of ingredients. The chocolate flavor, which comes from cocoa powder, is subtle yet present, complemented by the tanginess of buttermilk. This balance of flavors creates a delightful experience for the palate, making red velvet cake a favorite among dessert enthusiasts.
The iconic cream cheese frosting often paired with red velvet cake adds another layer of complexity to the overall flavor profile. The tangy creaminess contrasts beautifully with the sweet cake, enhancing its richness while providing a refreshing element.
Nutritional Aspects of Red Velvet Ingredients
While red velvet cake is undoubtedly a treat to indulge in, it’s essential to consider the nutritional aspects of its ingredients. The primary components of red velvet cake include all-purpose flour, sugar, cocoa powder, buttermilk, and vegetable oil.
– All-Purpose Flour: This ingredient provides structure to the cake, helping it maintain its form while ensuring a tender crumb.
– Granulated Sugar: A key player in sweetness, sugar also contributes to moisture retention, keeping the cake soft and delectable.
– Baking Soda and Cocoa Powder: These ingredients work together to create leavening and depth of flavor, giving the cake its characteristic lift and subtle chocolate notes.
– Buttermilk: This ingredient not only adds moisture but also reacts with baking soda to create a light and fluffy texture.
– Vegetable Oil: A crucial component for enhancing richness and softness, oil helps to keep the cake moist.
– Red Food Coloring: While primarily for aesthetics, it’s an essential element that gives the cake its signature red hue.
– Cream Cheese: Used in the frosting, cream cheese provides a creamy texture and tangy flavor that pairs perfectly with the sweet cake.
By choosing high-quality ingredients, you can ensure that your Crimson Delight Red Velvet Cake Balls not only look stunning but also taste incredible.
Key Ingredients and Their Role
In creating the Crimson Delight Red Velvet Cake Balls, the choice of ingredients is vital to achieving a perfect balance of flavor and texture. Let’s delve into the key ingredients and their contributions to this delightful recipe.
All-Purpose Flour
All-purpose flour is the backbone of any cake, providing the necessary structure and support. In red velvet cake, this flour helps create a tender crumb while ensuring the cake holds its shape. It is essential to measure the flour correctly, as too much can lead to a dense texture, while too little can result in a cake that falls apart.
Granulated Sugar
Sugar is more than just a sweetener in this recipe; it plays a crucial role in moisture retention. The granulated sugar helps to create a moist cake, enhancing the overall mouthfeel. Additionally, sugar contributes to the cake’s browning during baking, giving it a delightful surface.
Baking Soda and Cocoa Powder
Baking soda serves as the leavening agent, helping the cake rise and achieve that airy texture we all love. Cocoa powder, while providing depth of flavor, also adds to the cake’s color and richness. The two ingredients work together to create a balanced flavor profile, ensuring that the red velvet taste shines through.
Buttermilk
Buttermilk is a key ingredient that adds both moisture and tenderness to the cake. It reacts with baking soda to create a fluffy texture, while its tanginess enhances the overall flavor. If you don’t have buttermilk on hand, you can easily create a substitute by mixing regular milk with a splash of vinegar or lemon juice.
Vegetable Oil
Using vegetable oil instead of butter in this recipe ensures a moist and tender cake. Oil enhances the cake’s richness and creates a softer texture, making it an excellent choice for red velvet cake. The result is a cake that remains fresh and moist for several days.
Red Food Coloring
The iconic red color of red velvet cake comes from the addition of red food coloring. While it may seem purely aesthetic, the food coloring also plays a role in the overall flavor perception, making the cake visually appealing and enticing. When selecting food coloring, opt for high-quality gel or liquid food coloring to achieve the brightest hue.
Cream Cheese
In the context of cake balls, cream cheese is used primarily for the frosting. It adds a rich, creamy texture and tangy flavor that perfectly complements the sweetness of the cake. The cream cheese frosting is often the finishing touch that elevates red velvet cake, making it truly indulgent.
Optional Walnuts
While not a traditional ingredient in red velvet cake, chopped walnuts can be added for an extra layer of texture and flavor. They provide a pleasant crunch and a nutty taste that contrasts beautifully with the soft cake. If you enjoy a bit of texture in your desserts, consider adding walnuts to your cake batter.
Importance of Quality Ingredients
Using high-quality ingredients is essential for achieving the best results in your Crimson Delight Red Velvet Cake Balls. Fresh ingredients not only enhance the flavor but also contribute to the overall texture and appearance of the cake. Whenever possible, source organic or locally-produced ingredients to ensure a superior taste and quality.
Step-by-Step Guide to Making Crimson Delight Red Velvet Cake Balls
Now that we have a thorough understanding of the ingredients and their roles, we can dive into the step-by-step process of making Crimson Delight Red Velvet Cake Balls. This section will guide you through the initial preparation and baking phases to ensure your cake balls turn out perfectly.
Preheating and Preparing the Baking Environment
Before you begin mixing your ingredients, it’s important to prepare your baking environment. Start by preheating your oven to 350°F (175°C). This temperature ensures that your cake bakes evenly and rises properly.
Next, prepare your baking pan. For red velvet cake, a 9-inch round cake pan is ideal. Grease the pan with butter or cooking spray, and lightly dust it with flour to prevent sticking. This step is crucial for ensuring that your cake releases easily from the pan once it’s baked.
Importance of Oven Temperature and Pan Preparation
Maintaining the correct oven temperature is key to achieving a perfectly baked cake. An oven that is too hot can lead to over-browning and a dry texture, while an oven that is too cool can result in a dense, undercooked cake. To ensure accuracy, consider using an oven thermometer to verify that your oven is at the desired temperature.
Proper pan preparation is equally important. Greasing and flouring your cake pan not only prevents sticking but also promotes even baking. If you prefer, you can use parchment paper to line the bottom of the pan for an extra layer of protection.
Mixing the Batter
Once your oven is preheated and your pan is prepared, it’s time to mix the batter. Start by gathering all your ingredients and equipment, including a mixing bowl, whisk, and spatula. In a large mixing bowl, combine the dry ingredients: all-purpose flour, cocoa powder, baking soda, and salt. Whisk these ingredients together until they are well blended, ensuring there are no lumps.
In a separate bowl, mix the wet ingredients: granulated sugar, vegetable oil, buttermilk, eggs, and red food coloring. Whisk these ingredients together until smooth and well combined. The vibrant red color should start to emerge, adding excitement to the mixing process.
Techniques for Blending Dry and Wet Ingredients for Optimal Texture
When it comes to combining the dry and wet ingredients, it’s essential to do so gently to achieve the best texture. Start by adding the dry mixture to the wet mixture in batches, folding it in with a spatula or whisk. Be careful not to overmix, as this can lead to a dense cake. The goal is to combine the ingredients just until no streaks of flour remain.
If you’re adding optional walnuts to the batter, fold them in at this stage, ensuring they are evenly distributed throughout the mixture.
Baking Tips for Perfect Cake
Once the batter is mixed, pour it into the prepared cake pan, smoothing the top with a spatula. Bake in the preheated oven for 25 to 30 minutes, or until a toothpick inserted into the center comes out clean. Keep an eye on the cake as it bakes, as oven times can vary.
For an extra precaution, check for doneness a few minutes before the timer goes off. If the cake is browning too quickly, you can cover it loosely with aluminum foil to prevent over-browning.
After baking, remove the cake from the oven and allow it to cool in the pan for about 10 minutes. Then, carefully transfer the cake to a wire rack to cool completely. Cooling is a crucial step, as it allows the cake to firm up and makes it easier to handle when forming the cake balls.
As you can see, the journey to creating Crimson Delight Red Velvet Cake Balls is filled with exciting steps that culminate in a delightful treat. In the following sections, we will explore the process of forming the cake balls, coating them in delicious frosting, and presenting them beautifully for your next gathering. Stay tuned for an unforgettable dessert experience!
How to Tell When the Cake is Done
One of the most crucial steps in making the perfect Crimson Delight Red Velvet Cake Balls is ensuring that the cake is baked to perfection. To determine if your cake is done, you should use the toothpick test. Insert a toothpick into the center of the cake; if it comes out clean or with a few moist crumbs attached, the cake is ready to be taken out of the oven. It’s important not to overbake, as this can lead to a dry cake that won’t crumble correctly. The ideal baking time is usually around 25 to 30 minutes, but keep an eye on it, as ovens may vary.
Importance of Cooling for Crumble Consistency
Once your cake is baked, it’s essential to let it cool completely before proceeding with the recipe. Cooling is critical for achieving the right crumble consistency. A warm cake can become mushy and difficult to crumble evenly. Let it rest in the pan for about 10-15 minutes, then transfer it to a wire rack for thorough cooling. This process not only makes it easier to handle the cake but also ensures that the cake balls maintain their form when mixed with the cream cheese filling.
Creating the Cake Crumbs
After the cake has cooled completely, it’s time to create the cake crumbs that will form the base of your cake balls. Start by breaking the cake into chunks; this can be done easily with your hands. Place the chunks into a large mixing bowl. For best results, ensure that the crumbs are as fine as possible, as this will create a smoother texture for your cake balls.
Techniques for Crumbling the Cake Evenly
To achieve even crumbs, you can use a fork or a food processor. If you opt for a fork, simply press down and drag through the cake pieces until they resemble coarse crumbs. If you’re using a food processor, pulse the chunks in short bursts to avoid over-processing. Aim for a consistency that looks like fine sand. This is key for ensuring that your cake balls have a delightful melt-in-your-mouth quality.
The Cream Cheese Mixture
The next step involves making the cream cheese mixture that will bind the cake crumbs together. In a mixing bowl, combine softened cream cheese with powdered sugar and a splash of vanilla extract. Mix until smooth and creamy. The cream cheese provides a rich flavor that complements the red velvet, while the powdered sugar adds sweetness.
Combining Flavors for the Perfect Filling
Once your cream cheese mixture is ready, it’s time to incorporate it into the cake crumbs. Gradually add the cream cheese mixture to the crumbled cake, mixing gently with your hands or a spatula until fully combined. The key is to ensure that the crumbs are evenly coated to achieve a cohesive mixture. The mixture should be moist enough to hold together but not overly wet. If it feels too dry, a small addition of cream cheese can help achieve the right consistency.
Rolling the Cake Balls
With your mixture prepared, it’s time to roll the cake balls. Take a small portion of the mixture—about a tablespoon—and roll it into a ball between your palms. It’s important to apply gentle pressure to ensure the balls hold their shape without crumbling.
Tips on Achieving Uniform Size and Shape
For a visually appealing presentation, consistency is key. Consider using a cookie scoop or measuring spoon to portion out the mixture. This will help you create uniform cake balls that look professional and are easy to serve. Once rolled, place the cake balls on a parchment-lined baking sheet.
Chilling for Firmness
After rolling the cake balls, it’s crucial to chill them in the refrigerator for at least 30 minutes. Chilling not only firms up the cake balls, making them easier to coat, but also enhances their flavor as the ingredients meld together.
Why Chilling is Crucial for Coating
Chilling is especially important before coating the cake balls in chocolate. If the balls are too soft, they may break apart or lose their shape when dipped into the melted chocolate. A properly chilled cake ball will retain its form while being coated, ensuring a clean and professional finish.
Melting and Coating with White Chocolate
To coat your cake balls, you’ll need to melt some high-quality white chocolate. This can be done using either a double boiler or the microwave. If using the microwave, heat the chocolate in short increments, stirring frequently until it is completely melted and smooth.
Methods for Melting Chocolate Smoothly
When melting chocolate, avoid overheating it, as this can cause it to seize. If your chocolate does seize, you can add a small amount of vegetable shortening or coconut oil to help restore its smooth texture. The goal is to achieve a silky consistency that will coat the cake balls evenly.
Techniques for Even Coating and Tapping Off Excess
Once your chocolate is melted, dip each cake ball into the chocolate, using a fork to lift it out. Allow the excess chocolate to drip off before placing it back on the parchment paper. A gentle tap on the side of the bowl can help remove excess chocolate and create a smoother finish on the cake balls.
Decorative Touches
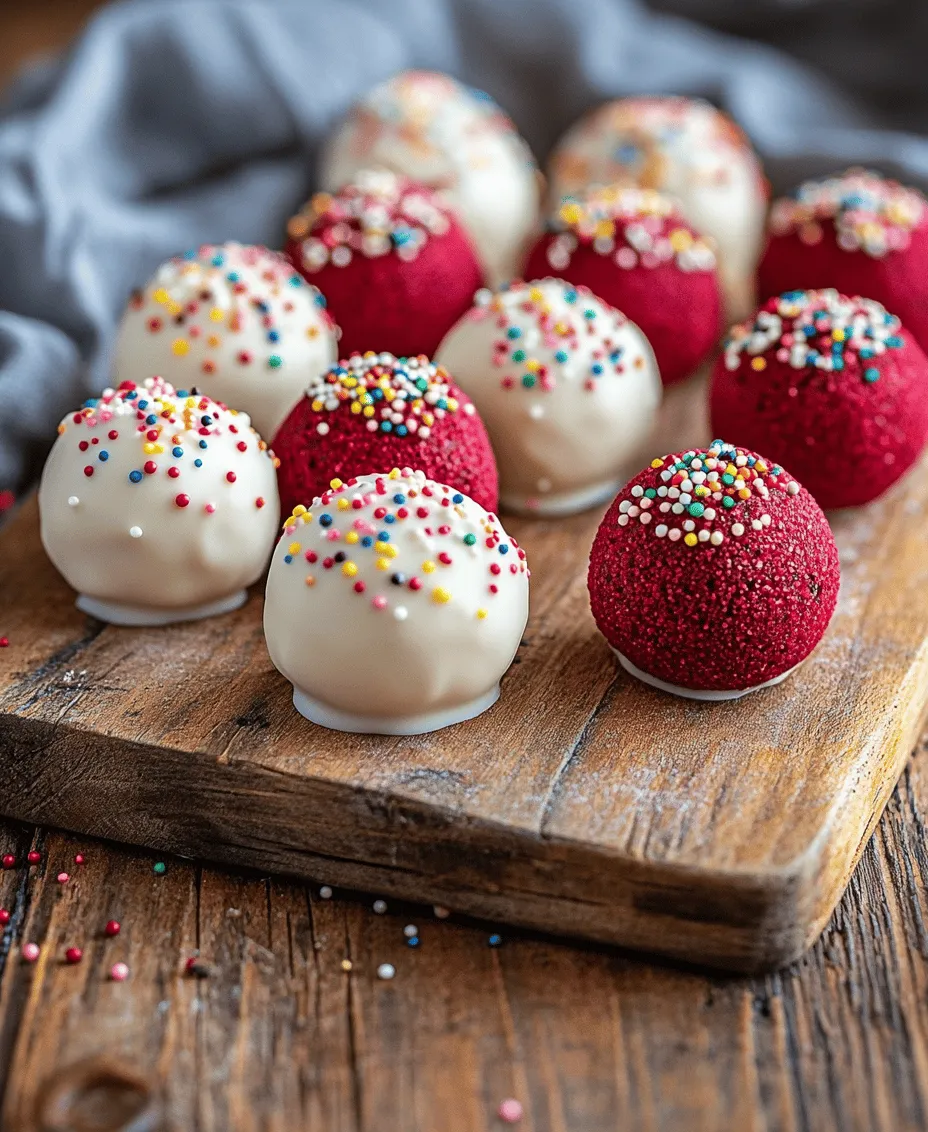
To elevate your Crimson Delight Red Velvet Cake Balls, consider adding decorative touches. While the chocolate is still wet, sprinkle edible glitter, colored sprinkles, or crushed nuts on top. These additions not only enhance the visual appeal but also add a delightful textural contrast.
Serving Suggestions and Pairings
Crimson Delight Red Velvet Cake Balls are perfect for various occasions. Whether it’s a birthday celebration, a holiday gathering, or a simple dessert to enjoy with friends, these treats are sure to impress.
Ideal Occasions for Serving Crimson Delight Red Velvet Cake Balls
These cake balls make an excellent addition to dessert tables, party favors, or even as a sweet surprise for loved ones. Their vibrant color and rich flavor make them a festive choice year-round.
Recommended Beverages and Food Pairings to Enhance the Experience
Pair your cake balls with a glass of cold milk, a cup of coffee, or a rich hot chocolate for the ultimate indulgence. For a refreshing option, consider serving them with a berry-infused iced tea or lemonade that complements the sweetness of the cake.
Creative Serving Ideas for Parties and Gatherings
Present your cake balls on a decorative platter or tiered cake stand to create an eye-catching display. You can also place them in mini cupcake liners for an elegant touch. For themed parties, consider color-coordinating your decorations with the vibrant red of the cake balls.
Storage and Shelf Life
When it comes to storing your Crimson Delight Red Velvet Cake Balls, there are a few best practices to keep in mind to maintain their freshness and flavor.
Best Practices for Storing Cake Balls
Store the cake balls in an airtight container at room temperature for up to three days. If you live in a particularly warm climate, refrigeration may be necessary to ensure they hold their shape and flavor.
How to Maintain Freshness and Flavor Over Time
To maintain the best flavor and texture, avoid stacking the cake balls directly on top of one another. Instead, place parchment paper between layers to prevent sticking.
Freezing Options for Future Enjoyment
For longer storage, you can freeze your cake balls. Place them on a baking sheet in a single layer and freeze until solid. Once frozen, transfer them to a freezer-safe bag or container. They can be kept in the freezer for up to three months. When you’re ready to enjoy them, let them thaw in the refrigerator overnight before serving.
Conclusion
Creating and enjoying Crimson Delight Red Velvet Cake Balls is a delightful experience that brings joy to both the maker and the eater. These decadent treats not only showcase the classic flavors of red velvet cake but also provide a fun and bite-sized way to indulge in dessert.
As you experiment with this recipe, feel free to add your unique twists or variations—perhaps a hint of almond extract or a different coating flavor. Cooking is a community experience, so don’t hesitate to share your creations with family and friends. The joy of making and sharing food is what truly brings us together, and these cake balls are sure to become a favorite in your home. Enjoy the process and the delicious results!