
Introduction
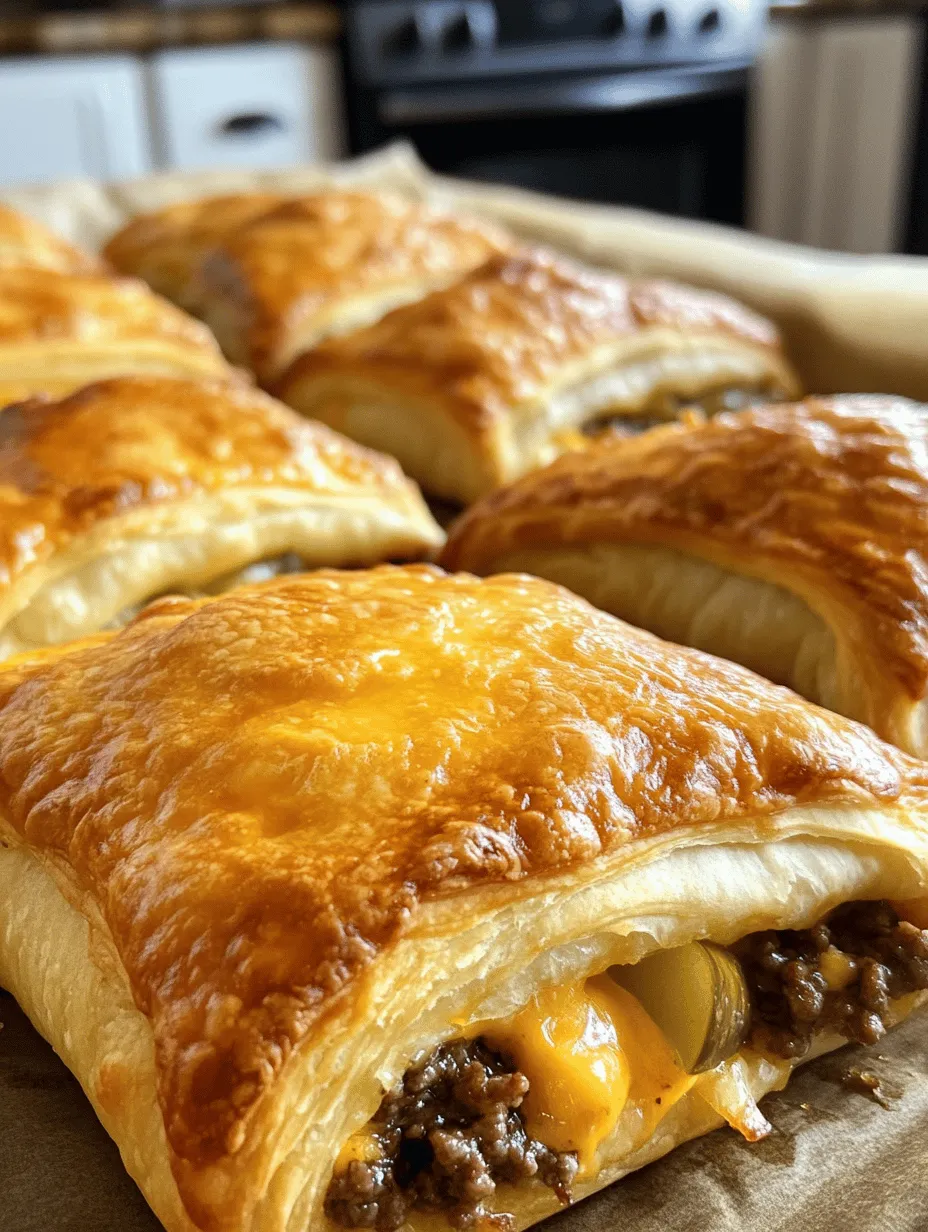
Cheeseburgers have long held a beloved spot in the hearts and stomachs of food lovers around the world. Whether grilled at summer barbecues, served at family gatherings, or enjoyed at your favorite diner, the classic cheeseburger embodies comfort food at its finest. However, as our lives become busier, the demand for convenient meals that don’t compromise on flavor has surged. Enter cheeseburger pockets—a delightful and portable twist on the traditional cheeseburger. These handheld delights are not only easy to make but are also perfect for any occasion, from casual family dinners to festive gatherings with friends.
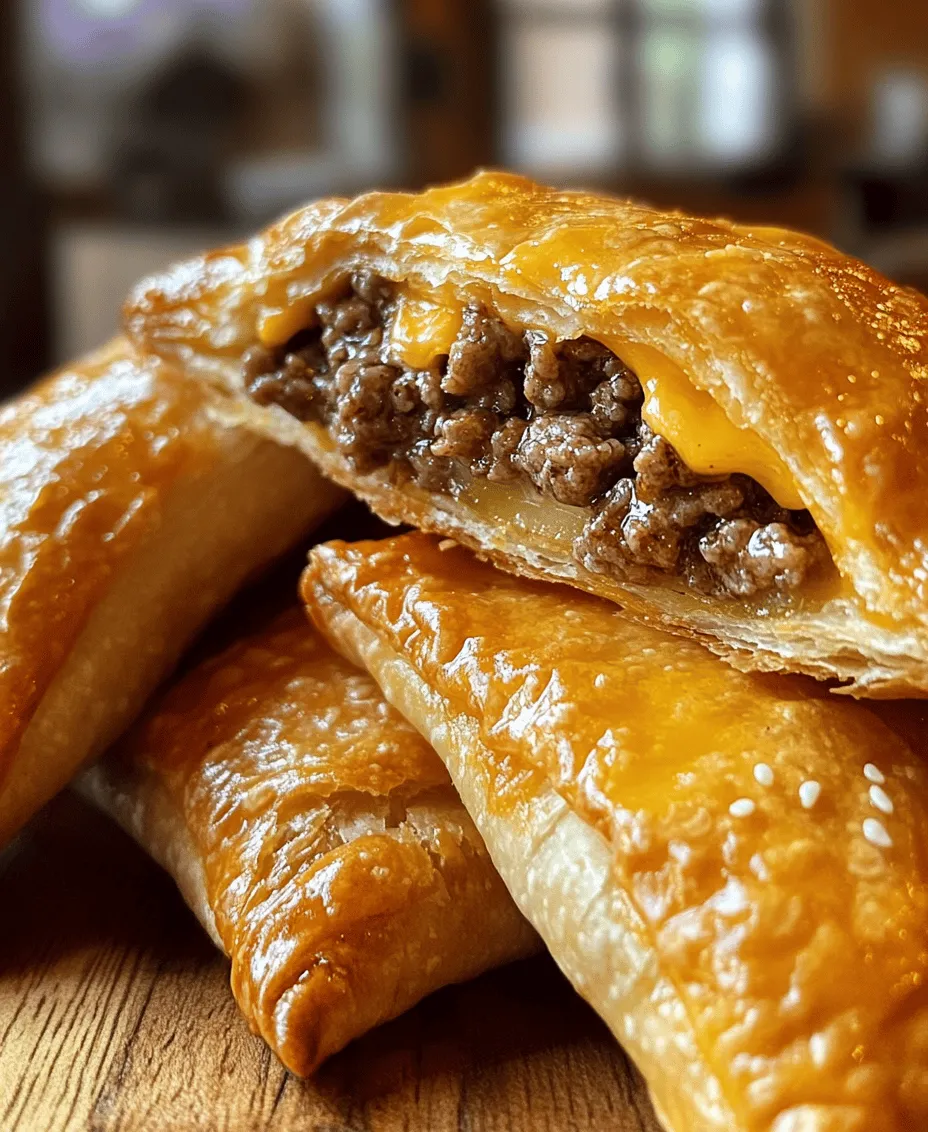
Cheeseburger pockets are an ingenious fusion of flavors and textures, combining the classic elements of a cheeseburger into a delectable pocket that can be eaten on the go. The recipe is straightforward, making it approachable for cooks of all skill levels, and its appeal to both kids and adults alike ensures that it will quickly become a favorite in your household. Whether you’re looking for a quick weeknight meal or a fun dish to impress guests, cheeseburger pockets tick all the boxes.
In this article, we will explore the essential ingredients that make up these delicious pockets, followed by a detailed explanation of the preparation steps you’ll need to follow to create your own mouthwatering cheeseburger pockets at home.
Understanding the Ingredients
To create a flavorful and satisfying cheeseburger pocket, it’s important to understand the role of each ingredient in the recipe. Let’s dive into the key components that will elevate your cheeseburger pockets from ordinary to extraordinary.
Ground Beef: The Foundation of Flavor
Ground beef is the heart of any cheeseburger, and it serves the same purpose in cheeseburger pockets. The choice of ground beef can greatly impact the final dish, so it’s essential to select quality meat. When shopping for ground beef, consider the fat content. A blend with around 80% lean meat and 20% fat is ideal for achieving a juicy filling, while leaner options may result in a drier texture.
For those who are health-conscious or prefer a more sustainable option, grass-fed ground beef is a fantastic choice. Not only does it provide a richer flavor, but it also tends to be higher in omega-3 fatty acids and vitamins compared to conventionally raised beef.
Onions and Garlic: Aromatic Enhancers
Onions and garlic are classic aromatics that add depth and complexity to the flavor of the filling. Freshly diced onions provide a slight sweetness and crunch, while garlic adds a robust and savory note. When sautéed together with the ground beef, they create an aromatic base that enhances the overall taste of the cheeseburger pockets.
Using fresh ingredients is crucial, as they contribute significantly to the flavor profile. Dried or powdered versions can be used in a pinch, but nothing beats the impact of fresh onions and garlic.
Cheddar Cheese: The Melting Magic
Cheddar cheese is synonymous with cheeseburgers, and it plays a starring role in cheeseburger pockets as well. As it melts, cheddar adds that creamy, gooey texture that makes each bite irresistible. When selecting cheese, consider the type of cheddar you prefer—sharp, medium, or mild—each brings its own unique flavor to the dish.
If you want to experiment with different tastes, feel free to mix in other cheeses like Monterey Jack, Gouda, or pepper jack for a spicy kick. The melting properties of these cheeses will also create a deliciously gooey filling.
Dill Pickles: A Zesty Crunch
Dill pickles are a quintessential component of the classic cheeseburger, and they add a delightful crunch and acidity to cheeseburger pockets. The tanginess of the pickles helps to balance the richness of the beef and cheese, creating a well-rounded flavor profile.
When preparing your filling, consider dicing the pickles to ensure that every pocket contains a bit of that zesty goodness. For those who prefer a milder flavor, bread-and-butter pickles can be used as a sweet alternative.
Worcestershire Sauce: Umami Boost
Worcestershire sauce is a secret weapon in many savory dishes, and it’s no exception in cheeseburger pockets. This fermented condiment is packed with umami flavor and elevates the taste of the ground beef. Just a splash can enhance the meat’s natural flavors, making every bite more satisfying.
When mixing Worcestershire sauce into the filling, be careful not to overdo it; a little goes a long way. The goal is to enhance the flavor without overpowering the other ingredients.
Crescent Roll Dough: A Convenient Shortcut
One of the best parts about cheeseburger pockets is the use of crescent roll dough, which simplifies the cooking process tremendously. This pre-made dough is not only convenient but also adds a flaky, buttery texture that complements the savory filling perfectly.
For those who prefer a homemade touch, making dough from scratch is certainly an option. A simple dough recipe made from flour, yeast, and butter can yield delicious results, though it will require more time and effort. If you’re short on time or want a quicker solution, store-bought crescent roll dough is a fantastic shortcut.
Egg Wash: The Golden Finish
To achieve that beautiful golden-brown finish on your cheeseburger pockets, an egg wash is essential. This simple mixture of beaten egg and water brushed over the dough before baking creates an appealing sheen and enhances the overall presentation of the dish. The egg wash also helps to seal the edges of the pockets, ensuring that the filling stays securely inside during baking.
Preparation Steps Explained
Now that we’ve covered the essential ingredients, let’s move on to the preparation steps that will guide you in crafting the perfect cheeseburger pockets.
Preheating the Oven: Setting the Stage for Baking
Before you begin assembling your cheeseburger pockets, it’s crucial to preheat your oven. Set it to 375°F (190°C) to ensure that it reaches the desired temperature for baking. Preheating the oven helps to create a crispy and golden exterior while cooking the filling evenly inside.
Browning the Beef: Techniques for Perfect Texture
With the oven heating up, it’s time to focus on the ground beef. Start by heating a skillet over medium-high heat and adding the ground beef. Use a wooden spoon or spatula to break up the meat as it cooks, ensuring it browns evenly. Browning the beef is an essential step, as it develops a rich flavor and improves the overall texture of the filling.
As the beef cooks, keep an eye on the heat to prevent it from burning. You want a nice brown color without any charred bits. Once the meat is fully cooked and no longer pink, it’s important to drain any excess fat. This step is vital for achieving a lighter filling and preventing the dough from becoming soggy during baking.
Mixing Ingredients: Achieving the Right Flavor Balance
Once the beef is browned and drained, it’s time to incorporate the remaining ingredients. Add the diced onions, minced garlic, Worcestershire sauce, dill pickles, and shredded cheddar cheese to the skillet. Stir everything together thoroughly, allowing the heat to melt the cheese and soften the onions.
Taste the mixture at this stage, and feel free to adjust the seasoning as needed. A pinch of salt or pepper can go a long way in enhancing the flavors. The goal is to create a well-balanced filling that harmonizes the savory meat, creamy cheese, and zesty pickles.
Tips for Ensuring the Cheese Melts Perfectly into the Filling
To achieve that perfect cheeseburger pocket experience, ensure that the cheese is thoroughly melted into the filling. One tip is to cover the skillet with a lid for a few minutes while the heat is still on low. This traps steam inside, which helps to melt the cheese evenly.
Once the cheese has melted and the filling is well combined, remove the skillet from the heat and let it cool for a few minutes before assembling the pockets. This cooling period makes it easier to handle the filling without burning your fingers.
By understanding the ingredients and following these preparation steps, you’ll be well on your way to creating delicious cheeseburger pockets that are sure to impress. In the next section, we will delve into the assembly and baking process, bringing these delightful pockets to life.
Assembling the Pockets: Step-by-Step Guidance
Now that you have prepared your delicious cheeseburger filling, it’s time to assemble the pockets. This process is simple and fun, making it perfect for a family cooking activity or a casual meal prep.
1. Prepare Your Work Surface: Start by lightly flouring your workspace to prevent the dough from sticking. If you’re using pre-made dough, roll it out into a rectangle about ¼ inch thick. If you made your own dough, ensure it’s well-kneaded and rolled out evenly.
2. Cut the Dough: Using a sharp knife or pizza cutter, slice the dough into squares, typically around 4 to 6 inches across. This size is ideal for holding the filling without the risk of overflowing.
3. Add the Filling: Place a generous spoonful of your cheeseburger filling in the center of each square. Be careful not to overfill, as this can make sealing difficult.
4. Fold and Seal: Gently fold the dough over the filling to create a pocket. Ensure that the edges align perfectly.
Visualizing the Folding and Sealing Process
To visualize the folding and sealing process, think of it as creating a small envelope. The filling should be snugly contained in the center with enough dough on the sides to fold over without stretching too thin.
Crimping Edges for Aesthetics and Sealing Integrity
Once the pockets are folded, it’s crucial to seal them properly. Using your fingers, press down around the edges to secure the pocket. For an added aesthetic touch, you can crimp the edges using a fork, which will also strengthen the seal. This step is vital to prevent any filling from leaking during baking, ensuring a perfect pocket that holds its shape.
Baking: Achieving the Perfect Golden Brown
1. Preheat Your Oven: Set your oven to 375°F (190°C). Preheating ensures that the dough cooks evenly and develops a beautiful golden exterior.
2. Prepare for Baking: Place the assembled pockets on a lined baking sheet, ensuring they are spaced apart to allow for expansion. This spacing is important to achieve that perfect crispness.
3. Egg Wash for Color: For a beautiful, glossy finish, consider brushing the tops of the pockets with an egg wash (a beaten egg mixed with a splash of water). This step will help achieve a rich golden color during baking.
Understanding Oven Times and How to Monitor Doneness
Bake the cheeseburger pockets for approximately 20-25 minutes, or until they are golden brown and puffed up. To monitor doneness, look for the following signs:
– Color: A rich golden brown color indicates that the pockets are likely done.
– Sound: Gently tap the top of a pocket; a hollow sound suggests that the interior is cooked through.
– Temperature: If you have a kitchen thermometer, the internal temperature should reach 165°F (74°C) to ensure that all ingredients are cooked safely.
Serving Suggestions and Pairings
Cheeseburger pockets are incredibly versatile and can be paired with a variety of accompaniments to enhance your meal.
1. Ideal Accompaniments: Ketchup and mustard are classic choices that bring out the flavors of the cheeseburger filling. They also add a tangy contrast to the richness of the dough.
2. Exploring Other Sauces: Consider experimenting with other sauces such as barbecue sauce, spicy mayo, or even ranch dressing. Each sauce can add a different flavor profile, making each meal unique.
3. Side Dishes That Enhance the Meal: To create a well-rounded meal, think about adding side dishes that complement the cheeseburger pockets.
– Salads: A simple green salad with a light vinaigrette can balance the richness of the pockets.
– Fries: Crispy fries or sweet potato fries are a classic pairing that provides a satisfying crunch.
– Vegetable Sticks: Carrot and celery sticks can add a fresh, crunchy contrast to the cheeseburger pockets.
Creative Variations: Personalizing Your Cheeseburger Pockets
One of the best things about cheeseburger pockets is their versatility. You can easily personalize them to suit your preferences or dietary needs.
1. Adding Different Vegetables: Consider incorporating sautéed onions, bell peppers, or mushrooms into your filling for added nutrition and flavor.
2. Cheese Options: While cheddar is a classic choice, try experimenting with mozzarella, pepper jack, or even blue cheese for a unique twist.
Nutritional Information and Benefits of Ingredients
Understanding the nutritional profile of your cheeseburger pockets can help you make informed choices for a balanced diet.
1. Nutritional Breakdown per Serving: A typical cheeseburger pocket contains approximately:
– Calories: 300
– Protein: 15g
– Carbohydrates: 30g
– Fat: 15g
2. Healthier Alternatives: To make the pockets lighter, consider using lean ground turkey or chicken instead of beef. You can also opt for whole wheat dough to increase fiber content.
3. The Importance of Homemade Meals in a Balanced Diet: Homemade meals allow you to control ingredients, ensuring you avoid preservatives and excess sodium often found in store-bought options. Cooking at home also encourages mindful eating and can be a fun way to spend time with family.
The Perfect Occasion for Cheeseburger Pockets
Cheeseburger pockets are not only delicious but also incredibly versatile, making them suitable for various occasions.
1. Family Dinners: They are a kid-friendly favorite that can please even the pickiest eaters. Their fun shape and customizable fillings make them appealing for family meals.
2. Game Day Snacks: These pockets make for easy finger food, ideal for game day gatherings or parties. Serve them with an assortment of dipping sauces for a fun snack bar.
3. Meal Prepping: Cheeseburger pockets are perfect for meal prepping. You can prepare a batch in advance, freeze them, and reheat them as needed for a quick meal option.
4. Freezing and Reheating Tips: To freeze, allow the pockets to cool completely, then place them in an airtight container or freezer bag. They can be reheated directly from frozen in the oven at 375°F (190°C) for 20-25 minutes, or until heated through.
Conclusion
Cheeseburger pockets are not just a meal; they are an experience that brings comfort and joy to the table. Their versatility allows for endless customization, making them a favorite among families and friends alike. Whether you’re serving them at a casual family dinner, enjoying them as game day snacks, or prepping them for busy weekday meals, cheeseburger pockets are sure to satisfy.
By trying out this recipe, you’re not only treating yourself to a delicious and satisfying meal but also embracing the warmth and love that comes from home-cooked food. So gather your ingredients, invite your loved ones into the kitchen, and create lasting memories around the dining table with your very own cheeseburger pockets. Enjoy the process, and savor every bite!
