Introduction to Pavlova: A Delightful Easter Dessert
Pavlova is a stunning dessert that has captured the hearts of many with its delicate structure and tantalizing flavor. Named after the famous Russian ballerina Anna Pavlova, this dessert is believed to have originated in either Australia or New Zealand in the early 20th century. The exact origins remain a matter of spirited debate between the two countries, but what is universally accepted is Pavlova’s status as a beloved treat, especially during festive occasions such as Easter.
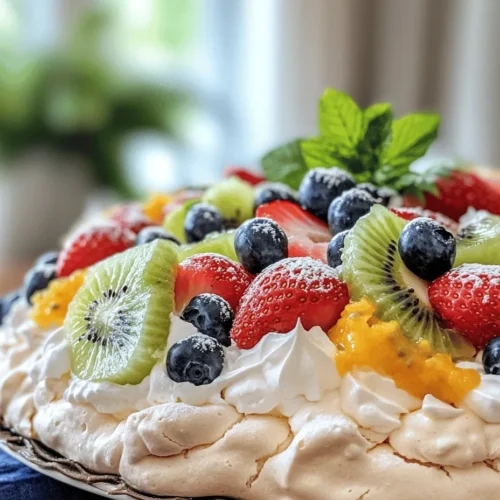
The significance of Pavlova during Easter celebrations cannot be overstated. Its light and airy meringue base symbolizes renewal and rebirth, making it a fitting dessert for this time of year. Traditionally adorned with a vibrant array of fresh fruits, Pavlova is not only visually stunning but is also a refreshing end to the rich meals often associated with Easter festivities. Whether you’re hosting a family gathering or attending a springtime brunch, serving Pavlova is a delightful way to celebrate the season.
This Easy Pavlova Recipe is perfect for both novice bakers and seasoned chefs alike. With straightforward instructions and readily available ingredients, it allows you to create an impressive dessert without the fuss. The lightness of the meringue combined with the luscious fruits and whipped cream makes it a crowd-pleaser that will leave your guests raving. So, let’s dive into the components that make up this exquisite dessert and how you can prepare it effortlessly at home.
Understanding the Components of Pavlova
To truly appreciate Pavlova, it’s essential to understand its three key components: meringue, fresh fruits, and whipped cream. Each element plays a crucial role in creating the perfect balance of texture and flavor.
Meringue: The Base of Pavlova
Meringue is the heart of Pavlova. Made primarily from egg whites and sugar, this airy concoction is whipped to create a light and crispy exterior while maintaining a soft, marshmallow-like interior. The key to achieving the perfect meringue lies in the technique of whisking the egg whites. They must be beaten to a stiff peak, which means they hold their shape when the whisk is removed. The addition of granulated sugar helps stabilize the egg whites, creating a structure that can support the weight of toppings.
Fresh Fruits: Nature’s Sweet Touch
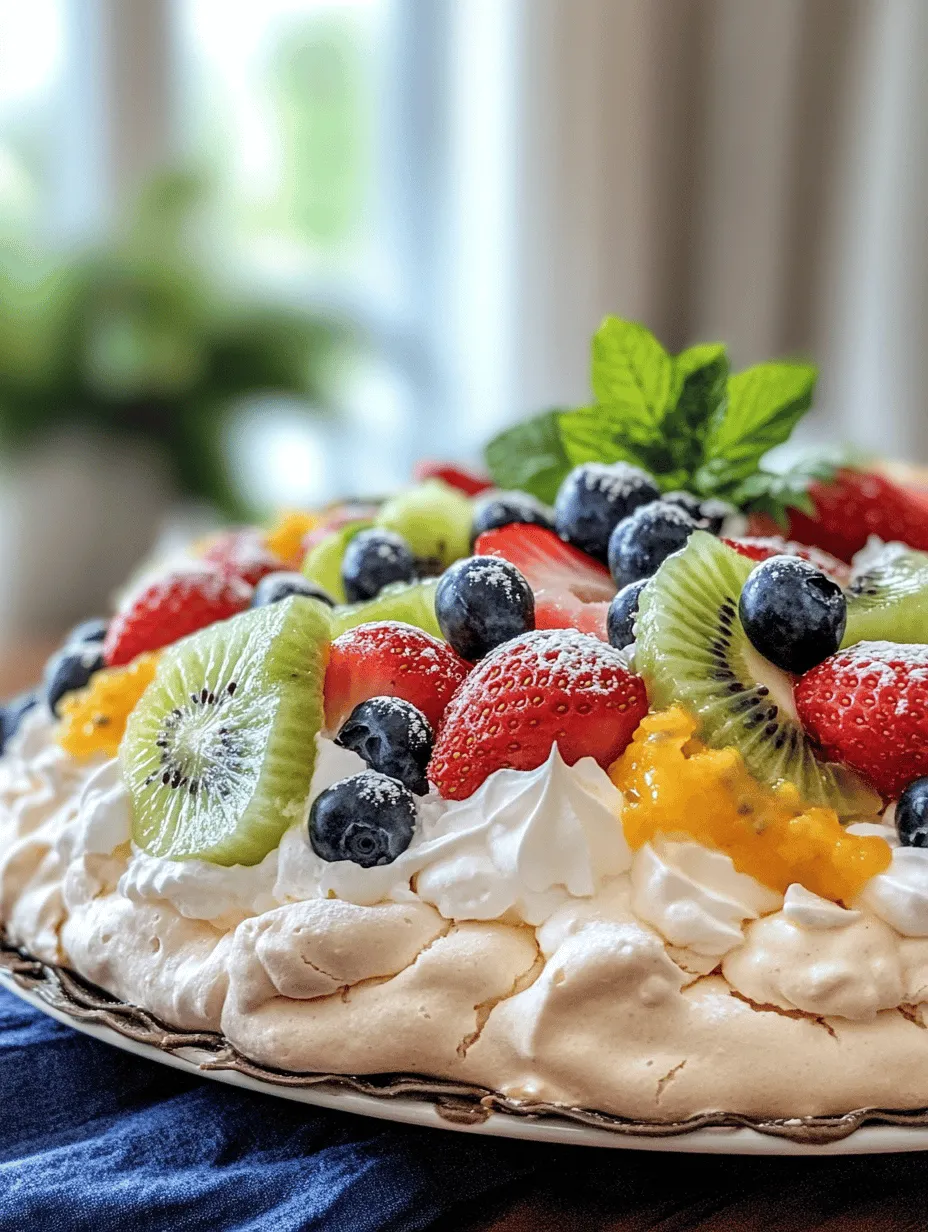
The importance of fresh fruits in Pavlova cannot be overstated. They not only enhance the flavor profile but also add a burst of color that elevates the dessert’s visual appeal. Seasonal fruits such as strawberries, kiwis, passion fruit, and blueberries are popular choices, but feel free to get creative with your selections. The sweetness of the fruits contrasts beautifully with the slight tanginess of the meringue, making each bite a delightful experience.
Whipped Cream: The Finishing Touch
Finally, no Pavlova is complete without a generous dollop of whipped cream. This creamy layer adds richness and a smooth texture that complements the crispness of the meringue and the juiciness of the fruits. When whipping cream, it’s essential to achieve soft peaks, which means the cream holds its shape without being overly thick. This light and airy topping rounds out the dessert, making it decadent yet not too heavy.
Ingredient Breakdown for the Easy Easter Fruit Pavlova
Now that we understand the essential components of Pavlova, let’s delve into the specific ingredients needed to create this Easy Easter Fruit Pavlova. Each ingredient contributes significantly to the overall texture and flavor of the dessert.
Egg Whites
The foundation of your meringue, egg whites, must be fresh and at room temperature for optimal results. Fresh egg whites whip better and yield a more stable meringue, while room temperature whites help achieve a greater volume. For the best outcome, separate the yolks from the whites carefully, ensuring that no yolk contaminates the whites.
Granulated Sugar
Granulated sugar plays a crucial role in the meringue’s texture. It not only sweetens the dessert but also helps create the glossy, smooth appearance that Pavlova is known for. The sugar should be added gradually while whisking the egg whites to ensure it dissolves completely, resulting in a stable meringue.
Vinegar and Cornstarch
Adding a small amount of vinegar and cornstarch to the meringue mixture is what sets this recipe apart. The vinegar helps stabilize the egg whites, while the cornstarch contributes to the meringue’s chewy interior, creating that delightful contrast between the crisp exterior and soft center.
Heavy Cream
When it comes to whipping cream, choosing the right type is essential. Heavy cream, which has a higher fat content than regular cream, is the best choice for creating fluffy whipped cream. It holds its shape well once whipped, providing a luxurious topping for your Pavlova.
Fresh Fruits
Seasonal fruits are the star of the show when it comes to decorating your Pavlova. Strawberries, kiwis, raspberries, and passion fruit are excellent choices that not only taste divine but also add a beautiful splash of color. Feel free to mix and match based on what’s available and in season to create a stunning display.
Optional Garnishes
While fresh fruits and whipped cream are the main toppings, consider adding optional garnishes to enhance the aesthetics of your Pavlova. Mint leaves, edible flowers, or a drizzle of chocolate can elevate the dessert and make it even more visually appealing.
Step-by-Step Instructions for Making Easy Pavlova
Now that we’ve covered the ingredients, let’s get started on the step-by-step instructions for making your Easy Easter Fruit Pavlova.
Preheating and Preparing the Baking Tray
The first step in creating your Pavlova is to preheat your oven to 300°F (150°C). The right temperature is crucial for achieving the perfect meringue. While the oven is heating up, line a baking tray with parchment paper. To ensure the meringue adheres to the tray, lightly grease the parchment with a bit of cooking oil or butter, then dust it with cornstarch. This technique also helps prevent the meringue from sticking.
Creating the Perfect Meringue
Once your oven is preheated and your baking tray is prepared, it’s time to make the meringue. Start by placing your room temperature egg whites in a clean, dry mixing bowl. Using an electric mixer, begin whisking the egg whites on medium speed until they become frothy. At this stage, you may want to add a pinch of salt to help stabilize the mixture.
As the egg whites start to increase in volume, gradually add the granulated sugar, one tablespoon at a time. Continue whisking on high speed until the meringue forms stiff peaks. This means that when you lift the whisk out of the bowl, the peaks should stand straight up without collapsing. The mixture should appear glossy and smooth.
Next, gently fold in the vinegar and cornstarch with a spatula, ensuring that they are fully combined without deflating the meringue. The goal is to incorporate these stabilizing agents without losing the air you’ve whipped into the egg whites.
Once your meringue is ready, spoon it onto the prepared baking tray, shaping it into a round disc. Use a spatula to create a slight well in the center, which will hold the whipped cream and fruits later. The edges can be smoothed out or swirled for a decorative touch.
Baking the Pavlova
With your meringue shaped, carefully place the baking tray in the preheated oven. Bake for approximately 1 hour, then turn off the oven and allow the Pavlova to cool completely inside. This step is crucial, as it helps prevent the meringue from cracking due to a sudden temperature change. Once cooled, you can remove it from the oven and set it aside to prepare your toppings.
—
This concludes the first part of our Easy Pavlova Recipe. With the foundational knowledge and initial steps laid out, you’re now equipped to create this delightful dessert that will surely impress during your Easter celebrations. In the next part, we will delve into the finishing touches, including how to whip the cream and assemble your Pavlova with fresh fruits for a show-stopping presentation. Stay tuned!
Gradual Sugar Incorporation: Why It Matters
The process of incorporating sugar into the egg whites is crucial in achieving the perfect pavlova. Gradually adding sugar, about a tablespoon at a time, allows the sugar to dissolve properly, preventing any gritty texture in your meringue. This step is essential because undissolved sugar can lead to a weepy, unstable meringue that collapses easily. When sugar is added slowly, it also helps to stabilize the egg whites, ensuring a firm structure that can hold up to the weight of toppings.
To achieve the best results, make sure your egg whites are at room temperature before starting. They whisk up more voluminously than cold egg whites, enabling a better incorporation of air. Additionally, using superfine sugar can expedite the dissolving process, resulting in a smoother meringue.
Folding in Additional Ingredients: Best Practices to Maintain Fluffiness
Once the sugar is fully incorporated, you may choose to fold in cornstarch and vinegar, which are common additions in pavlova recipes. These ingredients not only enhance texture but also contribute to the pavlova’s signature chewiness. However, it’s vital to fold these in gently.
Use a spatula to scoop from the bottom of the bowl and lift it over the top, rotating the bowl as you go. This technique ensures that you maintain the air bubbles that you’ve painstakingly created while whisking the egg whites. Over-mixing can deflate your meringue, leading to a less-than-ideal structure.
Shaping and Baking the Meringue
How to Shape the Meringue for Optimal Presentation
When it comes to shaping your meringue, the design is as important as the taste. Start by spooning the meringue mixture onto a baking sheet lined with parchment paper. Using the back of a spoon, create a well in the center—this will hold your whipped cream and fresh fruit later on.
For a more sophisticated look, you can opt for a circular shape or a free-form style. Aim for a height of about 2 to 3 inches, as a taller pavlova leads to a more impressive presentation.
Baking Tips for Achieving a Crispy Outer Shell and Soft Interior
Baking the pavlova requires a bit of finesse. Preheat your oven to a low temperature—typically around 225°F (110°C)—to ensure the meringue dries out slowly. This method creates a crispy outer shell while keeping the inside soft and marshmallow-like.
Once the pavlova is in the oven, avoid opening the door frequently, as sudden temperature changes can cause it to crack. Depending on the size of your pavlova, baking time will vary; usually, it takes about 1.5 to 2 hours. You’ll know it’s done when it easily lifts off the parchment paper and sounds hollow when tapped.
Cooling Process: Importance of Gradual Temperature Drop
After baking, allow your pavlova to cool slowly in the oven with the door slightly ajar. This step is crucial as it prevents the sudden temperature drop that can lead to cracks. Letting it cool completely ensures that the meringue retains its structure and texture, providing a perfect base for your toppings.
Whipping the Cream: A Key Component
Techniques for Achieving Soft Peaks in Whipped Cream
While your pavlova cools, it’s time to whip the cream. Start with cold heavy cream and a chilled mixing bowl for the best results. Using an electric mixer, beat the cream on medium speed until it begins to thicken. Gradually increase to high speed until soft peaks form.
Soft peaks are characterized by the cream holding its shape but with tips that gently curl over when the beaters are lifted. Be cautious not to over-whip, as this can lead to a grainy texture and eventually butter.
Sweetening the Cream: Balancing Flavors with Powdered Sugar
To sweeten your whipped cream, incorporate powdered sugar. This type of sugar dissolves easily, ensuring a smooth texture. Start with a tablespoon and adjust to your taste—remember that the pavlova will also be sweet, so a little sweetness in the cream goes a long way.
Adding Vanilla Extract: Enhancing the Cream’s Profile
A splash of vanilla extract can elevate the flavor of your whipped cream. It adds depth and complexity, balancing the sweetness of the pavlova and fruits. Use pure vanilla extract for the best taste, and mix it in gently after reaching soft peaks.
Assembling the Pavlova: A Visual Feast
Step-by-Step Guide to Transferring and Assembling the Pavlova
Carefully transfer your cooled pavlova to a serving platter. If you’ve baked it on parchment paper, simply peel it off and place the meringue directly on the platter.
Start by dolloping the whipped cream into the well of the pavlova, spreading it gently with a spatula to maintain its height and fluffiness.
Techniques for Spreading Whipped Cream Beautifully
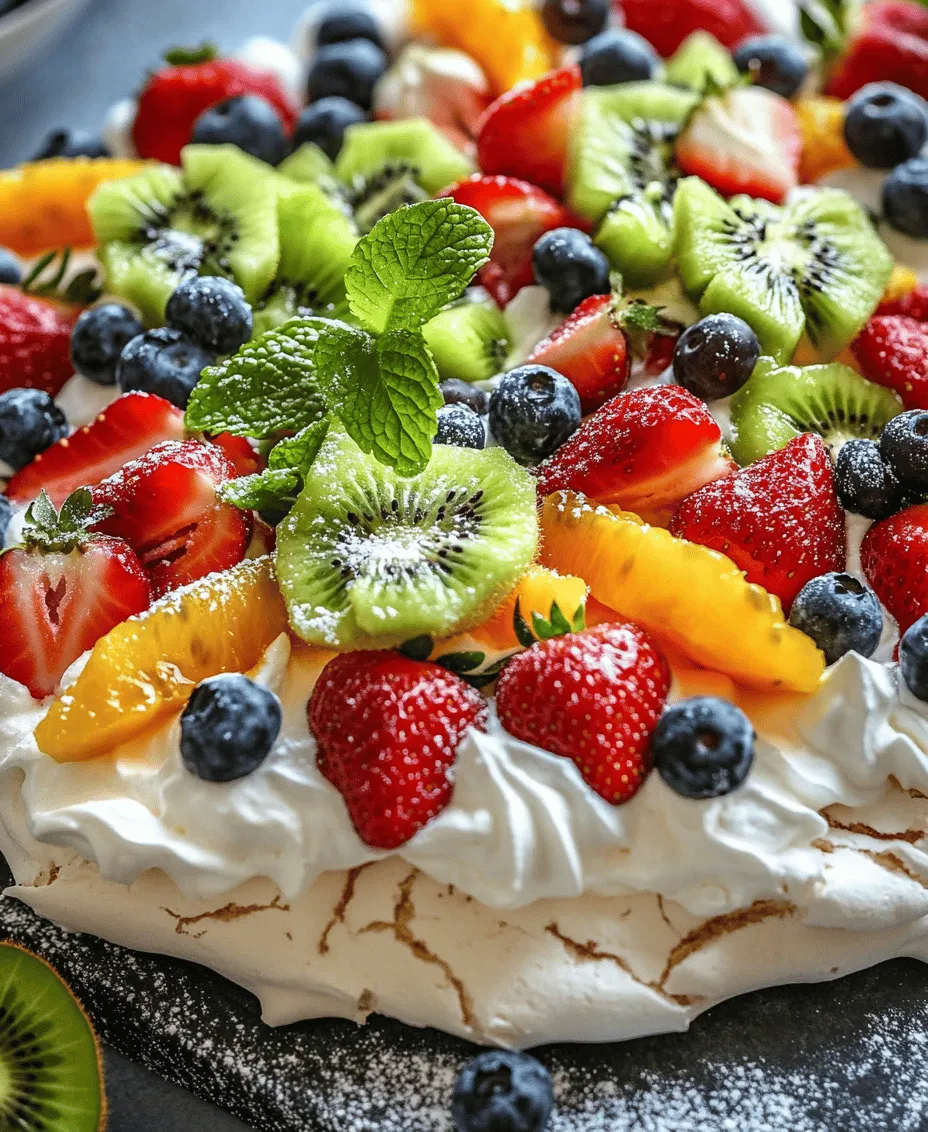
To create a beautiful wave-like pattern, use the spatula to create soft peaks in the whipped cream as you spread it. This not only adds to the visual appeal but also serves as a delightful texture contrast against the crispy meringue.
Creative Ways to Arrange Fresh Fruits for Visual Appeal
Now comes the fun part—arranging your fresh fruits! Choose a colorful mix to create a vibrant display. Slices of kiwi, strawberries, blueberries, and passion fruit work beautifully together. Place larger fruits first and fill in with smaller berries. Consider placing fruits in a way that complements the curvature of the pavlova, emphasizing its shape.
Garnishing and Serving Suggestions
The Role of Mint Leaves in Enhancing Flavor and Presentation
To finish off your pavlova, garnish it with fresh mint leaves. Not only does the mint add a pop of color, but it also provides a refreshing flavor that contrasts nicely with the sweetness of the meringue and cream.
Serving Ideas: Pairing with Beverages or Additional Sides
Pavlova is an elegant dessert that pairs well with a variety of beverages. Consider serving it with a glass of sparkling wine or a refreshing iced tea. For additional sides, a scoop of sorbet or a small bowl of lemon curd can complement the sweetness and provide a delightful citrus burst.
Importance of Serving at the Right Time for the Best Texture
For optimal enjoyment, serve your pavlova soon after assembling. The meringue will begin to absorb moisture from the cream and fruits over time, which can cause it to lose its crispness. Aim to serve it within an hour of assembly for the best texture and flavor experience.
Conclusion: The Joy of Sharing Pavlova
Creating and serving a pavlova is not just about the end result; it’s about the joy that comes from sharing this delightful dessert with loved ones. The process of making pavlova—from whipping the egg whites to assembling the beautiful layers—can be a rewarding experience that fosters connection and celebration.
With its airy texture and vibrant toppings, pavlova is a dessert that invites conversation and admiration. It’s perfect for special occasions, particularly during holidays like Easter, where its lightness and fruity flavors complement festive meals.
Encouraging the tradition of making pavlova for gatherings can be a wonderful way to create lasting memories. Whether you’re passing down the recipe to younger generations or simply enjoying it with friends, each pavlova shared is a celebration of flavor, creativity, and togetherness. So, gather your ingredients, embrace the art of making pavlova, and enjoy every moment of this delightful culinary experience.