Introduction
There’s something irresistibly comforting about a freshly baked cookie, and sweet and chewy molasses cookies hold a special place in the hearts (and stomachs) of cookie lovers everywhere. These delightful treats are renowned for their rich flavor, soft texture, and the warm scents of spices that envelop the kitchen as they bake. With roots deeply embedded in history, molasses cookies not only provide a delicious snack but also connect us to the past, showcasing the evolution of baking and the ingredients that have been cherished through generations.
The appeal of sweet and chewy molasses cookies extends beyond their taste. They are perfect for various occasions—whether it’s a cozy family gathering, a festive holiday celebration, or simply a quiet afternoon treat with a cup of tea. Their distinct flavor profile, combining sweetness with a hint of spice, creates a delightful experience for both children and adults alike. Additionally, the simplicity of this recipe makes it accessible for bakers of all skill levels, ensuring that anyone can enjoy the process of baking and the joy of sharing these cookies with loved ones.
In this article, we will delve into the rich history of molasses cookies, spotlight the key ingredients that make them so special, and provide you with a detailed step-by-step guide to creating your own batch of sweet and chewy molasses cookies. Get ready to embark on a delicious journey that will not only fill your kitchen with delightful aromas but also fill your heart with the warmth of home-baked goodness.
The Rich History of Molasses Cookies
Molasses cookies have a fascinating history that dates back centuries. The use of molasses as a sweetener can be traced to the early colonial period in America when sugar was a luxury item. As the availability of sugar decreased, molasses became a popular and affordable alternative. Derived from the sugarcane or sugar beet, molasses provided not only sweetness but also a depth of flavor that was embraced in many baked goods, including cookies.
Culturally, molasses cookies are celebrated in various cuisines around the world. In the United States, they are often associated with traditional holiday baking, particularly during Thanksgiving and Christmas. Their warm spices and chewy texture make them a favorite among families who pass down their recipes from generation to generation. In fact, many families have their own unique spin on the classic molasses cookie recipe, incorporating different spices or variations in sweetness based on personal preferences.
As time marched on, the molasses cookie recipe transitioned and adapted, reflecting the tastes of each era. While the basic ingredients have remained relatively constant, the introduction of new baking techniques and the availability of various spices have allowed these cookies to evolve. Today, they can be found in bakeries and homes alike, serving as a reminder of the enduring nature of traditional baking and the joy of sharing homemade treats.
Ingredient Spotlight
To create the perfect sweet and chewy molasses cookies, it’s essential to understand the role of each key ingredient. The following ingredients not only contribute to the cookies’ flavor and texture but also enhance the overall baking experience.
Unsalted Butter
Using softened unsalted butter is crucial for achieving the right texture in your molasses cookies. Butter adds richness and moisture to the dough, resulting in a tender and chewy cookie. The process of creaming the butter with sugar helps to incorporate air into the mixture, which contributes to the cookie’s rise and lightness. For the best results, allow your butter to sit at room temperature until soft, ensuring a smooth blend with the other ingredients.
Brown Sugar
Brown sugar is another essential ingredient in molasses cookies, bringing both moisture and flavor. Its characteristic molasses content gives the cookies their deep, toasty flavor, while the added moisture helps create that coveted chewy texture. When measuring brown sugar, be sure to pack it firmly into the measuring cup for accuracy, ensuring that your cookies turn out perfectly sweet and soft.
Molasses
The star ingredient in these cookies is, of course, molasses. It imparts a unique flavor profile that sets molasses cookies apart from other varieties. Aside from its rich taste, molasses also offers some health benefits. It is a source of essential minerals such as iron, calcium, and magnesium. When selecting molasses, opt for unsulfured varieties, which are typically more flavorful and less bitter than their sulfured counterparts.
Spices (Cinnamon, Ginger, Cloves)
The spices used in this recipe—cinnamon, ginger, and cloves—play a vital role in enhancing the flavor of the cookies. Cinnamon provides a warm, sweet aroma, while ginger adds a zesty kick, and cloves contribute a hint of earthiness. Together, these spices create a harmonious balance that complements the sweetness of the molasses and brown sugar. Feel free to adjust the spice quantities to suit your personal preference, as some may prefer a spicier cookie while others may opt for a milder flavor.
Flour and Baking Soda
Flour is the backbone of any cookie recipe, providing structure and stability. All-purpose flour is the best choice for molasses cookies, ensuring a good balance between chewiness and tenderness. Baking soda serves as a leavening agent, helping the cookies rise and develop a light texture. The combination of these two ingredients is crucial for achieving the perfect cookie consistency.
Choosing High-Quality Ingredients
When it comes to baking, the quality of your ingredients can significantly impact the final product. Opting for high-quality, fresh ingredients will ensure that your molasses cookies are flavorful and satisfying. Consider sourcing organic or locally produced butter and sugar, and always check the expiration dates on your spices and baking powder to ensure optimal freshness.
Step-by-Step Guide to Making Sweet & Chewy Molasses Cookies
Now that we’ve explored the delightful history and essential ingredients of molasses cookies, it’s time to roll up your sleeves and get baking! Before you dive in, let’s gather the essential tools and equipment you’ll need.
Prepping the Kitchen: Essential Tools and Equipment
To make your baking experience smooth and enjoyable, it’s important to have the right tools on hand. Here’s a list of essential equipment you’ll need to prepare your sweet and chewy molasses cookies:
– Mixing bowls: A large mixing bowl for combining wet ingredients and a smaller bowl for dry ingredients.
– Measuring cups and spoons: Accurate measurements are key to successful baking.
– Electric mixer or whisk: An electric mixer will make creaming the butter and sugar easier, but a whisk can work just as well if you prefer a more hands-on approach.
– Rubber spatula: Ideal for scraping down the sides of the mixing bowl and folding ingredients together.
– Baking sheets: Use two or more baking sheets lined with parchment paper or silicone baking mats to prevent sticking.
– Cooling rack: Once baked, your cookies will need to cool on a wire rack to maintain their chewy texture.
Detailed Instructions for Each Step of the Recipe
Now that your kitchen is prepped, let’s break down the steps to create your sweet and chewy molasses cookies:
1. Preheat the Oven: Begin by preheating your oven to 350°F (175°C). Preheating ensures your cookies bake evenly and achieve that perfect texture.
2. Cream the Butter and Sugars: In a large mixing bowl, combine ¾ cup of softened unsalted butter with 1 cup of packed brown sugar. Using an electric mixer or a whisk, cream the butter and sugar together until the mixture is light and fluffy, typically about 2-3 minutes. This step is crucial for incorporating air into the dough, which contributes to the cookies’ chewiness.
3. Add the Molasses and Egg: Next, add ¼ cup of unsulfured molasses and 1 large egg to the creamed mixture. Mix until fully incorporated, ensuring that the molasses is evenly distributed throughout the batter.
4. Combine Dry Ingredients: In a separate bowl, whisk together 2 cups of all-purpose flour, 1 teaspoon of baking soda, 1 teaspoon of ground cinnamon, ½ teaspoon of ground ginger, and ¼ teaspoon of ground cloves. This blend of dry ingredients brings together the spices and leavening agent, ensuring they are evenly mixed before being added to the wet ingredients.
5. Gradually Incorporate Dry Ingredients: Slowly add the dry ingredient mixture to the wet ingredients, using a rubber spatula to fold them together gently. Mix until just combined, being careful not to overmix, as this can affect the cookie’s texture.
6. Chill the Dough: For optimal flavor and texture, cover the mixing bowl with plastic wrap and refrigerate the dough for at least 30 minutes. Chilling the dough helps the flavors meld and prevents the cookies from spreading too much during baking.
7. Shape the Cookies: Once the dough has chilled, remove it from the refrigerator. Using a cookie scoop or your hands, portion out tablespoon-sized balls of dough and roll them into smooth balls. Place them onto the prepared baking sheets, leaving space between each cookie to allow for spreading.
8. Bake the Cookies: Place the baking sheets in the preheated oven and bake for 8-10 minutes, or until the edges are set and the tops appear slightly cracked. The cookies will continue to firm up as they cool, so be careful not to overbake them.
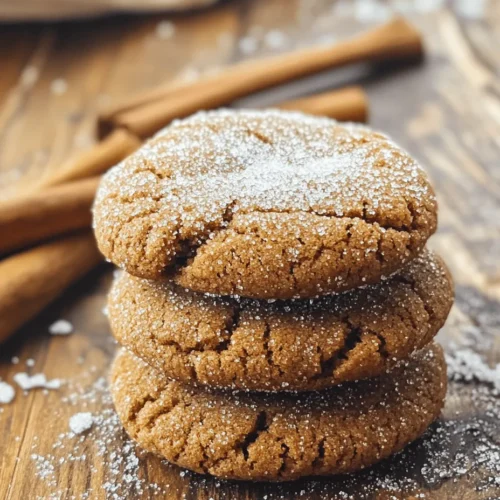
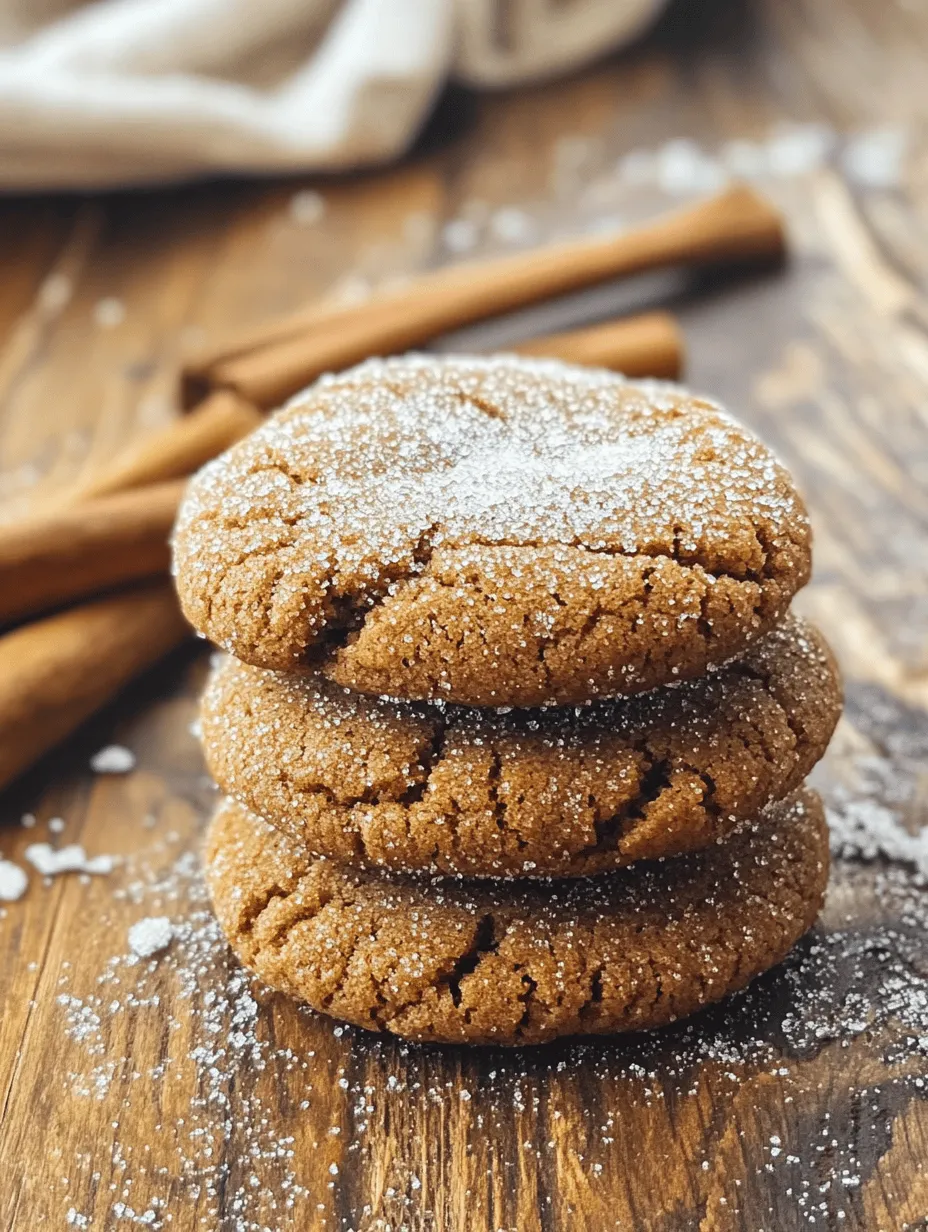
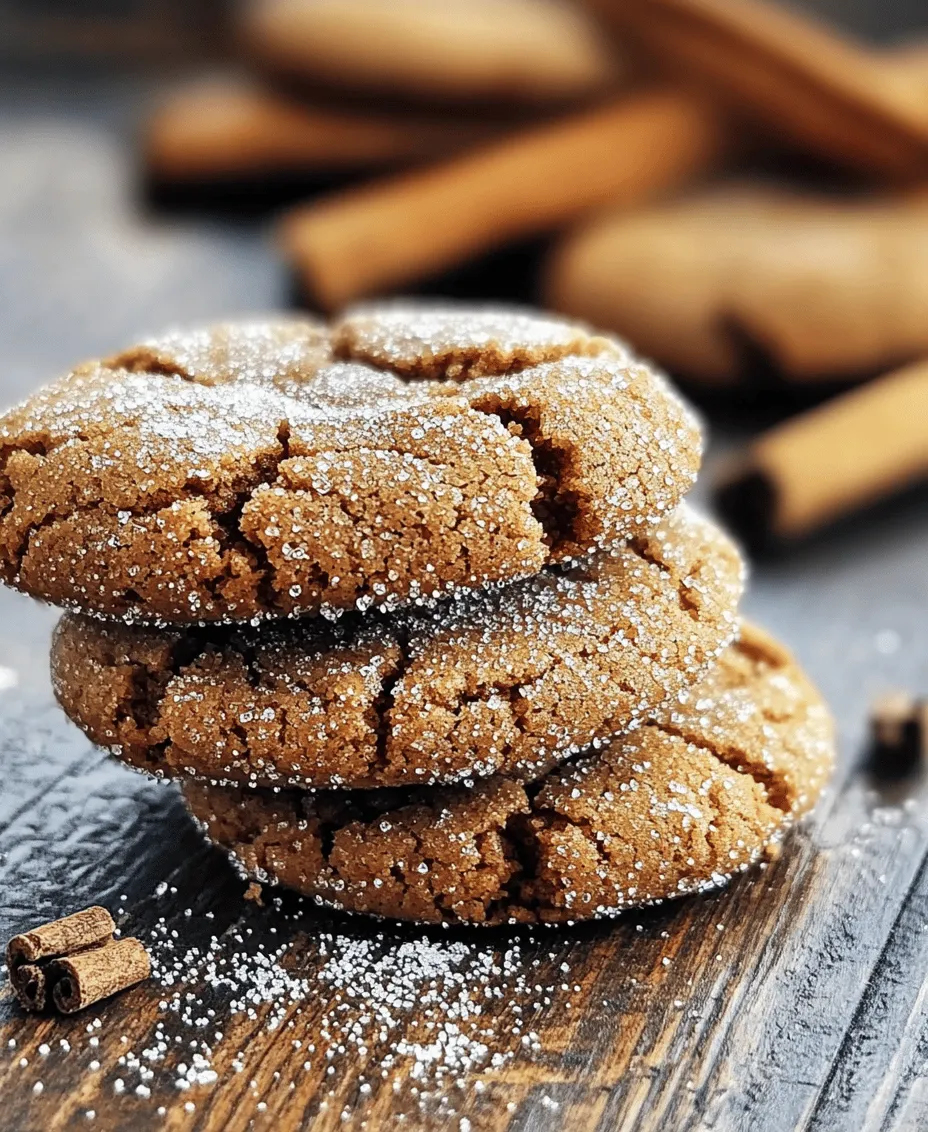
9. Cool and Enjoy: After baking, remove the cookies from the oven and allow them to cool on the baking sheets for about 5 minutes before transferring them to a wire cooling rack. This step helps maintain their chewy texture while allowing them to cool completely.
By following these detailed instructions, you will create delightful sweet and chewy molasses cookies that are sure to impress your family and friends. The combination of warm spices and rich molasses makes these cookies a timeless treat that captures the essence of home baking.
Stay tuned for the next part of this article, where we will explore tips for achieving the best results and address common questions about molasses cookies!
Preheating the Oven and Preparing Baking Sheets
Before diving into the delightful process of cookie-making, it’s crucial to prepare your kitchen environment. Start by preheating your oven to 350°F (175°C). This temperature is ideal for achieving that perfect balance between a chewy center and slightly crisp edges, characteristic of molasses cookies.
While the oven is warming up, line your baking sheets with parchment paper or silicone baking mats. These surfaces not only prevent the cookies from sticking but also promote even baking. If you don’t have these materials on hand, lightly grease the baking sheets with a bit of butter or non-stick spray. Ensure that your baking sheets are spaced evenly apart, allowing enough room for the cookies to spread as they bake.
Creaming Butter and Sugar: Techniques for Achieving the Right Texture
The next step in creating your sweet and chewy molasses cookies is the creaming of butter and sugar. This process is crucial as it incorporates air into the dough, giving your cookies a light and fluffy texture.
1. Choose Your Butter Wisely: For optimal results, use unsalted butter that has been softened to room temperature. If your butter is too soft or melted, you may end up with flatter cookies.
2. Mixing Method: In a large mixing bowl, combine 1 cup of softened butter with 1 cup of granulated sugar and 1 cup of brown sugar (packed). Using an electric mixer, beat the mixture on medium speed until it becomes light and fluffy, which usually takes about 2-3 minutes. This process is essential—don’t rush it, as the right texture will help achieve those chewy cookies.
3. Adding Eggs and Molasses: Once the butter and sugars are well combined, add 2 large eggs (one at a time) and ½ cup of molasses to the mix. Continue to beat until fully incorporated. The molasses not only adds flavor but also contributes to the chewy texture of your cookies.
Mixing Wet and Dry Ingredients: Importance of Not Over-Mixing
In a separate bowl, whisk together the dry ingredients:
– 3 cups of all-purpose flour
– 2 teaspoons of baking soda
– 1 teaspoon of ground cinnamon
– 1 teaspoon of ground ginger
– ½ teaspoon of ground cloves
– ½ teaspoon of salt
Gradually add the dry mixture to the wet ingredients. It’s essential to mix until just combined. Over-mixing at this stage can lead to tough cookies due to gluten development, which we want to avoid for that soft, chewy texture.
Shaping Cookies: Tips for Rolling Dough and Coating in Sugar
Once the dough is mixed, it’s time to shape the cookies. Use a cookie scoop or your hands to form dough balls, roughly about 1 inch in diameter.
1. Coating in Sugar: To achieve that signature sparkly finish, roll each dough ball in granulated sugar before placing them on the prepared baking sheets. This not only adds a touch of sweetness but also creates that appealing crunch on the outside.
2. Spacing: Place the cookie dough balls about 2 inches apart on the baking sheets to allow for spreading during baking.
Baking Time and Temperature: Understanding When Cookies Are Perfectly Done
Place the baking sheets in the preheated oven and bake for 8-10 minutes. Keep a close eye on them, as ovens can vary. The cookies are done when the edges are set, and the centers look slightly underbaked; they will continue to cook as they cool on the baking sheet.
Once baked, remove the cookies from the oven and let them sit on the baking sheets for about 5 minutes before transferring them to a wire rack to cool completely. This waiting period allows them to firm up slightly while maintaining their chewy texture.
Baking Tips for Perfect Molasses Cookies
Common Pitfalls to Avoid When Baking Molasses Cookies
1. Using Cold Ingredients: Ensure that your butter and eggs are at room temperature for better integration.
2. Incorrect Measurements: Use a kitchen scale for precision, especially with flour, as too much can lead to dry cookies.
3. Skipping the Cooling Time: Allowing cookies to rest before transferring them helps achieve the right texture.
How to Achieve the Ideal Chewy Texture
To ensure your cookies are chewy, avoid overbaking them. The cookies should look slightly soft in the center when you take them out. Additionally, using a higher ratio of brown sugar to granulated sugar helps retain moisture, contributing to a chewy texture.
Adjusting Spices Based on Personal Preference
Feel free to adjust the spices in the recipe to suit your taste. If you love a more robust ginger flavor, increase the amount of ground ginger. Alternatively, for a milder cookie, reduce the spices slightly. Experimenting with spices can create a unique twist on the classic molasses cookie.
Serving and Storing Your Molasses Cookies
Best Practices for Serving Cookies
Molasses cookies are delightful on their own, but you can elevate your serving experience. Pair them with a warm cup of chai tea or a glass of cold milk for a comforting treat. Present them on a decorative platter or in a glass jar for an inviting appearance that draws guests in.
Tips for Storing Cookies to Maintain Freshness
To keep your cookies fresh, store them in an airtight container at room temperature. They will maintain their deliciousness for up to one week. If you live in a humid area, consider adding a slice of bread to the container; it helps absorb moisture and keeps the cookies from becoming too soft.
Ideas for Freezing Cookies for Later Enjoyment
If you want to save some cookies for later, freezing is an excellent option. You can freeze the unbaked dough balls on a baking sheet until firm, then transfer them to a zip-top freezer bag. When ready to bake, simply add a couple of extra minutes to the baking time. Alternatively, you can freeze baked cookies in a single layer and then store them in a freezer-safe container for up to three months.
Variations on the Classic Recipe
Suggestions for Ingredient Substitutions
If you’re looking for alternatives to suit dietary needs, consider these substitutions:
– Gluten-Free Options: Substitute all-purpose flour with a gluten-free flour blend designed for baking. Make sure it contains xanthan gum for better structure.
– Vegan Adaptations: Replace the eggs with flaxseed meal (1 tablespoon of flaxseed meal mixed with 2.5 tablespoons of water per egg) and use a plant-based butter.
Creative Flavor Variations
Take your molasses cookies to the next level by incorporating add-ins. Chocolate chips, chopped nuts, or dried fruits can enhance both flavor and texture. For a delightful twist, consider adding a teaspoon of orange zest to the dough for a hint of citrus.
Seasonal Twists
Embrace the flavors of the season by incorporating pumpkin spice during autumn or using festive decorations during the holidays. Dipping the cookies in white chocolate and sprinkling with crushed peppermint can create a delightful holiday treat.
Conclusion
Baking sweet and chewy molasses cookies is not just about the end product; it’s about the joy of creating something delicious from scratch. The aroma that fills your kitchen as these cookies bake is a comforting reminder of home and warmth. Whether you enjoy them fresh out of the oven, paired with a beverage, or shared with loved ones, molasses cookies hold a special place in the hearts of many.
As you experiment with this versatile recipe, don’t hesitate to make it your own. From adding spices to trying new variations, the possibilities are endless. The comforting nature of homemade baked goods is undeniable; they bring people together, create memories, and evoke feelings of nostalgia. So, roll up your sleeves, gather your ingredients, and dive into the delightful world of molasses cookies. Happy baking!