Introduction
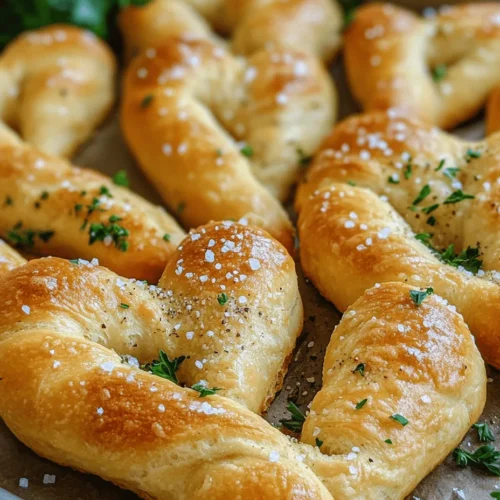
Imagine a warm, inviting kitchen filled with the comforting aroma of freshly baked breadsticks, each one shaped like a heart. Heart-shaped breadsticks are not just a delightful culinary creation; they are a charming addition to any meal, especially during special occasions like romantic dinners or family gatherings. They bring a touch of whimsy and love to the dining table, making them perfect for Valentine’s Day, anniversaries, or simply to show your appreciation for loved ones.
Homemade breadsticks are a treat that many people cherish, and the satisfaction of pulling your own warm, golden-brown breadsticks from the oven is an experience like no other. Beyond their delightful flavor and texture, these breadsticks are incredibly versatile. They can accompany a wide variety of dishes, from a simple salad to a hearty pasta meal, or even stand alone as a tasty snack.
One of the best aspects of making heart-shaped breadsticks is the ease of preparation. This recipe is designed to be accessible for cooks of all skill levels, whether you’re a seasoned baker or a novice in the kitchen. With just a few basic ingredients and some simple steps, you can create a batch of delicious breadsticks that are sure to impress. So, roll up your sleeves, and let’s get started on this fun and rewarding baking adventure!
Understanding the Ingredients
Before we dive into the heart of the recipe, it’s essential to understand the key ingredients that will bring our heart-shaped breadsticks to life. Each component plays a vital role in achieving the perfect texture and flavor, so let’s explore them in detail:
All-Purpose Flour
All-purpose flour is the backbone of our breadstick recipe. It provides the structure and texture needed to create those light, airy breadsticks we all love. The protein content in all-purpose flour, which typically ranges from 10-12%, is ideal for creating gluten when mixed with water and kneaded. This gluten development is crucial for the elasticity and chewiness of the breadsticks, allowing them to rise beautifully in the oven.
Instant Yeast
Instant yeast is a key player in our breadstick dough, responsible for the leavening process. Unlike active dry yeast, instant yeast can be mixed directly with the dry ingredients without needing to be activated in water first. This type of yeast works quickly, allowing the dough to rise faster, which is perfect for those who want to whip up a batch of breadsticks in a short amount of time. Additionally, instant yeast contributes to the flavor development of the breadsticks as they rise.
Sugar and Salt
Sugar and salt might seem like simple ingredients, but they play significant roles in enhancing the flavor and controlling the fermentation process of the dough. Sugar not only adds a touch of sweetness but also feeds the yeast, promoting a better rise and richer flavor. Salt, on the other hand, is crucial for regulating the fermentation rate of the dough, ensuring that the yeast doesn’t work too quickly. It also strengthens the gluten structure, contributing to the overall texture of the breadsticks.
Warm Water
The temperature of the water used in our dough is crucial for the activation of the yeast. Warm water, ideally between 100°F to 110°F (37°C to 43°C), helps to create the perfect environment for the yeast to thrive. If the water is too hot, it can kill the yeast, while water that is too cold can slow down the fermentation process. Using warm water ensures that the yeast is activated properly, leading to a good rise and fluffy breadsticks.
Olive Oil
Olive oil adds richness and depth of flavor to our breadsticks. It not only enhances the taste but also contributes to a tender crumb and a soft texture. The fat in olive oil coats the gluten strands, preventing them from becoming too tough and ensuring that our breadsticks are light and fluffy. Additionally, the flavor of olive oil complements the other ingredients beautifully, making every bite a delight.
Optional Ingredients
For those looking to elevate their heart-shaped breadsticks further, consider adding optional ingredients like garlic powder or dried Italian herbs. Garlic powder can infuse the breadsticks with a savory aroma and flavor that pairs wonderfully with many dishes. Dried Italian herbs, such as oregano or basil, can add a fragrant, herbaceous note that enhances the overall taste. These optional ingredients allow you to customize your breadsticks to suit your palate and the occasion.
Step-by-Step Guide to Making Heart-Shaped Breadsticks
Now that we have a clear understanding of our ingredients, let’s jump into the step-by-step process of making these delightful heart-shaped breadsticks. This section will cover the preparation of the dough, kneading, and the all-important rising process.
Preparation of the Dough
1. Mixing the Dry Ingredients:
Begin by gathering your all-purpose flour, instant yeast, sugar, and salt. In a large mixing bowl, combine the flour, yeast, sugar, and salt. Using a whisk, mix the dry ingredients thoroughly to ensure even distribution of the yeast and salt. This step is vital as it helps activate the yeast uniformly during the mixing process.
2. Adding the Liquid:
Gradually add warm water and olive oil to the dry ingredients. It’s important to add the liquid slowly, mixing as you go. This method allows the flour to absorb the moisture evenly, reducing the chance of clumping and ensuring a consistent dough. You can use a wooden spoon or your hands to mix until the dough starts to come together.
3. Achieving Optimal Dough Consistency:
As you mix, you may notice that the dough is too sticky or too dry. If it feels sticky, sprinkle a little extra flour, a tablespoon at a time, until it reaches a workable consistency. If it appears too dry, add a few drops of warm water. The goal is to have a soft, pliable dough that is not overly sticky.
Kneading and Rising Process
1. Kneading the Dough:
Once the dough has come together, transfer it to a lightly floured surface. Begin kneading the dough by pushing it away from you with the palms of your hands, then folding it back over itself. Rotate the dough a quarter turn and repeat this process. Kneading is essential as it develops the gluten, leading to a smooth and elastic dough. Continue kneading for about 8-10 minutes, or until the dough is smooth and elastic. You should be able to stretch it without it tearing easily.
2. First Rise:
After kneading, shape the dough into a ball and place it in a lightly oiled bowl, turning it to coat all sides with oil. This step prevents the dough from drying out while it rises. Cover the bowl with a clean kitchen towel or plastic wrap to create a warm environment for the dough to rise. Allow the dough to rise in a warm, draft-free area for about 1 to 1.5 hours, or until it has doubled in size. This first rise is crucial for developing flavor and texture in your breadsticks.
As the dough rises, you’ll notice it becoming puffy and airy, which is exactly what we want. The yeast will be working hard, creating carbon dioxide bubbles that contribute to the light and fluffy texture of the final product.
With the initial steps of our heart-shaped breadsticks laid out, you’re well on your way to creating a delightful addition to any meal or celebration. Stay tuned for the next part, where we’ll shape these delicious breadsticks and prepare them for baking!
Shaping the Breadsticks
Shaping the heart-shaped breadsticks is a delightful part of the process that not only adds to their aesthetic appeal but also enhances the overall experience of creating this recipe. Begin by lightly flouring your work surface to prevent sticking. With your prepared dough, gently punch it down to release any trapped air. This step is crucial as it helps to create a more uniform texture in the final product.
Detailed Instructions on Rolling Out the Dough
1. Divide the Dough: After the first rise, divide your dough into two or three equal portions. This makes it easier to work with and helps maintain its elasticity as you shape the breadsticks.
2. Roll Out the Dough: Using a rolling pin, roll each portion into a rectangle approximately 1/4 inch thick. This thickness is ideal for achieving a nice rise while baking, ensuring they are soft and airy on the inside.
3. Cut into Strips: Using a sharp knife or pizza cutter, slice the dough into strips about 1 inch wide. This width is perfect for forming heart shapes while allowing the breadsticks to maintain their structure during baking.
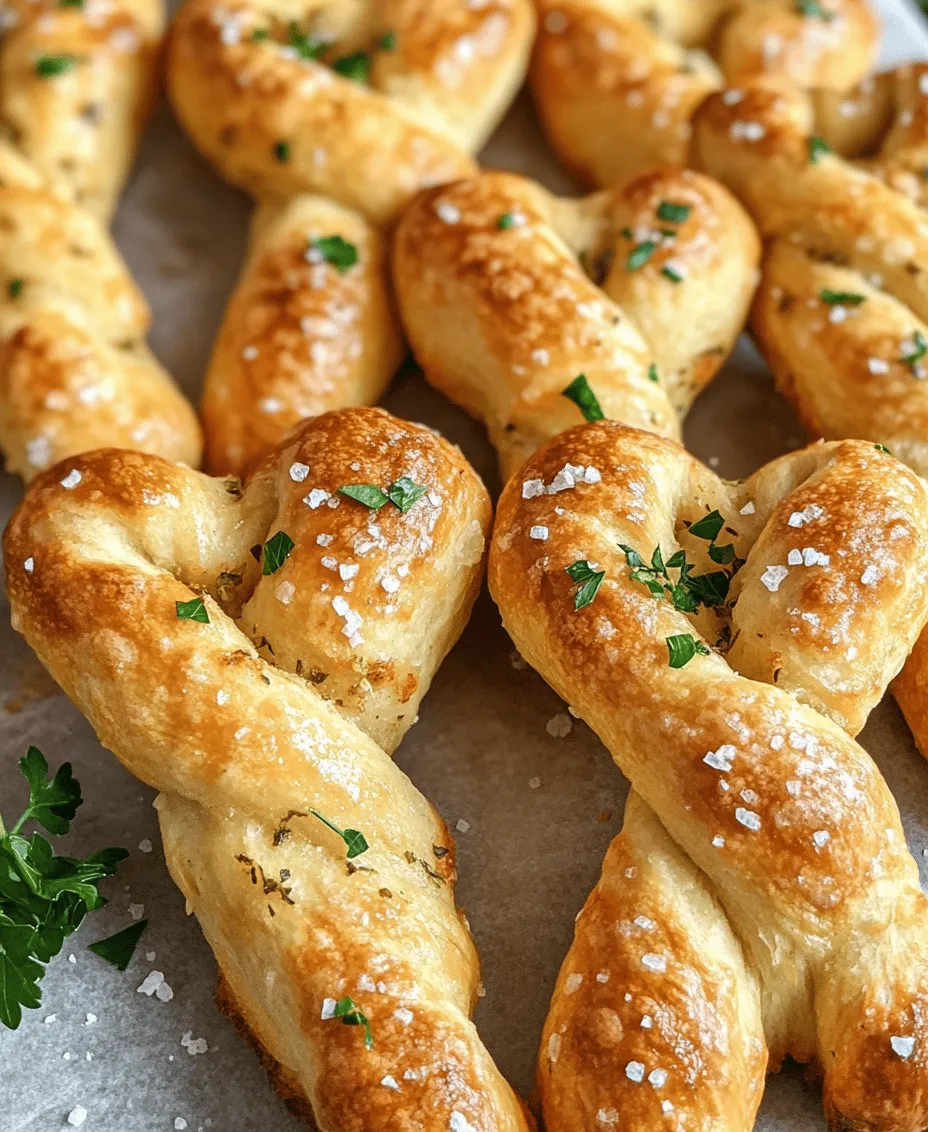
Step-by-Step Guide on Forming Heart Shapes
1. Creating the Heart Shape: Take one strip of dough and fold it in half. Pinch the top of the folded end to create the top of the heart.
2. Form the Heart: Next, curve the two ends downwards, and pinch them at the bottom to create the heart’s point. This visual cue is important; ensuring the curves are smooth will give your breadsticks a lovely appearance.
3. Repeat the Process: Continue this process with the remaining strips of dough, placing each shaped breadstick on a parchment-lined baking sheet, leaving some space between them to allow for the second rise.
The Second Rise
Allowing your shaped breadsticks to rise again is essential for achieving the perfect texture. This second rise creates air pockets within the dough, resulting in a light and airy interior once baked.
1. Cover the Breadsticks: Once shaped, cover the baking sheet with a clean kitchen towel or plastic wrap. This helps retain moisture and warmth, encouraging the yeast to continue its work.
2. Duration: Let the breadsticks rise in a warm, draft-free area for about 30 to 45 minutes. The dough should puff up noticeably but not double in size.
The rationale behind this rise is simple: it allows the gluten to relax, making the breadsticks tender and soft while also enhancing their flavor. The yeast continues to ferment, creating a more complex taste profile.
Baking the Breadsticks
With the dough now beautifully risen, it’s time to bake your heart-shaped breadsticks to golden perfection.
Preheating the Oven
Preheat your oven to 375°F (190°C). This temperature is ideal for baking breadsticks, ensuring that they cook evenly and achieve a crispy exterior while remaining soft inside. An adequately preheated oven is crucial; baking in a hot oven helps to create an initial steam effect that contributes to a better rise.
Egg Wash Application
To achieve a beautiful golden-brown finish, prepare an egg wash by whisking together one egg with a tablespoon of water or milk.
1. Application: Use a pastry brush to gently apply the egg wash over each breadstick. This step not only enhances color but also provides a glossy finish that makes your breadsticks visually appealing.
2. Sprinkle with Toppings: After applying the egg wash, consider sprinkling some coarse sea salt, sesame seeds, or grated Parmesan cheese on top for added flavor and texture.
Baking Time and How to Determine Doneness
Place the baking sheet in the preheated oven and bake the heart-shaped breadsticks for 12 to 15 minutes, or until they are golden brown.
1. Tips for Achieving Doneness: Keep an eye on the breadsticks during the last few minutes of baking. They can go from golden to overly brown quite quickly. A gentle tap on the bottom of a breadstick should sound hollow, indicating that they are cooked through.
2. Cooling: Once baked, remove them from the oven and allow them to cool on a wire rack for a few minutes before serving. This helps to maintain their texture and prevents them from becoming soggy.
Serving Suggestions and Pairings
Heart-shaped breadsticks are not just visually charming; they are also incredibly versatile and can be served in various delightful ways.
Ideas for Serving
– Accompaniments: These breadsticks pair wonderfully with soups like tomato basil or minestrone. Their shape adds a special touch to any dinner table, making them perfect for family meals or special occasions.
– Appetizers: Serve them as appetizers alongside a fresh salad or a charcuterie board. Their unique shape will impress your guests and make your spread more inviting.
Suggestions for Dips or Spreads
– Marinara Sauce: A classic pairing is warm marinara sauce for dipping. The rich, tangy flavor complements the breadsticks beautifully.
– Garlic Butter: For a savory option, melt some garlic butter infused with herbs and serve it alongside the breadsticks for an irresistible treat.
– Pesto: A vibrant green pesto adds a burst of flavor and color, making it an excellent choice for those looking to elevate their appetizer game.
Creative Serving Ideas for Special Occasions
– Presentation: Consider garnishing your serving platter with fresh parsley or basil for a pop of color. You can also arrange the breadsticks in a heart shape on the plate for a romantic touch.
– Themed Occasions: For celebrations like Valentine’s Day or anniversaries, serve the breadsticks with a side of your favorite dipping sauce in the shape of a heart, using a cookie cutter for a fun twist.
Nutritional Information and Dietary Considerations
Understanding the nutritional content of your heart-shaped breadsticks can help you enjoy them guilt-free.
Overview of Nutritional Content
Per serving (2 breadsticks), the approximate nutritional content is as follows:
– Calories: 160
– Carbohydrates: 30g
– Protein: 4g
– Fat: 3g
– Fiber: 1g
This information can vary based on the specific ingredients and portion sizes used, so it’s advisable to calculate based on your recipe variations.
Dietary Considerations
For those with dietary restrictions, there are several substitutions you can consider:
– Gluten-Free Options: Use a high-quality gluten-free flour blend to make these breadsticks suitable for individuals with gluten sensitivities.
– Dairy-Free Alternatives: If you prefer dairy-free options, substitute the egg wash with a mixture of almond milk and a pinch of turmeric for color, or use a vegan egg wash made from ground flaxseed mixed with water.
Conclusion
Making heart-shaped breadsticks from scratch is not only a rewarding culinary experience but also a wonderful way to connect with loved ones over food. The joy of shaping and baking these delightful treats brings a sense of accomplishment that is hard to beat.
Their appeal extends beyond everyday meals; they are perfect for special occasions and gatherings, where their charming shape and delicious flavor can truly shine.
As you embark on this baking journey, remember that the heart-shaped breadsticks are more than just food—they are a means of sharing love and warmth with those around you. Invite your friends and family to join in the fun of baking, creating not just a meal but lasting memories. Embrace the experience of cooking and sharing, and let these heart-shaped breadsticks be a testament to the joy of togetherness.