Introduction
If you’re on the hunt for a dessert that effortlessly combines rich flavor with a creamy texture, look no further than Philadelphia Cheesecake Bars. These luscious treats encapsulate the essence of classic cheesecake in a convenient bar form, making them a perfect choice for gatherings, celebrations, or a delightful indulgence at home. Cheesecake has long been a beloved dessert, with its smooth, velvety filling and buttery crust captivating the taste buds of dessert enthusiasts everywhere.
The beauty of cheesecake lies not only in its taste but also in its versatility. While traditional cheesecakes are often baked in a springform pan, cheesecake bars offer an easier, more approachable way to enjoy this classic dessert. With their straightforward preparation process and delightful presentation, Philadelphia Cheesecake Bars are a hit among home bakers looking for an easy yet impressive dessert option.
In today’s fast-paced world, the importance of easy and delicious recipes cannot be overstated. Home bakers are constantly searching for ways to create mouthwatering desserts without spending hours in the kitchen. Philadelphia Cheesecake Bars fit the bill perfectly, allowing you to whip up a crowd-pleaser with minimal effort and maximum flavor.
The Allure of Cheesecake
Cheesecake has a rich history that dates back to ancient Greece, where it was served to athletes during the first Olympic Games. The Romans later adopted this creamy dessert, and over the centuries, it has evolved into numerous regional variations. Today, cheesecake is enjoyed worldwide, with styles ranging from the light and fluffy Italian ricotta cheesecake to the dense and decadent New York-style cheesecake.
One of the key ingredients that sets many cheesecakes apart is the type of cheese used. Philadelphia cream cheese, a staple in American kitchens, is often the preferred choice for cheesecake recipes. Its smooth texture and mild flavor create the perfect foundation for cheesecake, allowing it to shine without overwhelming the palate. The brand’s reputation for quality and consistency has made it a go-to ingredient for both home bakers and professional chefs alike.
The versatility of cheesecake is also one of its main attractions. It can be flavored with various ingredients, from fruits and chocolate to spices and extracts, enabling bakers to customize their creations to suit any occasion. Whether you’re making a classic plain cheesecake or a unique flavor combination, the possibilities are endless, making cheesecake a beloved dessert across cultures and generations.
Ingredients Breakdown
When preparing Philadelphia Cheesecake Bars, it’s essential to understand the role each ingredient plays in creating the perfect balance of flavor and texture. Let’s dive into the key components of this delightful recipe:
Graham Cracker Crumbs: The Foundation of the Crust
The base of any great cheesecake bar starts with a crumbly crust, and in this recipe, graham cracker crumbs are the star. These crushed crackers provide a sweet and slightly nutty flavor that contrasts beautifully with the creamy filling. Additionally, their texture offers a satisfying crunch, creating a delightful contrast with the smooth cheesecake filling. For those looking for a gluten-free option, alternative crusts can be made using gluten-free graham crackers or even crushed nuts.
Unsalted Butter: Binding Agent for the Crust
Unsalted butter is a crucial ingredient that binds the graham cracker crumbs together, creating a cohesive and firm base for the cheesecake bars. Using unsalted butter allows you to control the overall saltiness of the recipe, ensuring that the flavors remain balanced. When melted and combined with the crumbs, the butter helps to create a crust that is both sturdy and flavorful.
Granulated Sugar: Sweetness Balance for Both Crust and Filling
Granulated sugar serves two primary roles in this recipe: sweetening both the crust and the filling. The sugar in the crust enhances the flavor of the graham cracker crumbs, while the sugar in the filling contributes to the overall sweetness of the cheesecake. The amount of sugar can be adjusted based on your preference and the sweetness of any additional ingredients you may choose to incorporate.
Philadelphia Cream Cheese: Key Ingredient for Rich Flavor and Creamy Texture
No cheesecake is complete without cream cheese, and Philadelphia cream cheese is the gold standard for achieving that rich and creamy texture. Its smooth consistency allows for easy blending with other ingredients, resulting in a lump-free filling. The flavor profile of Philadelphia cream cheese is mild yet tangy, providing the perfect backdrop for the other flavors in the recipe. This ingredient is indispensable for creating the signature cheesecake taste that fans crave.
Vanilla Extract: Enhancing Flavor Profile
A splash of vanilla extract adds depth and warmth to the cheesecake filling. This simple ingredient elevates the overall flavor profile, enhancing the sweetness without overshadowing the primary ingredients. For an even more robust vanilla flavor, consider using high-quality vanilla extract or vanilla bean paste.
Eggs: Structure and Richness
Eggs are essential for providing structure to the cheesecake filling. They help bind the ingredients together, resulting in a smooth and creamy texture. When baked, eggs also contribute to the firmness of the cheesecake bars, ensuring they hold their shape when cut. Additionally, eggs add richness and enhance the overall flavor of the dessert.
Sour Cream: Adds Creaminess and Tang
Sour cream plays an important role in balancing the richness of the cream cheese. Its tangy flavor helps to cut through the sweetness, creating a more complex taste. Moreover, sour cream adds a luxurious creaminess to the cheesecake filling, ensuring each bite is velvety and decadent.
Lemon Zest and Juice: Brightening Flavors
Lemon zest and juice are the finishing touches that brighten the overall flavor of the cheesecake bars. The acidity of the lemon juice complements the creaminess of the filling, while the zest contributes an aromatic citrus note. Together, they enhance the flavor profile, making the cheesecake bars refreshing and delicious.
Preparation Steps for Success
Before diving into the preparation of your Philadelphia Cheesecake Bars, it’s essential to set yourself up for success by prepping your workspace and gathering all the necessary ingredients. A well-organized kitchen will streamline the process and ensure that you don’t miss any critical steps.
1. Preheat the Oven
Start by preheating your oven to 325°F (160°C). A properly heated oven is crucial for achieving the ideal baking conditions, ensuring that your cheesecake bars cook evenly and set properly.
2. Prepare the Baking Dish
Next, grab a 9×13-inch baking dish and line it with parchment paper. This step is vital for easy removal of the cheesecake bars once they are baked and cooled. The parchment paper will prevent the bars from sticking to the sides of the dish, allowing for clean and neat slices.
3. Gather Your Ingredients
Having all your ingredients at hand will make the preparation process smoother. Measure out the graham cracker crumbs, unsalted butter, granulated sugar, Philadelphia cream cheese, vanilla extract, eggs, sour cream, lemon zest, and lemon juice. Make sure to let the cream cheese come to room temperature for easier blending.
4. Prepare the Crust
In a mixing bowl, combine your graham cracker crumbs and granulated sugar. Melt the unsalted butter and pour it into the crumb mixture, stirring until the crumbs are evenly coated. The mixture should have a sandy texture that holds together when pressed. Transfer the crust mixture into the prepared baking dish, pressing it firmly into an even layer across the bottom. This step is crucial for ensuring that your crust holds its shape during baking.
5. Bake the Crust
Place the baking dish in the preheated oven and bake the crust for approximately 10 minutes, or until it is lightly golden. Allowing the crust to set before adding the filling helps create a sturdy base for your cheesecake bars.
6. Prepare the Cheesecake Filling
While the crust is baking, it’s time to prepare the creamy filling. In a large mixing bowl, beat the softened Philadelphia cream cheese with granulated sugar until smooth and creamy. This process should take about 2-3 minutes. Scrape down the sides of the bowl as needed to ensure an even mixture.
7. Add Remaining Ingredients
Once the cream cheese and sugar are well combined, mix in the eggs one at a time, ensuring that each egg is fully incorporated before adding the next. This step is key to achieving a smooth batter. After the eggs, add in the sour cream, vanilla extract, lemon zest, and lemon juice. Mix until everything is well combined, and the filling is silky smooth.
8. Pour Filling Over the Crust
After the crust has finished baking, remove it from the oven and pour the cheesecake filling over the hot crust. Use a spatula to spread the filling evenly, ensuring that it reaches the corners of the baking dish.
9. Bake the Cheesecake Bars
Return the baking dish to the oven and bake for an additional 25-30 minutes or until the edges are set and the center is slightly jiggly. The cheesecake will firm up as it cools, so don’t worry if it looks a little soft in the middle.
10. Cool and Chill
Once baked, remove the cheesecake bars from the oven and allow them to cool in the baking dish for about an hour. Afterward, transfer the dish to the refrigerator to chill for at least 4 hours, or overnight if possible. Chilling the bars is crucial for achieving the perfect texture and flavor, allowing the ingredients to meld beautifully.
Stay tuned for the next part of this article, where we’ll explore tips for achieving the best results with your Philadelphia Cheesecake Bars, address common questions, and share creative variations to make this recipe your own.
Crafting the Crust: Proper Mixing and Pressing Techniques
The foundation of any great cheesecake bar lies in its crust. A well-made crust not only adds texture but also provides a delicious contrast to the creamy filling. To craft the perfect crust for your Philadelphia Cheesecake Bars, start with the right ingredients: graham cracker crumbs, sugar, and melted butter.
1. Mixing the Ingredients: In a medium bowl, combine 1 ½ cups of graham cracker crumbs with ¼ cup of granulated sugar. Mixing these dry ingredients first ensures that the sugar is evenly distributed throughout the crumbs. Next, pour in ½ cup of melted unsalted butter and stir until the mixture resembles wet sand. The butter acts as a binding agent, holding the crust together once baked.
2. Pressing the Crust: Transfer the crumb mixture into a greased 9×13-inch baking pan. Use the back of a measuring cup or your fingers to firmly press the mixture into an even layer across the bottom of the pan. This step is crucial; a well-packed crust will hold together better when baked. Aim for an even thickness of about ¼ inch to ensure it bakes uniformly.
Whipping Up the Cheesecake Filling: Tips for Achieving a Smooth Consistency
Now that your crust is perfectly prepared, it’s time to focus on the cheesecake filling, which is the star of the show. Achieving a smooth and creamy texture is vital for the best cheesecake experience.
1. Room Temperature Ingredients: Begin by ensuring that all your ingredients, especially the cream cheese, are at room temperature. Cold cream cheese can lead to lumps in your filling. Whip 24 ounces of softened Philadelphia cream cheese in a large mixing bowl using an electric mixer on medium speed until it’s creamy and smooth.
2. Incorporating Sugar: Gradually add ¾ cup of granulated sugar to the cream cheese while mixing. This method helps dissolve the sugar thoroughly, which contributes to the overall texture of your filling.
The Significance of Adding Eggs One at a Time
When it comes to adding eggs to your cheesecake mixture, patience is key.
1. Adding Eggs: Add three large eggs one at a time, mixing well after each addition. This gradual incorporation allows the eggs to blend smoothly into the mixture, resulting in a creamy filling without overmixing. Overmixing can introduce too much air into the batter, leading to cracks during baking.
Incorporating Sour Cream and Lemon: Enhancing Flavor and Texture
To elevate the flavor profile of your cheesecake bars, adding sour cream and fresh lemon juice is essential.
1. Sour Cream: Mix in 1 cup of sour cream until fully incorporated. The sour cream adds a delightful tanginess and creaminess, enhancing the overall texture of the filling.
2. Lemon Juice: Squeeze in the juice of one medium lemon (about 2 tablespoons). This not only brightens the flavor but also helps balance the richness of the cream cheese. For an extra zing, consider adding a teaspoon of lemon zest for a burst of citrus aroma.
Baking the Cheesecake Bars
With the crust and filling prepared, it’s time to bake the cheesecake bars to perfection.
1. Baking Temperature and Time: Preheat your oven to 325°F (163°C). Pour the cheesecake filling over the prepared crust, spreading it evenly with a spatula. Bake in the preheated oven for 30-35 minutes.
2. Recognizing When the Cheesecake is Done: The cheesecake bars are ready when the edges are set, and the center has a slight jiggle. It’s important to avoid overbaking, as this can lead to a dry texture.
3. Cooling and Chilling Time: Once baked, remove the cheesecake from the oven and allow it to cool in the pan on a wire rack. After about an hour, cover the pan with plastic wrap or aluminum foil and refrigerate for at least four hours, or overnight, for best results. Chilling allows the flavors to meld and the texture to firm up.
Serving Suggestions
Once your Philadelphia Cheesecake Bars are chilled and ready to serve, it’s time to think about presentation and accompaniments.
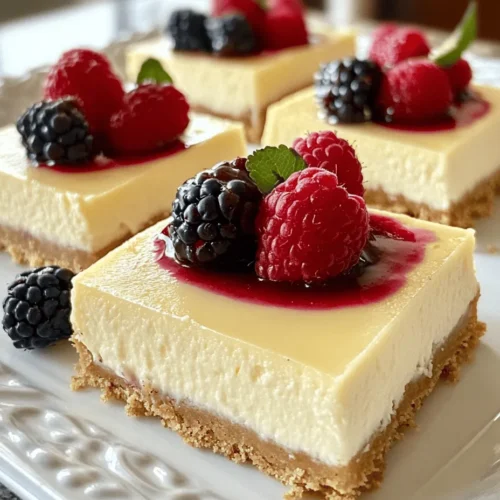
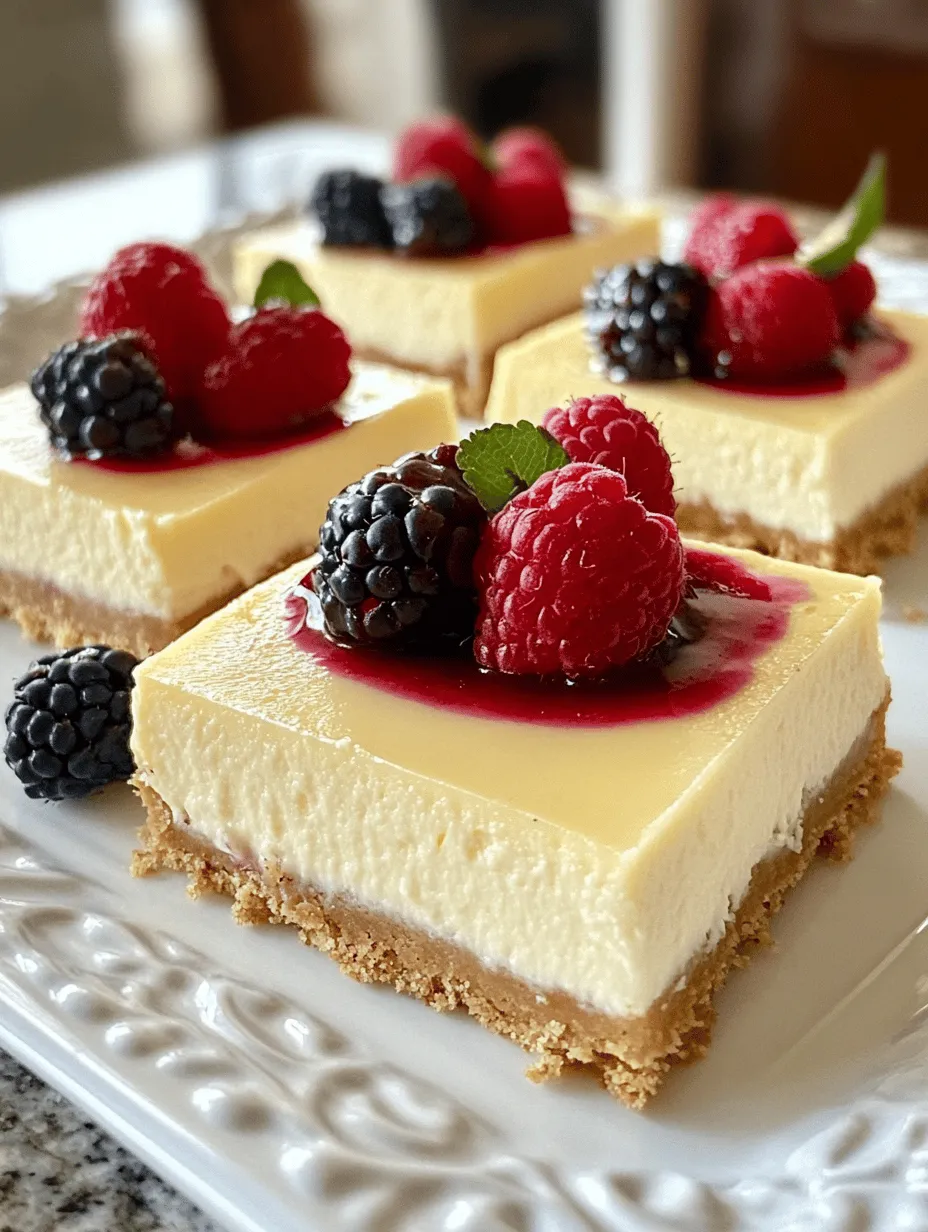
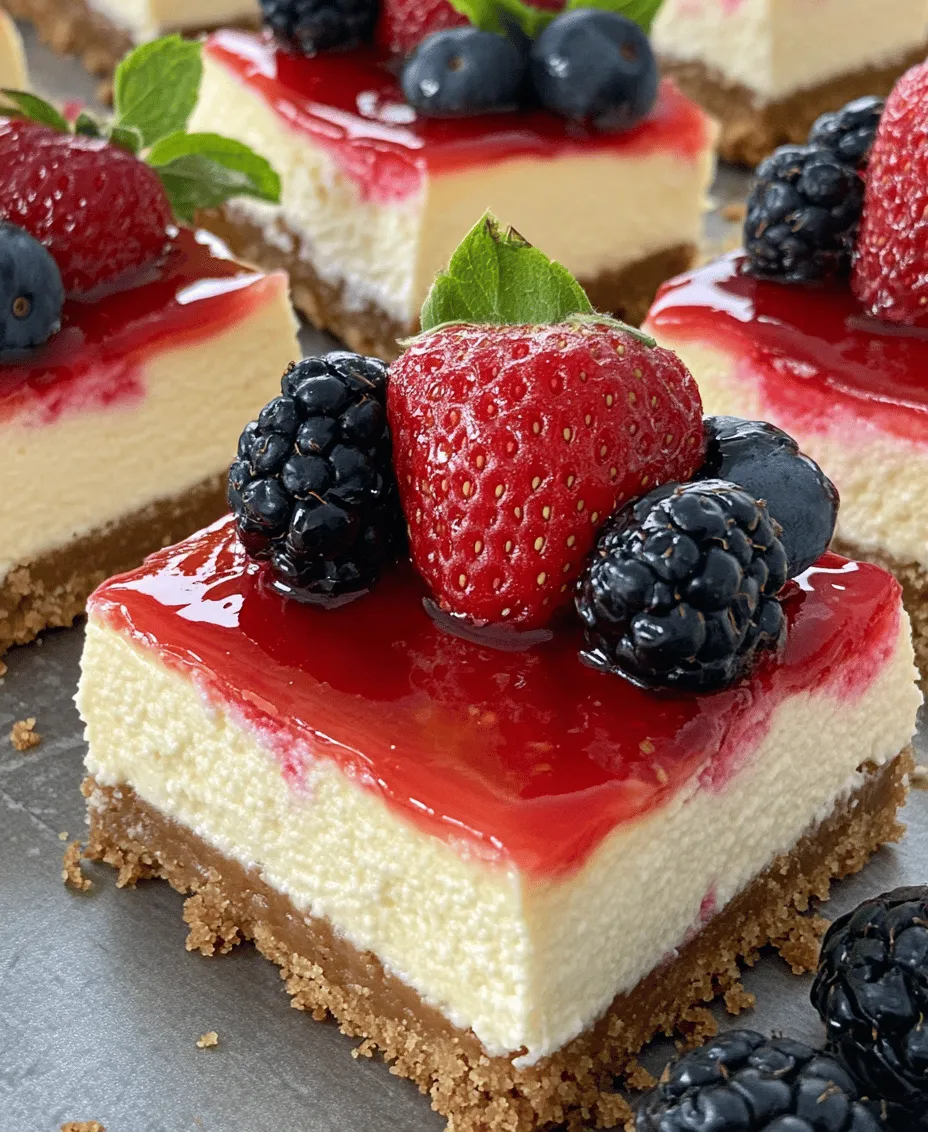
1. Fresh Berry Toppings: A simple yet elegant way to serve your cheesecake bars is by topping them with fresh berries. Seasonal options such as strawberries, blueberries, raspberries, or blackberries not only add a pop of color but also a fresh, fruity flavor that complements the creaminess of the cheesecake.
2. Fruit Sauces: For an easy homemade fruit sauce, consider blending fresh or frozen fruit with a bit of sugar until smooth. Drizzle this sauce over each bar for an added layer of flavor. A raspberry or blueberry sauce pairs beautifully with the rich cheesecake.
3. Presentation Tips: To make your dessert visually appealing, consider cutting the bars into neat squares and placing them on a decorative platter. You can garnish with mint leaves or a dusting of powdered sugar for an extra touch of elegance.
Nutritional Information
Understanding the nutritional content of your Philadelphia Cheesecake Bars can help you enjoy them in moderation.
– Each serving (based on a 12-serving recipe) contains approximately 280 calories, 20g of fat, 25g of carbohydrates, and 4g of protein.
– Portion sizes are important, and it’s easy to indulge, but enjoying a smaller piece can satisfy your sweet tooth while balancing your dietary choices.
Variations and Customizations
One of the best things about cheesecake bars is their versatility. Here are a few ideas for variations and adaptations:
1. Flavor Variations: Consider adding different flavorings to your cheesecake batter. For a chocolate twist, melt and fold in ½ cup of semi-sweet chocolate. For a seasonal favorite, incorporate 1 cup of pumpkin puree and a teaspoon of pumpkin spice for a fall-themed treat.
2. Dietary Preferences: If you need to adjust the recipe for dietary restrictions, you can use gluten-free graham crackers for the crust and dairy-free cream cheese alternatives for the filling. There are now many excellent substitutes available that still provide a creamy texture.
3. Creative Toppings: Get creative with toppings! Consider crushed cookies, caramel drizzle, or even a sprinkle of nuts for crunch. These additions can bring a delightful texture contrast to the creamy cheesecake.
Conclusion
Homemade Philadelphia Cheesecake Bars are a delightful treat that embodies the joy of baking. Their creamy texture and rich flavor make them a favorite for gatherings, parties, or simply to enjoy at home. The process of making these bars is not only rewarding but also allows you to customize and share a delicious dessert with family and friends.
So why not gather your ingredients and embark on this baking adventure? With this detailed recipe and tips in hand, you’re well on your way to creating a dessert that will impress everyone who tries it. Embrace the joy of baking, and enjoy every bite of your homemade Philadelphia Cheesecake Bars!