Introduction
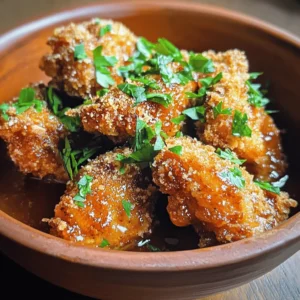
Honey Butter Chicken is a delightful dish that perfectly balances sweet and savory flavors, making it a favorite among comfort food enthusiasts. This dish consists of tender, juicy chicken breasts coated in a rich and flavorful honey butter sauce that is sure to satisfy your taste buds. Whether you’re cooking for a busy weeknight dinner or a special occasion, Honey Butter Chicken is both easy to prepare and utterly delicious, ensuring that your meal will be a hit with family and friends.
In recent years, this dish has gained popularity due to its incredible flavor profile and the growing trend of combining sweet and savory elements in cooking. The irresistible coating of honey and butter not only enhances the chicken’s natural flavors but also adds a delightful sweetness that complements the savory and crispy chicken perfectly. If you’re searching for a meal that combines comfort with culinary flair, Honey Butter Chicken is an excellent choice.
Understanding the Appeal of Honey Butter Chicken
At the heart of Honey Butter Chicken lies its unique flavor profile, which marries the sweetness of honey with the richness of butter and the savory essence of chicken. This harmonious combination creates a mouthwatering experience that has made fried chicken dishes beloved across various cuisines. From Southern fried chicken to Asian-inspired variations, the crispy and succulent nature of fried chicken has found its way into dining rooms around the world.
The rise of honey butter as a trendy sauce has further propelled the popularity of this dish. Originally gaining traction in the Southern United States, honey butter has since made its way into culinary circles globally, inspiring chefs and home cooks alike to experiment with its versatility. The sauce not only elevates the taste of fried chicken but can also be drizzled over biscuits, vegetables, and even used as a marinade for different proteins. Thus, Honey Butter Chicken is not just a meal; it’s a celebration of flavors that showcase the best of comfort cooking.
Ingredients Breakdown
To create the perfect Honey Butter Chicken, you will need a selection of essential ingredients that contribute to the dish’s delightful taste and texture. Here’s a detailed breakdown of each component:
– Chicken Breast: Chicken breasts are an ideal choice for this recipe due to their lean and tender meat. When cooked correctly, they remain juicy and flavorful, making them a perfect canvas for the honey butter sauce. If you prefer, you can use chicken thighs for a richer flavor.
– All-Purpose Flour: Coating the chicken in all-purpose flour is crucial for achieving that perfect crispy texture. The flour forms a protective layer around the chicken, helping to lock in moisture during cooking while creating a golden-brown crust.
– Spices (Salt, Black Pepper, Paprika, Garlic Powder): Seasoning is key in any recipe, and these spices play a significant role in enhancing the overall flavor of the dish. Salt and black pepper provide the foundational seasoning, while paprika adds a smoky depth. Garlic powder introduces a savory note that pairs beautifully with the sweetness of honey.
– Eggs and Panko Breadcrumbs: The dredging process is essential for creating a crunchy coating. Eggs act as a binding agent, allowing the panko breadcrumbs to adhere to the chicken. Panko breadcrumbs are lighter and crispier than traditional breadcrumbs, contributing to the dish’s delightful crunch.
– Honey, Butter, Soy Sauce, and Vanilla Extract: These ingredients form the heart of the honey butter sauce. Honey adds a natural sweetness that balances the savory elements, while butter provides richness and creaminess. Soy sauce introduces an umami kick, enhancing the flavor profile. A splash of vanilla extract adds a subtle warmth that complements the other flavors.
– Optional Garnish (Parsley): For a touch of freshness and visual appeal, chopped parsley can be used as a garnish. This not only brightens the dish but also provides a nice contrast to the rich flavors of the honey butter chicken.
Step-by-Step Preparation Guide
Preparing the Chicken
To begin, you’ll want to prepare the chicken breasts properly to ensure they cook evenly and absorb the delicious flavors of the honey butter sauce. Start by trimming any excess fat and slicing the chicken breasts in half horizontally to create thinner cutlets. This technique not only reduces cooking time but also allows for better absorption of flavors.
Next, season the chicken cutlets generously with salt, black pepper, paprika, and garlic powder. This seasoning step is crucial as it infuses the chicken with flavor from the inside out. Allow the seasoned chicken to sit for a few minutes while you prepare the dredging station.
Dredging Process
Set up a dredging station by placing the all-purpose flour in one shallow bowl, beaten eggs in another, and panko breadcrumbs in a third. This three-step process is essential for achieving that signature crispy coating.
1. Coat in Flour: Take each seasoned chicken cutlet and dredge it in the all-purpose flour, ensuring it’s evenly coated. Shake off any excess flour to prevent clumping.
2. Dip in Eggs: Next, dip the floured chicken into the beaten eggs, allowing the egg to coat the entire surface. This step helps the panko breadcrumbs adhere firmly to the chicken.
3. Coat with Panko: Finally, press the egg-coated chicken into the panko breadcrumbs, ensuring a generous layer sticks to the surface. For an extra crunch, gently press the breadcrumbs onto the chicken to help them adhere better.
Once all the chicken cutlets are dredged, it’s time to move on to frying them to golden perfection.
The process of preparing Honey Butter Chicken is straightforward, allowing even novice cooks to create a dish that feels gourmet. The combination of flavors and textures will surely impress anyone at your dinner table, making this recipe a go-to for any occasion. So, gather your ingredients and let’s dive into the cooking process, where the magic happens.
Dredging Process
To achieve that irresistible crunch on your Honey Butter Chicken, the dredging process is crucial. Begin by preparing three separate bowls: the first will contain seasoned flour, the second will hold beaten eggs, and the last will have a mixture of seasoned flour and cornstarch.
Step 1: Season the Flour
In the first bowl, mix about 2 cups of all-purpose flour with 1 teaspoon of salt, 1 teaspoon of garlic powder, and ½ teaspoon of black pepper. You can also add a pinch of cayenne pepper for a hint of heat. This seasoning will enhance the flavor of your chicken while providing a delicious coating.
Step 2: Prepare the Egg Wash
In the second bowl, crack 2 large eggs and beat them thoroughly until well mixed. This egg wash will help the flour adhere to the chicken, ensuring a crispy exterior.
Step 3: Create the Cornstarch Mixture
In the third bowl, combine 1 cup of seasoned flour with ½ cup of cornstarch. The addition of cornstarch will give the chicken an extra crunch, making it even more enjoyable.
Dredging Technique
Start with a piece of chicken, coating it in the seasoned flour first. Make sure it’s fully covered, shaking off any excess. Next, dip it into the egg wash, allowing any excess to drip off before returning it to the seasoned flour and cornstarch mixture. Press lightly to ensure a good coating, then set the dredged chicken aside on a wire rack. Repeat this process for each piece of chicken, ensuring they all have an even coating. This method will create a crispy, flavorful crust once fried.
Heating the Oil
Now that your chicken is dredged and ready, it’s time to heat the oil. Safety is paramount when working with hot oil, so make sure to follow these tips.
Choosing the Right Oil
For frying, opt for oils with high smoke points, such as canola oil, peanut oil, or vegetable oil. These oils will withstand high temperatures without burning, ensuring your chicken cooks evenly.
Heating the Oil
In a large, heavy-bottomed skillet or deep fryer, pour in about 2 inches of oil. Heat the oil over medium-high heat until it reaches around 350°F (175°C). Use a cooking thermometer to monitor the temperature accurately. If you don’t have a thermometer, you can test the oil by dropping in a small piece of the dredged chicken; if it sizzles immediately, your oil is ready.
Safety Tips
– Never leave hot oil unattended; it can catch fire if it gets too hot.
– Keep a lid nearby to extinguish any flames in an emergency.
– Avoid overcrowding the pan, as this can lower the oil temperature and lead to greasy chicken.
Frying the Chicken
Once your oil is heated, it’s time to fry the chicken. This step is where your patience and technique will shine.
Frying Technique
Carefully add the dredged chicken pieces to the hot oil, ensuring they are not touching to allow even cooking. Fry in batches if necessary. Cook each piece for about 8-10 minutes, turning occasionally for even browning. The chicken should develop a beautiful golden-brown color and reach an internal temperature of 165°F (74°C).
Timing Tips
– Thicker pieces of chicken may require a longer cooking time, while smaller parts will cook faster.
– Use a meat thermometer to ensure doneness without cutting into the chicken, which can release juices and dryness.
Draining the Chicken
Once golden brown and cooked through, remove the chicken from the oil using tongs or a slotted spoon, and place it on a wire rack set over a baking sheet to drain excess oil.
Making the Honey Butter Sauce
The honey butter sauce is what elevates this dish, adding a sweet, buttery richness that complements the crispy chicken perfectly.
Ingredients for the Sauce
In a saucepan, combine ½ cup of unsalted butter, ½ cup of honey, and a pinch of salt. For an added flavor dimension, consider stirring in 1 teaspoon of garlic powder or a dash of cayenne pepper.
Cooking the Sauce
Melt the butter over medium heat, then stir in the honey until fully combined. Let the sauce simmer for about 2-3 minutes, just enough to thicken slightly. Be careful not to let it boil, as this can change the texture.
Finishing Touches
Remove the sauce from the heat and allow it to cool slightly. If you prefer a smoother texture, you can blend the sauce with an immersion blender for a few seconds.
Combining Chicken and Sauce
Now for the final touch: combining your crispy chicken with the honey butter sauce.
Tossing Technique
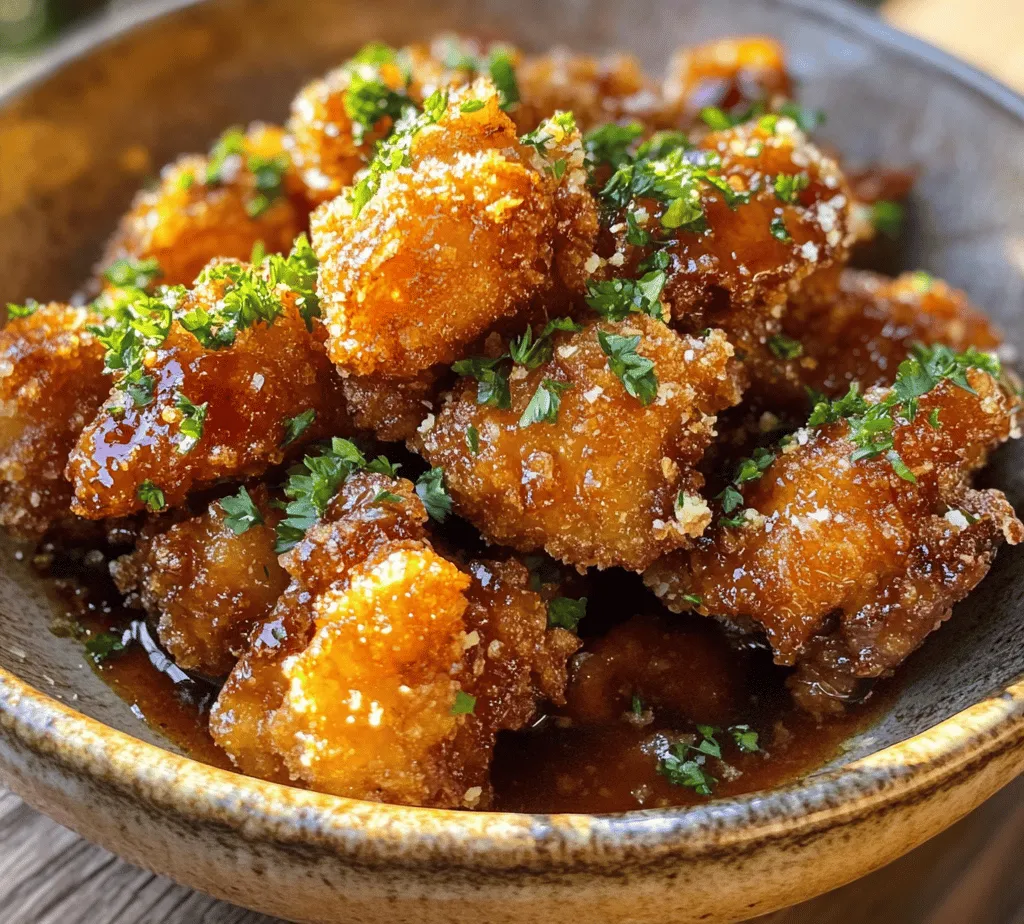
In a large bowl, add the fried chicken pieces, then pour the warm honey butter sauce over them. Using tongs, gently toss the chicken until each piece is evenly coated in the sauce. Ensure every piece gets a good amount of the honey butter for the best flavor experience.
Serving the Chicken
Transfer the coated chicken to a serving platter. If there’s any leftover sauce, drizzle it over the top for an extra layer of flavor.
Serving Suggestions and Pairings
Honey Butter Chicken is not just a dish; it’s a complete dining experience that pairs beautifully with several side dishes and beverages.
Side Dishes
– Coleslaw: The crunch of coleslaw balances the sweet and savory chicken, creating a refreshing contrast.
– Mashed Potatoes: Creamy mashed potatoes offer a comforting side that complements the flavors of the chicken.
– Steamed Vegetables: Lightly steamed broccoli or green beans add color and nutrition to your plate, enhancing the overall meal without overpowering the chicken.
Beverage Pairings
Consider serving your Honey Butter Chicken with refreshing iced tea or lemonade. Both drinks have a sweetness that pairs well with the dish. For an adult option, a light lager or fruity white wine can complement the meal without overshadowing the flavors.
Presentation Tips
To make your dining experience even more appealing, garnish the chicken with freshly chopped parsley or green onions. Serve on a wooden platter or a colorful ceramic dish to create a rustic yet elegant presentation.
Nutritional Information
Understanding the nutritional content of Honey Butter Chicken can help you enjoy it as part of a balanced diet.
Nutritional Breakdown
A serving of Honey Butter Chicken (about 4 oz) typically contains:
– Calories: Approximately 400-500
– Protein: 25-30 grams
– Fat: 20-25 grams (depending on the frying method)
– Carbohydrates: 30-35 grams
Dietary Modifications
For those seeking gluten-free options, substituting all-purpose flour with a gluten-free flour blend can work well, maintaining the dish’s integrity. Additionally, you can adjust the honey to reduce sugar content if desired.
Cultural and Culinary Context
Honey Butter Chicken, while a modern favorite, has its roots in American culinary traditions, particularly Southern cooking.
History of Honey Butter
Honey butter is a staple in many Southern kitchens, often used as a spread or as a glaze for various meats. Its origins can be traced back to the need for sweeteners in savory dishes, making it a beloved addition to fried chicken.
Influence of Southern Cooking
Fried chicken has long been a symbol of Southern hospitality, and the addition of honey butter brings a unique flavor profile that enhances this classic dish. Southern cooks have perfected the art of frying chicken, and the trends have spread far beyond the South, influencing menus across the country.
Modern Variations
Recently, Honey Butter Chicken has inspired various restaurant creations, including sandwiches and bowls, reflecting evolving culinary trends. Food trucks and diners have embraced this dish, presenting it in innovative ways that attract both traditionalists and foodies alike.
Conclusion
In summary, making Honey Butter Chicken at home is not only simple but also incredibly rewarding. With its golden-crisp exterior and rich, sweet glaze, this dish is bound to impress family and friends alike. Its versatility makes it suitable for various occasions, whether it’s a casual weeknight dinner or a festive gathering.
By following these detailed steps and tips, you’ll create a dish that stands out for its flavor and presentation. Enjoy the satisfaction of serving a homemade meal that brings everyone together, creating memories over delicious bites of Honey Butter Chicken.