
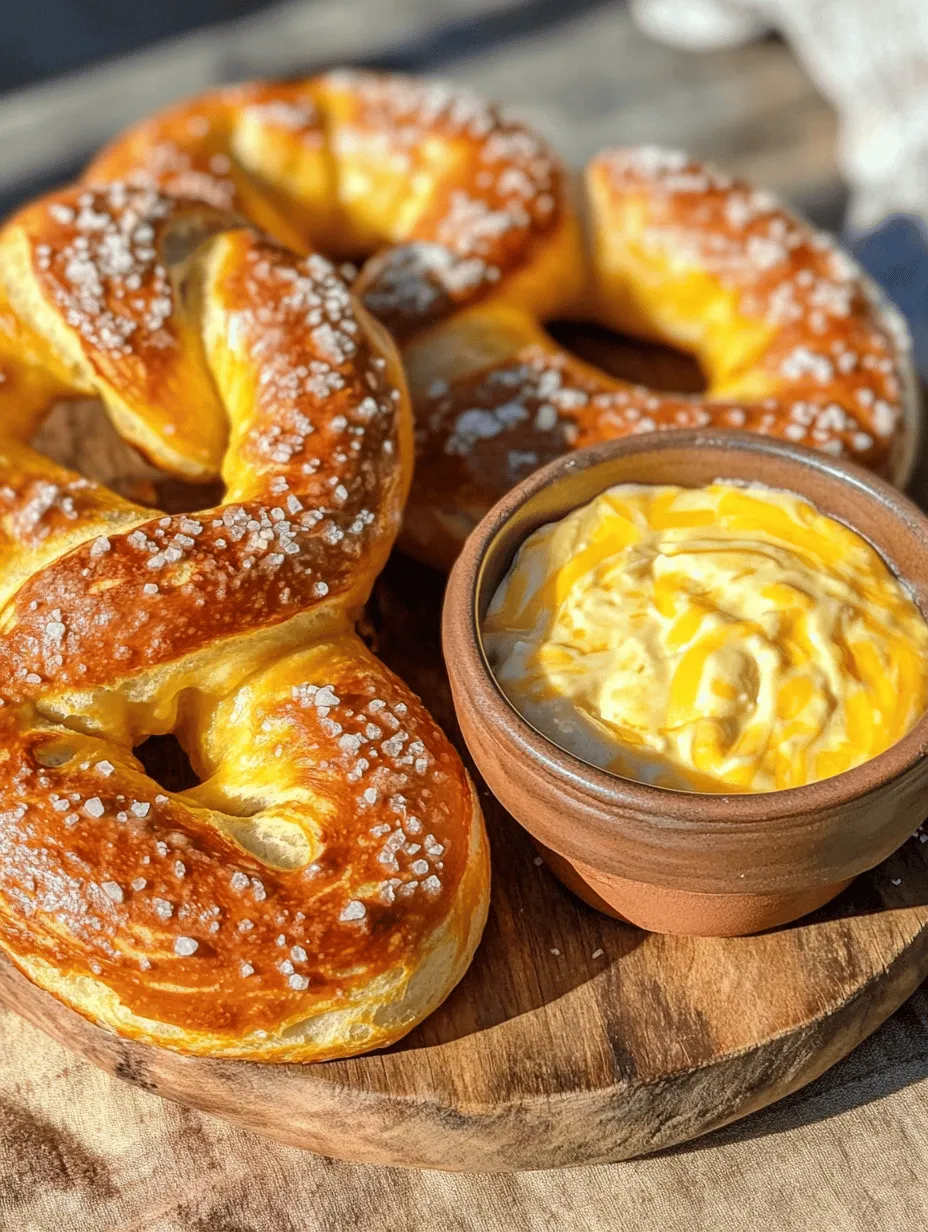
Soft pretzels are more than just a snack; they embody comfort, nostalgia, and a touch of culinary artistry. The moment you bite into a warm, chewy pretzel, you’re transported to a bustling street fair or a cozy movie night at home. But what if we told you that the experience could be elevated to new heights with a rich, creamy cheese dip? This combination is a match made in heaven, perfect for gatherings, intimate evenings, or simply indulging in a delightful culinary project. In this article, we will guide you through the process of crafting exquisite soft pretzels and a decadent cheesy delight that will satisfy your cravings and impress your guests.
Understanding the Basics of Soft Pretzels
The Origin of Soft Pretzels
Soft pretzels have a storied history that dates back to ancient times. Originating in Europe, particularly in Germany, the soft pretzel became synonymous with street food culture. The original shape of pretzels is said to represent arms crossed in prayer, a nod to their religious significance in early Christianity. Over the centuries, they evolved into the beloved snack we know today, with variations found in different cultures. In the United States, soft pretzels gained immense popularity in the late 20th century, often found at ballparks, fairs, and street vendors. Their unique texture and flavor have made them a staple at gatherings and celebrations, capturing the hearts and taste buds of many.
The Science of Pretzel Dough
At the heart of every great soft pretzel is its dough. Understanding the science behind pretzel dough can significantly enhance your baking experience. The primary components of pretzel dough include flour, yeast, water, salt, and sugar. Each ingredient plays a crucial role in achieving that iconic chewy texture and golden-brown crust.
– Flour: The backbone of the dough, all-purpose flour or bread flour is commonly used due to its high gluten content, which contributes to the chewy texture.
– Yeast: This magical ingredient is responsible for fermentation and leavening. When activated, yeast produces carbon dioxide, causing the dough to rise and develop a light texture.
– Sugar: While it might seem counterintuitive, sugar nourishes the yeast, helping it to thrive and produce the desired rise. It also adds a hint of sweetness to balance the savory flavors.
– Salt: Essential for flavor, salt also strengthens the dough’s structure and controls yeast activity, preventing it from over-fermenting.
An exciting aspect of soft pretzel preparation is the baking soda bath. Before baking, the dough is briefly immersed in a solution of water and baking soda. This crucial step not only gives pretzels their distinctive dark color and shiny appearance but also enhances the flavor, creating that iconic pretzel taste we all adore.
Ingredients Breakdown
Essential Ingredients for Soft Pretzels
To create the perfect soft pretzels, you’ll want to gather the following essential ingredients:
– All-Purpose Flour: About 4 cups of all-purpose flour will create the base of your dough, providing the necessary structure and chewiness.
– Active Dry Yeast: One packet (approximately 2¼ teaspoons) of active dry yeast is required for leavening. Make sure it’s fresh to ensure optimal rise.
– Warm Water: Approximately 1½ cups of warm water (around 110°F) is needed to activate the yeast effectively. Too hot or too cold water can hinder yeast activation.
– Granulated Sugar: 1 tablespoon of sugar will help to feed the yeast and add a subtle sweetness to the dough.
– Kosher Salt: 1 teaspoon of kosher salt is necessary for flavor and to balance the sweetness.
– Baking Soda: ⅓ cup of baking soda is used for the alkaline bath that gives pretzels their unique texture and flavor.
– Coarse Sea Salt: This is used as a topping for the pretzels before baking, providing a delightful crunch and burst of flavor.
Crafting the Perfect Cheese Dip
No soft pretzel experience is complete without a cheesy accompaniment. To create a rich and creamy cheese dip, you will need:
– Cheddar Cheese: About 2 cups of shredded sharp cheddar cheese will provide a robust flavor that pairs perfectly with the pretzels.
– Mozzarella Cheese: Adding 1 cup of shredded mozzarella cheese will enhance the creaminess and stretchiness of the dip.
– Milk: Approximately 1 cup of whole milk will help achieve the desired consistency, making the dip smooth and pourable.
– Butter: 2 tablespoons of unsalted butter will enrich the dip and add a velvety texture.
– All-Purpose Flour: 2 tablespoons of flour will act as a thickener, ensuring your cheese dip has the right consistency.
– Garlic Powder and Onion Powder: A teaspoon of each will add depth and flavor to the cheese dip.
– Salt and Pepper: To taste, these seasonings will enhance the overall flavor of the dip.
When combined, these ingredients create a luscious, cheesy dip that complements the salty, chewy pretzels, bringing an irresistible flavor explosion to your snack table.
Step-by-Step Guide to Making Soft Pretzels
Activating the Yeast: The First Step to Success
The first step in crafting your soft pretzels is to activate the yeast. This process is crucial for ensuring that your dough rises properly and develops the desired texture. Here’s how to do it:
1. Measure Warm Water: Start by measuring 1½ cups of warm water (110°F). It should feel warm to the touch but not hot, as excessive heat can kill the yeast.
2. Add Sugar and Yeast: In a mixing bowl, combine the warm water with 1 tablespoon of granulated sugar. Stir gently until the sugar is dissolved. Sprinkle the active dry yeast over the surface of the water, allowing it to sit undisturbed for about 5-10 minutes. You should see bubbles forming, indicating that the yeast is active and ready to use.
3. Check for Activity: Once the mixture is frothy and bubbly, it’s a good sign that your yeast is alive and well. If there’s no bubbling after 10 minutes, your yeast may be inactive, and you should start over with fresh yeast.
Making and Kneading the Dough
Once your yeast is activated, it’s time to create the dough. Follow these steps for a successful dough-making process:
1. Combine Dry Ingredients: In a large mixing bowl, combine 4 cups of all-purpose flour and 1 teaspoon of kosher salt. Mix well to ensure that the salt is evenly distributed throughout the flour.
2. Add Wet Ingredients: After the yeast has activated, pour the yeast mixture into the bowl with the flour and salt. Mix with a wooden spoon or spatula until a shaggy dough begins to form.
3. Knead the Dough: Transfer the dough onto a lightly floured surface. Begin kneading the dough by pressing it down with the heel of your hand, folding it over, and repeating the process. Knead for about 8-10 minutes until the dough becomes smooth and elastic. If the dough sticks to your hands, sprinkle a little more flour as needed.
4. Let It Rise: Once kneaded, shape the dough into a ball and place it in a greased bowl, turning it to coat with oil. Cover the bowl with a clean kitchen towel or plastic wrap and let it rise in a warm, draft-free area for about 1 hour or until it doubles in size.
Shaping Pretzels: Techniques and Tricks
After allowing the dough to rise, it’s time to shape your pretzels. This is a fun and creative part of the process that can be done in a few simple steps:
1. Preheat the Oven: Before shaping the pretzels, preheat your oven to 450°F (232°C). Prepare a baking sheet by lining it with parchment paper or lightly greasing it.
2. Divide the Dough: Once your dough has risen, punch it down to release any air bubbles. Turn it out onto a floured surface and divide it into 8 equal pieces. Roll each piece into a long rope, about 24 inches in length.
3. Form the Pretzel Shape: Take one rope and form it into a “U” shape. Cross the ends over each other and twist them together twice. Then, fold the twisted ends down towards the bottom of the “U” to create the pretzel shape. Press the ends firmly against the dough to seal.
4. Prepare the Baking Soda Bath: In a large pot, bring about 10 cups of water to a gentle boil. Add ⅓ cup of baking soda to the boiling water carefully; it will bubble up. This solution is crucial for achieving that characteristic pretzel crust.
5. Boil the Pretzels: Gently place each shaped pretzel into the boiling water, one or two at a time, for about 30 seconds. This step enhances the texture and flavor of the pretzels. Use a slotted spoon to remove them from the bath and place them on the prepared baking sheet.
6. Season and Bake: Before baking, sprinkle coarse sea salt over the pretzels. Bake in the preheated oven for about 12-15 minutes, or until they are golden brown and cooked through.
Following these steps will set you on the path to creating soft pretzels that are not only delicious but also visually appealing. The combination of a crisp exterior and a soft, chewy interior is what makes these pretzels a crowd favorite. And with the addition of a creamy cheese dip, you’ll have a snack that’s perfect for any occasion.
Stay tuned for the next part of this article, where we will delve deeper into crafting that irresistible cheesy delight and provide more tips to ensure your pretzel-making journey is a resounding success!
Shaping Pretzels: The Art of the Twist
Shaping pretzels is a critical step that not only defines their iconic look but also affects their texture. Begin by dividing your dough into equal portions, typically about 8 ounces each for standard-sized pretzels. Roll each portion into a long rope, approximately 24 inches in length. The goal is to keep the rope uniform in thickness to ensure even cooking.
To create the twist, lay the rope in a U-shape. Take the ends of the rope and cross them over each other, then bring the ends down toward the bottom of the U. Tuck the ends under the pretzel to secure the shape. This classic twist is what gives pretzels their distinctive appearance.
Common Mistakes to Avoid:
1. Overworking the Dough: Kneading too much can lead to a dense pretzel. Just enough kneading to combine the ingredients and develop some gluten is ideal.
2. Inconsistent Thickness: Make sure your pretzel ropes are even in thickness; this ensures they bake evenly.
3. Poorly Defined Twist: If the twist isn’t tight enough, it may unravel during boiling or baking. Practice makes perfect!
Preparing the Baking Soda Bath
The baking soda bath is a crucial step in achieving the classic pretzel flavor and texture. This bath will give your pretzels their characteristic dark brown color and chewy crust.
Steps to Prepare the Bath:
1. Ingredients: In a large pot, bring 10 cups of water to a rolling boil and add 2/3 cup of baking soda. Be cautious, as the mixture will bubble up vigorously.
2. Purpose: The alkaline nature of the baking soda alters the pH level of the dough, giving the pretzels their unique flavor and helping achieve that gorgeous golden-brown color when baked.
Boiling the Pretzels: Ensuring Authenticity
Once your pretzels are shaped, it’s time to boil them. This step is vital for achieving authentic pretzel texture.
Step-by-Step Instructions:
1. Preparation: Preheat your oven to 425°F (220°C). Line a baking sheet with parchment paper or a silicone baking mat.
2. Boiling: Carefully place 2-3 pretzels in the boiling baking soda bath at a time. Boil each pretzel for about 30 seconds.
3. Flipping: Use a slotted spoon to gently flip each pretzel halfway through the boiling time to ensure even exposure to the alkaline bath.
4. Removing: After 30 seconds, remove the pretzels from the bath and let them drain for a moment before transferring them to the prepared baking sheet.
Egg Wash and Baking: Achieving the Golden Finish
The final touch before baking is the egg wash, which not only adds color but also gives a beautiful sheen to your pretzels.
Tips for Applying the Egg Wash:
1. Ingredients: Whisk together one egg with a tablespoon of water to create your egg wash.
2. Application: Brush the egg wash generously over each pretzel using a pastry brush. Make sure to cover all areas, including the twisted sections.
Baking:
1. Place the baking sheet in the preheated oven and bake for approximately 12-15 minutes or until the pretzels are deep golden brown.
2. Keep an eye on them, as oven temperatures can vary.
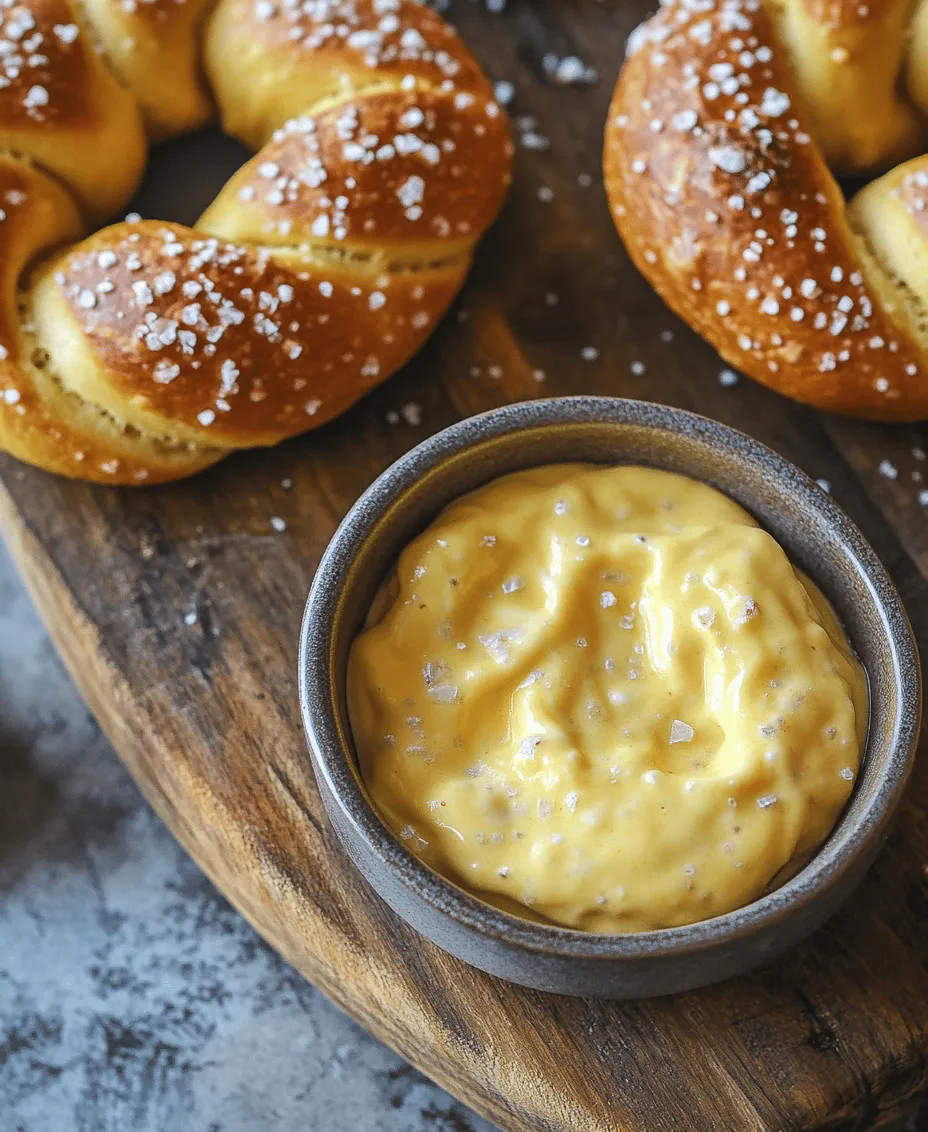
Crafting the Cheesy Dip
Creating a delectable cheese dip to accompany your pretzels will elevate your snack game.
Creating a Flavorful Cheese Sauce
Ingredients:
– 2 tablespoons of butter
– 2 tablespoons of all-purpose flour
– 1 cup of milk
– 1 ½ cups of shredded cheese (cheddar, gouda, or a blend)
– Salt and pepper to taste
– A dash of cayenne pepper or paprika for a kick (optional)
Instructions:
1. Melt the Butter: In a saucepan over medium heat, melt the butter. Once melted, whisk in the flour to create a roux, cooking for about 1-2 minutes until it turns a light golden color.
2. Add Milk: Gradually whisk in the milk, ensuring there are no lumps. Continue to stir until the mixture thickens.
3. Incorporate Cheese: Remove the saucepan from heat and add the shredded cheese, stirring until melted and smooth. Season with salt, pepper, and any additional spices you prefer.
Balancing Texture and Flavor
If your cheese dip is too thick, add a little more milk until you achieve your desired consistency. Conversely, if it’s too thin, allow it to simmer a bit longer to thicken. For added variety, consider mixing in cooked bacon bits, jalapeños, or garlic powder for a flavor boost.
Serving Suggestions and Pairings
Presenting your pretzels with cheese dip can be as fun as making them.
Ideas for Serving:
1. Garnishing: Sprinkle some chopped chives, parsley, or paprika over the cheese dip for a pop of color.
2. Beverage Pairings: Serve with a cold beer, sparkling water, or a tangy lemonade to complement the salty pretzels.
Exploring Flavor Variations
Don’t be afraid to get creative with your pretzels and cheese dip! Here are some ideas to inspire your culinary experimentation:
Flavoring the Pretzel Dough:
– Herbs: Incorporate dried herbs like rosemary or garlic powder into the dough for added flavor.
– Cheese: Mix shredded cheese directly into the dough for a cheesy pretzel experience.
Flavoring the Cheese Dip:
– Different Cheeses: Experiment with different types of cheese, such as pepper jack for extra spice or fontina for a creamy texture.
– Spices and Add-ins: Add caramelized onions or roasted garlic to the cheese dip for a gourmet touch.
Conclusion: Enjoying Your Homemade Soft Pretzels with Cheese Dip
Homemade soft pretzels paired with a cheesy dip are not just a snack; they are an experience that brings people together. The process of making them can be as enjoyable as eating them, allowing for creativity and personalization. Whether you’re hosting a party or indulging in a quiet night in, this recipe promises satisfaction and delight in every bite. Embrace the art of pretzel-making, savor the deliciousness of your creation, and enjoy the smiles they bring to your table. With practice, you’ll master the art of crafting perfect pretzels and a cheese dip that will have everyone coming back for more.
