
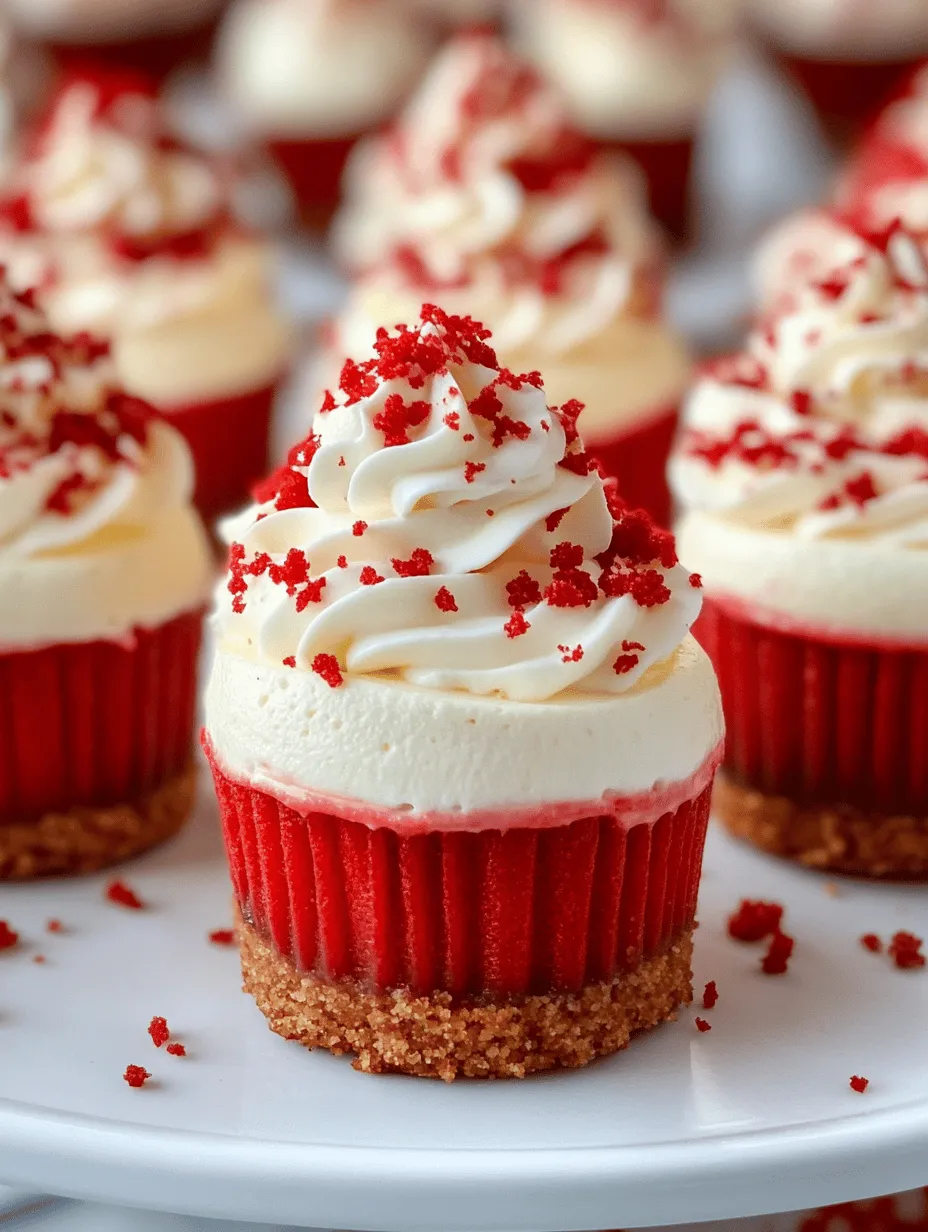
Mini red velvet cheesecakes have emerged as a beloved dessert for special occasions and celebrations, captivating hearts and taste buds alike. With their rich, creamy texture and the iconic flavor of red velvet cake, these delightful treats are a versatile addition to any dessert table. Whether it’s a birthday party, holiday gathering, or a simple craving for something sweet, mini red velvet cheesecakes are sure to impress.
As we delve into the art of creating these scrumptious mini cheesecakes from scratch, this article will provide a comprehensive step-by-step guide to ensure success in your baking endeavors. Not only will we explore the ingredients needed, but we will also highlight the importance of each component, making this an informative journey into the world of mini desserts.
The Allure of Red Velvet Cheesecake
Understanding the Origins of Red Velvet
The origins of red velvet cake date back to the 1800s, when it was originally referred to as “red cocoa cake.” This distinctive cake gained popularity during the World War II era when cocoa was scarce, and bakers began using beets to enhance the color and moisture of the cake. Over time, the rich red hue became a hallmark of the dessert, leading to its widespread appeal in the South of the United States.
The transition from red velvet cake to red velvet cheesecake was a natural evolution for dessert lovers. Cheesecake, with its smooth and creamy texture, paired beautifully with the moist, velvety layers of red velvet. This combination creates a decadent dessert that expertly marries the flavors of both cakes and cheesecakes, appealing to those who crave both.
Why Mini Cheesecakes?
In recent years, mini desserts have surged in popularity for a variety of reasons. One of the most significant advantages of mini cheesecakes is portion control. These delightful treats allow guests to indulge without the guilt of overindulgence, making them a perfect choice for gatherings where a variety of desserts are served.
Additionally, mini cheesecakes are visually appealing. Their petite size and elegant presentation make them an attractive option for dessert tables, enhancing the overall dining experience. With a variety of toppings and garnishes, each mini cheesecake can be customized to suit the occasion, making them a versatile dessert choice for any celebration.
Ingredients Breakdown for Mini Red Velvet Cheesecakes
To create the perfect mini red velvet cheesecakes, it is essential to understand the role of each ingredient. This knowledge not only enhances the flavor and texture of your dessert but also sets the foundation for a successful baking experience.
Creating the Perfect Crust
The crust of a cheesecake is a critical component that provides a contrast to the creamy filling. For mini red velvet cheesecakes, a graham cracker crust is often used.
– The Role of Graham Cracker Crumbs in Cheesecakes: Graham cracker crumbs serve as a delightful base for the crust, offering a subtle sweetness and a bit of crunch that complements the smooth filling. The texture of the crumbs provides a firm foundation for the cheesecake, ensuring it holds its shape while still being easy to serve.
– Importance of Melted Butter for Binding: Melted butter plays a crucial role in binding the graham cracker crumbs together. When mixed with the crumbs, the butter helps to create a cohesive mixture that can be pressed into the bottom of the mini cheesecake cups. This binding agent not only enhances the flavor but also adds richness to the crust.
– Sugar’s Contribution to Flavor and Texture: A touch of granulated sugar is often added to the crust mixture to enhance its sweetness and flavor profile. Sugar also contributes to the texture, helping to create a slightly crisp crust that balances the creaminess of the filling.
Crafting the Cheesecake Filling
The cheesecake filling is where the magic truly happens. This rich and creamy mixture is what makes mini red velvet cheesecakes so irresistible.
– The Significance of Cream Cheese as a Base: Cream cheese is the star of the cheesecake filling, providing a rich and creamy base that is essential for achieving the signature texture of a cheesecake. When whipped, cream cheese becomes light and airy, creating a luscious filling that is both decadent and satisfying.
– Balancing Sweetness with Granulated Sugar and Sour Cream: The sweetness of the filling is carefully balanced with granulated sugar, which enhances the flavor without overwhelming the palate. Additionally, sour cream is often included in the filling to add a slight tanginess, helping to cut through the richness of the cream cheese and create a more complex flavor profile.
– The Unique Flavor Profile of Red Velvet Cake Mix: To achieve that classic red velvet flavor, red velvet cake mix is incorporated into the cheesecake filling. This cake mix not only imparts a beautiful red hue but also adds the signature cocoa flavor that defines red velvet desserts. It’s a convenient ingredient that simplifies the baking process while ensuring a delicious outcome.
– How Eggs Contribute to the Creaminess of the Filling: Eggs are a crucial ingredient in most cheesecake recipes, and they play a vital role in achieving the desired texture. When baked, eggs help to set the filling and create a smooth, creamy consistency. They also contribute to the overall structure of the cheesecake, ensuring it holds together beautifully.
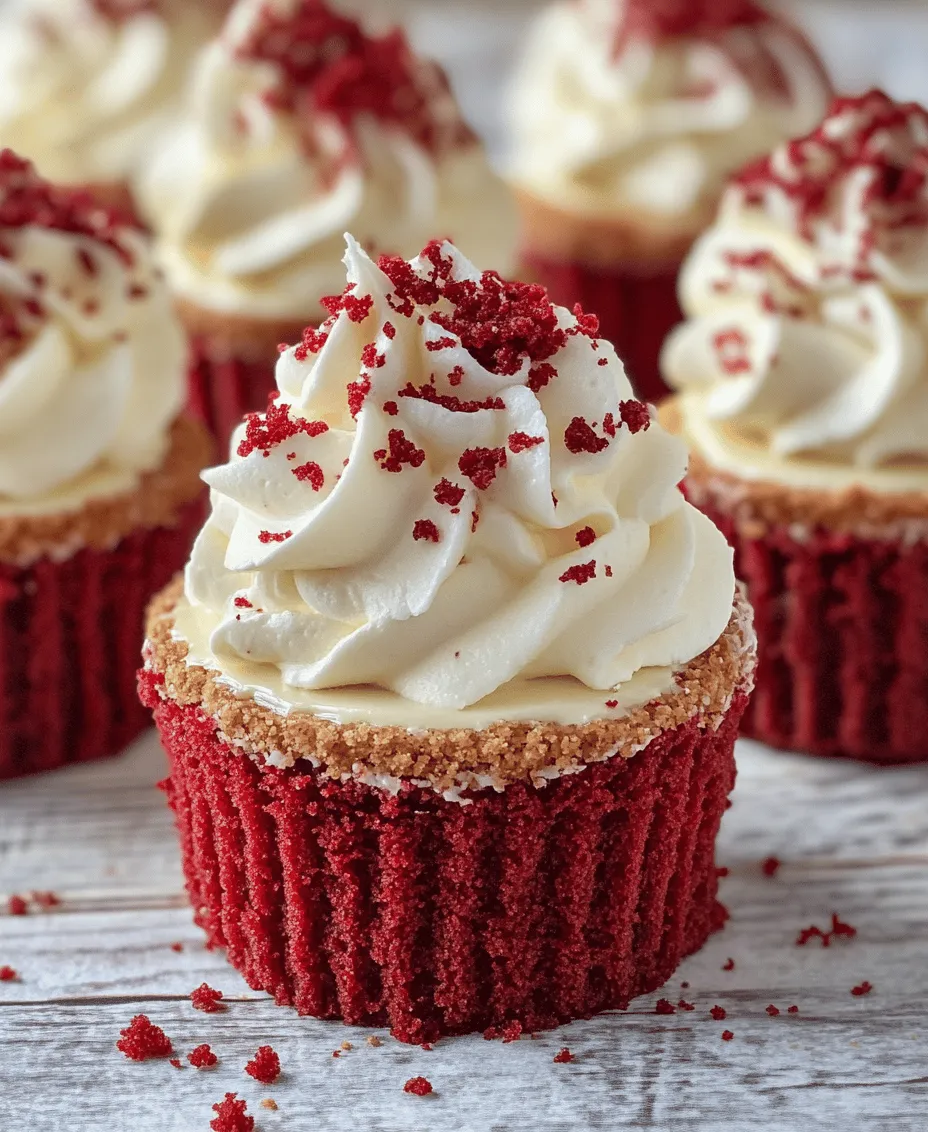
Whipped Cream Topping: The Finishing Touch
No cheesecake is complete without a luscious topping, and mini red velvet cheesecakes are no exception.
– Why Heavy Whipping Cream is Ideal for Toppings: Heavy whipping cream is the perfect choice for creating a light and airy whipped cream topping. Its high fat content allows for a stable whip that holds its shape, providing a beautiful contrast to the rich cheesecake filling.
– The Sweetness of Powdered Sugar and the Hint of Vanilla: To sweeten the whipped cream, powdered sugar is typically used. This fine sugar dissolves easily and helps create a smooth texture. A hint of vanilla extract can also be added to the whipped cream, enhancing its flavor and complementing the red velvet cake.
– Using Red Velvet Cake Crumbs for Garnish and Presentation: For an elegant touch, crushed red velvet cake crumbs can be sprinkled on top of the whipped cream. This not only adds visual appeal but also reinforces the red velvet flavor, making each bite a delightful experience.
Step-by-Step Guide to Making Mini Red Velvet Cheesecakes
Now that we’ve explored the ingredients and their significance, let’s dive into the step-by-step process of making mini red velvet cheesecakes.
Preparing the Crust
Before we can create the creamy filling, we need to start with the crust.
– Preheating the Oven: Why Temperature Matters: The first step in preparing the crust is preheating your oven to 325°F (160°C). Preheating ensures that the crust bakes evenly and achieves the perfect texture.
– Mixing Crust Ingredients: Achieving the Perfect Texture: In a mixing bowl, combine graham cracker crumbs, melted butter, and granulated sugar. Mix until the crumbs are well-coated and the mixture resembles wet sand. This consistency is crucial for creating a solid crust that won’t crumble when serving.
– Baking and Cooling the Crust: Key Tips for Success: Once the crust mixture is combined, press it firmly into the bottom of your mini cheesecake cups or a muffin tin lined with paper liners. Bake the crust for about 8-10 minutes, until it’s lightly golden. Allow the crust to cool completely before adding the cheesecake filling. This step is vital to prevent the filling from melting into the crust, ensuring a clean separation between the two layers.
Making the Cheesecake Filling
With the crust prepared, it’s time to create the luscious cheesecake filling that will make these mini red velvet cheesecakes unforgettable.
The following sections will provide detailed instructions on how to combine the ingredients and achieve the perfect consistency for the filling. By following these steps carefully, you’ll be well on your way to creating a dessert that is both delightful and dreamy.
Stay tuned for the continuation of this recipe, where we will guide you through the filling process and the final touches that will elevate your mini red velvet cheesecakes to new heights of deliciousness.
Beating the Cream Cheese to the Right Consistency
To achieve the perfect texture for your mini red velvet cheesecakes, starting with the cream cheese is essential. Use full-fat cream cheese for the best results, as it provides a rich and creamy consistency that complements the other ingredients. Begin by letting the cream cheese sit at room temperature for about 30 minutes. This step softens it, making it easier to blend smoothly.
When you’re ready to mix, place the softened cream cheese in a large mixing bowl. Using an electric mixer, beat the cream cheese on medium speed until it becomes light and fluffy, typically about 2-3 minutes. This aeration helps create a light texture in your cheesecake filling. Avoid overmixing at this stage, as it can incorporate too much air, leading to cracks during baking.
Incorporating Ingredients: Importance of Mixing Order
Once your cream cheese is ready, it’s time to incorporate the other ingredients. The order in which you add them can significantly affect the final texture of your cheesecake. Start by adding granulated sugar to the cream cheese and mix until combined. The sugar not only sweetens the filling but also helps to break down the cream cheese further.
Next, add in the eggs one at a time, mixing well after each addition. Be sure to scrape down the sides of the bowl to ensure that all ingredients are fully incorporated. After the eggs, mix in vanilla extract and buttermilk, which adds moisture and a slight tanginess that complements the red velvet flavor. Finally, gently fold in the cocoa powder, which gives the cheesecake its signature color and taste. Mixing in this order allows for an even distribution of flavors and a smooth filling.
Filling the Crusts: Techniques for Mess-Free Pouring
With your creamy filling prepared, it’s time to fill the crusts. To avoid a mess, consider using a liquid measuring cup or a ladle for pouring the cheesecake batter into the crusts. This will help control the flow and keep the batter contained within the mini cheesecake cups.
If you’re using a standard muffin tin, be sure to fill each cup about 3/4 full to allow room for the cheesecakes to rise slightly during baking. An even fill ensures uniform baking and presents a professional look. If you notice any air bubbles, gently tap the muffin tin on the countertop to release them before baking.
Baking the Cheesecakes
Understanding Baking Times: What to Look For
Baking mini cheesecakes is a delicate process. Preheat your oven to 325°F (163°C) and prepare a water bath to help regulate the temperature, preventing the cheesecakes from cracking. Place a larger baking pan filled with hot water on the oven rack beneath your cheesecakes. This method provides moisture, which is crucial for a creamy texture.
Bake the mini red velvet cheesecakes for about 18-22 minutes. You’ll know they’re done when the edges are set but the center still has a slight jiggle. This residual heat will continue to cook the center as they cool. Overbaking can lead to a dry texture, so keep a close eye on them during the last few minutes.
Preventing Cracks: The Science Behind Cooling in the Oven
To prevent cracks from forming on the surface of your cheesecakes, it’s important to cool them gradually. Once you’ve baked them, turn off the oven and crack the door open, allowing the cheesecakes to cool slowly in the residual heat. This gradual cooling process helps to stabilize their structure.
Let the cheesecakes sit in the oven for an additional 30 minutes before removing them. After that, transfer them to a wire rack to cool to room temperature. Chilling them too quickly can cause the surface to crack, so be patient during this cooling phase.
Chilling the Cheesecakes
Why Chilling is Crucial for Cheesecake Texture
Chilling is a critical step for achieving the perfect cheesecake texture. This process allows the flavors to meld and the filling to set, resulting in a smooth and creamy consistency. If you skip this step, you may end up with a loose filling that doesn’t hold its shape when served.
Ideal Chilling Times for Best Flavor Development
Once the cheesecakes have cooled to room temperature, cover them with plastic wrap and refrigerate for at least 4 hours, though overnight is preferable. The longer they chill, the better the flavors will develop. This resting time also allows the cheesecake to firm up, making it easier to slice and serve.
Preparing the Whipped Cream Topping
Techniques for Achieving Stiff Peaks in Whipped Cream
While your mini cheesecakes chill, you can prepare the whipped cream topping. Start with a mixing bowl and beaters that are chilled, as this helps the cream whip faster. Use heavy whipping cream for the best results; it should contain at least 36% fat for the cream to hold its shape.
Beat the cream on medium-high speed until soft peaks form, then gradually add powdered sugar to taste. Continue whipping until stiff peaks form, which means the cream will hold its shape without collapsing. Be careful not to overbeat, as this can turn the cream into butter.
Flavoring the Whipped Cream: Variations to Consider
For an extra touch of flavor, consider adding a splash of vanilla extract or a hint of almond extract when whipping the cream. For a festive twist, you could even incorporate a bit of cocoa powder or cream cheese into the whipped cream for a more decadent topping that ties in with the red velvet theme.
Assembling the Cheesecakes
Tips for Removing Cheesecakes from the Pan
Removing your mini cheesecakes from the muffin tin can be tricky, but with the right technique, it can be done smoothly. Allow the cheesecakes to sit at room temperature for a few minutes after chilling. This slight warming helps to loosen them from the sides of the pan.
Using a small offset spatula, gently run it around the edges of each cheesecake to separate it from the pan. If you used cupcake liners, carefully peel them away. For a clean presentation, use a sharp knife to cut the cheesecakes from the bottom if they stick.
Perfecting the Dollop of Whipped Cream
Once your cheesecakes are out of the pan, it’s time to top them with whipped cream. Using a piping bag fitted with a star tip can create a beautiful dollop of whipped cream on each cheesecake. If you don’t have a piping bag, you can use a spoon to dollop the cream on top.
Creative Garnish Ideas with Red Velvet Cake Crumbs
For a final touch, consider garnishing your mini cheesecakes with red velvet cake crumbs. Simply crumble a small piece of leftover red velvet cake and sprinkle it over the whipped cream. This not only adds visual appeal but also enhances the flavor profile of your dessert.
Serving Suggestions and Pairings
Best Occasions for Mini Cheesecakes
Mini red velvet cheesecakes are perfect for various occasions. Their rich flavor and stunning presentation make them ideal for celebrations such as birthdays, anniversaries, and holidays. These mini desserts can also be a hit at potlucks and gatherings, where guests will appreciate their individual servings.
Ideal Beverage Pairings
To complement the flavors of your mini red velvet cheesecakes, consider pairing them with coffee or tea. A rich, dark roast coffee enhances the chocolate notes, while a smooth chai or vanilla tea provides a nice contrast. For a more sophisticated touch, serve with a glass of dessert wine, such as late harvest Riesling or a sweet Moscato.
Nutritional Insights of Mini Red Velvet Cheesecakes
Understanding the Ingredients’ Nutritional Value
Each mini red velvet cheesecake contains a blend of delicious ingredients that contribute to its overall nutritional profile. While these treats are indulgent, understanding their caloric content and macronutrient breakdown can help you enjoy them more mindfully.
Typically, each cheesecake may contain around 250 calories, with about 15 grams of fat, 20 grams of carbohydrates, and 3 grams of protein. Keep in mind that these values can vary based on portion size and ingredient substitutions.
Healthier Ingredient Substitutions to Consider
For those looking to make healthier choices, consider substituting some ingredients without sacrificing flavor. You can use reduced-fat cream cheese or Greek yogurt in place of regular cream cheese to cut down on calories while maintaining creaminess. Additionally, swapping granulated sugar for a natural sweetener like agave or honey can reduce the overall sugar content.
Conclusion: The Joy of Baking Mini Red Velvet Cheesecakes
Mini red velvet cheesecakes are not only visually stunning but also a deliciously rich treat that can elevate any occasion. The combination of a buttery graham cracker crust, a creamy filling infused with red velvet flavor, and a light whipped cream topping creates a harmonious balance of textures and tastes. By following the detailed instructions provided, you can confidently create these delightful mini desserts at home, impressing friends and family with your baking skills.
Embrace the joy of baking and indulge in these dreamy cheesecakes that are sure to leave a lasting impression. Whether enjoyed at a special gathering or as a sweet treat for yourself, mini red velvet cheesecakes are a delightful way to celebrate life’s sweet moments.
