Introduction to Dutch Oven Pulled Chicken
Dutch oven cooking is an age-old method that has stood the test of time. This versatile kitchen tool, often made from cast iron, is renowned for its ability to evenly distribute heat and retain moisture, making it an ideal choice for braising and slow-cooking meats. One of the most beloved recipes to emerge from this cooking technique is Dutch Oven Pulled Chicken. Not only is it a dish that embodies comfort food, but it also serves as a perfect centerpiece for family dinners and gatherings alike.
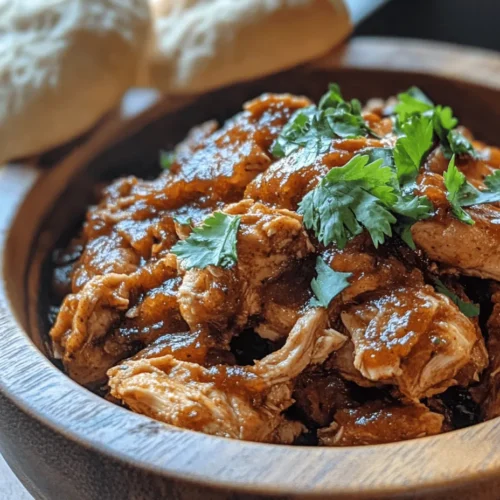
The process of making pulled chicken is simple, yet the end result is undeniably impressive. Imagine tender, juicy chicken that pulls apart effortlessly, bursting with flavor and perfect for sandwiches, tacos, or served atop a bed of rice. With its deep, savory profile and the ability to be customized with various sauces and spices, Dutch Oven Pulled Chicken is a versatile addition to any meal repertoire. Whether you’re hosting a weekend barbecue or looking for a comforting weeknight dinner, this recipe promises to satisfy every palate.
In this article, we will explore not only the convenience and deliciousness of Dutch Oven Pulled Chicken but also the essential ingredients that contribute to its rich flavor. We will guide you step-by-step through the preparation process, ensuring that you have all the tips and tricks necessary to create this mouth-watering dish in your own kitchen.
Understanding the Ingredients
Exploring Chicken Thighs
At the heart of our Dutch Oven Pulled Chicken recipe are chicken thighs, specifically bone-in and skinless varieties. Choosing chicken thighs over chicken breasts can make all the difference in terms of flavor and tenderness. Thighs have a higher fat content than breasts, which helps to keep the meat moist during the cooking process. This fat also contributes to a rich, savory flavor that is essential for pulled chicken.
Bone-in thighs not only enhance the taste but also add to the overall juiciness of the dish. The bones release collagen as they cook, which helps to create a luscious broth that infuses the chicken with even more flavor. When you pull the meat apart after cooking, you’ll find it is succulent and has a delightful texture that pairs perfectly with the barbecue sauce.
The Role of Aromatics
Aromatics are the unsung heroes of many recipes, and they play a crucial role in elevating the flavor profile of our pulled chicken. In this dish, we use onions and garlic as our primary aromatics.
Onions, when sautéed, develop a sweet and savory depth that forms the flavor base of the dish. They cook down to a caramelized state, releasing their natural sugars and providing a rich, underlying sweetness. Garlic, on the other hand, adds a pungent, aromatic quality that complements the chicken beautifully. Together, these aromatics create a fragrant foundation that enhances the overall taste of the dish, ensuring that every bite is packed with flavor.
The Importance of Barbecue Sauce
No pulled chicken recipe is complete without barbecue sauce, which is the star ingredient that ties everything together. The variety of barbecue sauces available can greatly affect the flavor profile of your dish, allowing for personalized flavor exploration. Whether you prefer a tangy vinegar-based sauce, a sweet and sticky Kansas City-style sauce, or a smoky Texas barbecue sauce, the choice is entirely yours.
When selecting a barbecue sauce, consider the balance of flavors you desire. A sauce with a good mix of acidity, sweetness, and spice will complement the richness of the chicken thighs. For those who like to experiment, you can even make your own homemade barbecue sauce, tailoring it to your taste preferences, which adds an extra layer of satisfaction to this dish.
Spices That Make a Difference
The right spices can transform a simple dish into something extraordinary. In our Dutch Oven Pulled Chicken recipe, we utilize a blend of spices that include paprika, onion powder, garlic powder, and cayenne pepper.
– Paprika: This spice adds a subtle smokiness and a vibrant color to the dish. It enhances the overall flavor without overpowering the natural taste of the chicken.
– Onion Powder and Garlic Powder: These spices provide an additional layer of flavor, complementing the fresh aromatics and ensuring that the dish is robust and satisfying.
– Cayenne Pepper: For those who enjoy a bit of heat, cayenne pepper is the perfect addition. It adds a kick that balances the sweetness of the barbecue sauce and the rich flavors of the chicken.
This carefully curated blend of spices allows for depth in flavor and ensures that your pulled chicken has a well-rounded taste that is both comforting and exciting.
Preparation Steps for Dutch Oven Pulled Chicken
Creating Dutch Oven Pulled Chicken is a straightforward process that begins with a few essential preparation steps. These steps are crucial for ensuring that your dish turns out flavorful and tender.
Prepping the Chicken
Before diving into the cooking process, it’s important to properly prepare your chicken thighs. Start by rinsing the chicken under cold water and patting it dry with paper towels. Removing excess moisture is key to achieving a good sear later on.
Once dried, season the chicken thighs generously with salt and pepper. This basic seasoning will enhance the natural flavor of the meat and set the stage for the other spices and ingredients to shine. You can also sprinkle the selected spices—paprika, onion powder, garlic powder, and cayenne pepper—over the chicken, ensuring that each piece is evenly coated. This step not only infuses flavor directly into the chicken but also enhances the color as it cooks.
Searing the Chicken
Searing the chicken is a critical step that should not be skipped. It may seem like an extra effort, but achieving a perfect sear is essential for flavor development. To begin, heat a tablespoon of oil in your Dutch oven over medium-high heat. Once the oil is shimmering, carefully place the seasoned chicken thighs skin-side down into the pot.
Allow the chicken to sear undisturbed for about 5-7 minutes, or until a beautiful golden-brown crust forms. This process creates a rich, caramelized layer on the chicken, adding depth to the overall flavor of the dish. After the first side is seared, flip the thighs and sear the other side for an additional 5-7 minutes. Once both sides are browned, remove the chicken from the pot and set it aside. This step may seem simple, but it lays the foundation for a dish that is packed with rich, complex flavors.
Sautéing Aromatics
With the chicken seared and set aside, it’s time to turn your attention to the aromatics. Keep the Dutch oven on medium heat and add the chopped onions to the pot. The goal here is to sauté the onions until they become translucent and start to caramelize, which typically takes about 5-8 minutes.
Once the onions are softened, add minced garlic and continue to sauté for an additional 1-2 minutes. The garlic should become fragrant but not burnt, as burnt garlic can impart a bitter taste to the dish. This step is crucial as it releases the aromatic oils from the onions and garlic, which will infuse the chicken with flavor once everything is combined.
Deglazing the Pot
After sautéing the onions and garlic, it’s essential to deglaze the pot. Deglazing is the process of adding a liquid to a hot pan to loosen and dissolve the browned bits of food stuck to the bottom. These bits are packed with flavor and will enhance your dish significantly.
To deglaze, pour in a splash of chicken broth or water, scraping the bottom of the pot with a wooden spoon to release those flavorful bits. This step not only adds moisture to the pot but also ensures that all the flavors from the chicken and aromatics are incorporated into the final dish. Once deglazing is complete, you’ll have a flavorful base ready for the chicken and sauce to join.
Cooking Process for Dutch Oven Pulled Chicken
The cooking process for Dutch Oven Pulled Chicken is where the magic truly happens. With all the preparation complete, it’s time to bring everything together for a comforting and satisfying meal.
Combining Chicken and Sauce
Start by returning the seared chicken thighs to the Dutch oven, placing them directly over the sautéed onions and garlic. Pour your choice of barbecue sauce over the chicken, ensuring that each piece is well-coated. The combination of the seasoned chicken, aromatic base, and rich barbecue sauce creates a symphony of flavors that will meld beautifully during the cooking process.
Once the chicken is coated in sauce, cover the Dutch oven with its lid. This is important for trapping moisture and allowing the chicken to cook through without drying out.
Slow Cooking for Tenderness
The final step in making Dutch Oven Pulled Chicken is the slow cooking process, which is essential for achieving that tender, pull-apart texture. Reduce the heat to low and allow the chicken to simmer gently for about 1.5 to 2 hours, or until the chicken is fork-tender and easily pulls apart.
During this time, the flavors will develop and deepen, creating a dish that is not only delicious but also comforting. The slow cooking method allows the chicken to absorb the smoky barbecue sauce and the aromatic essence of the onions and garlic. As the chicken cooks, it will release juices that combine with the sauce, ensuring every bite is rich and flavorful.
Stay tuned for the final steps where we’ll talk about shredding the chicken, serving suggestions, and how to make this dish even more special. Dutch Oven Pulled Chicken is the perfect way to bring family and friends together, and with these steps, you’ll be well on your way to mastering this delightful recipe.
The Importance of Low and Slow Cooking
One of the standout features of Dutch Oven Pulled Chicken is the technique of low and slow cooking. This method not only ensures that the chicken becomes meltingly tender but also allows the flavors of the ingredients to meld beautifully. Ideally, you should set your oven temperature to around 300°F (150°C). Cooking the chicken at this lower temperature for an extended period—typically around 3 to 4 hours—enables the connective tissues in the chicken to break down, resulting in irresistibly tender meat.
When cooking pulled chicken, it’s crucial to maintain a consistent temperature. If your oven tends to fluctuate, consider using a meat thermometer to monitor the internal temperature of the chicken. The chicken is done when it reaches an internal temperature of 165°F (74°C). However, for optimal tenderness, you can let it cook until it reaches 185°F (85°C) or even higher. At this point, the chicken will be juicy, flavorful, and ready to shred.
Shredding the Chicken
Once your chicken has cooked to perfection, it’s time to shred it. You can use a couple of techniques to ensure you get the best results while keeping the meat moist. Here are some effective methods:
1. Two Fork Method: This is the most common technique. Take two forks and place them on either side of the chicken breast or thigh. Pull the forks in opposite directions, and the meat will easily shred apart. This method allows you to control the shredding size, whether you prefer larger chunks or finer shreds.
2. Hand Method: For those who want a more hands-on approach, you can use your fingers to shred the chicken. Make sure to let the chicken cool slightly before handling it. This method can be easier for larger pieces and allows for quick shredding.
3. Mixer Method: If you’re dealing with a large batch, you might consider using a stand mixer with a paddle attachment. Place the cooked chicken in the bowl and mix on low speed for just a few seconds. This method is efficient and can save you time, especially when preparing food for a crowd.
Regardless of the method you choose, aim to shred the chicken while it’s still warm. This helps retain moisture, ensuring that every bite remains juicy and flavorful.
Mixing Back into Sauce
Once you’ve shredded the chicken, the next step is to mix it back into the sauce. This is a critical step for maximizing flavor absorption. Here’s how to do it:
1. Combine Shredded Chicken with Sauce: In the Dutch oven, gently fold the shredded chicken into the sauce. Make sure every piece of chicken is coated with the sauce, enhancing the flavor profile.
2. Simmer Together: Allow the shredded chicken to simmer in the sauce for an additional 15-20 minutes over low heat. This not only allows the chicken to absorb more flavor but also ensures that it is heated through. Stir occasionally to prevent sticking.
3. Adjust Seasoning: After mixing, taste the mixture. Depending on your preference, you may want to add more spices, salt, or a splash of vinegar for acidity. Adjusting the seasoning at this stage can elevate the entire dish.
Serving Suggestions for Dutch Oven Pulled Chicken
Dutch Oven Pulled Chicken is incredibly versatile and can be served in various delightful ways. Here are some ideas for enjoying this flavorful dish:
Classic Sandwiches
One of the most popular ways to serve pulled chicken is on a bun. Here’s how to create a classic pulled chicken sandwich:
– Choose Your Buns: Select soft hamburger buns, brioche rolls, or even whole grain options for a healthier twist. Toasting the buns lightly adds an extra layer of texture.
– Layering: Spoon a generous portion of the pulled chicken onto the bottom half of the bun. You can add a drizzle of the sauce for extra moisture.
– Toppings: Enhance your sandwich with your favorite toppings. Consider coleslaw for crunch, pickles for tang, or sliced jalapeños for heat. A slice of cheese can also be a delightful addition.
Creative Serving Ideas
While sandwiches are fantastic, there are countless other ways to enjoy Dutch Oven Pulled Chicken:
– Over Rice: Serve the pulled chicken over a bed of fluffy white rice or brown rice for a hearty meal. You can add steamed vegetables for added nutrition.
– In Tacos: Use corn or flour tortillas to create delicious pulled chicken tacos. Top with diced onions, fresh cilantro, and a squeeze of lime for a refreshing twist.
– On Salads: For a lighter option, serve the pulled chicken on a bed of mixed greens. Drizzle with your favorite dressing and add toppings like avocado, cherry tomatoes, or corn.
Garnishing for Flavor and Presentation
Presentation can elevate your dish, and garnishing plays a significant role in that. Fresh herbs are an excellent way to enhance both flavor and visual appeal. Here are some garnishing tips:
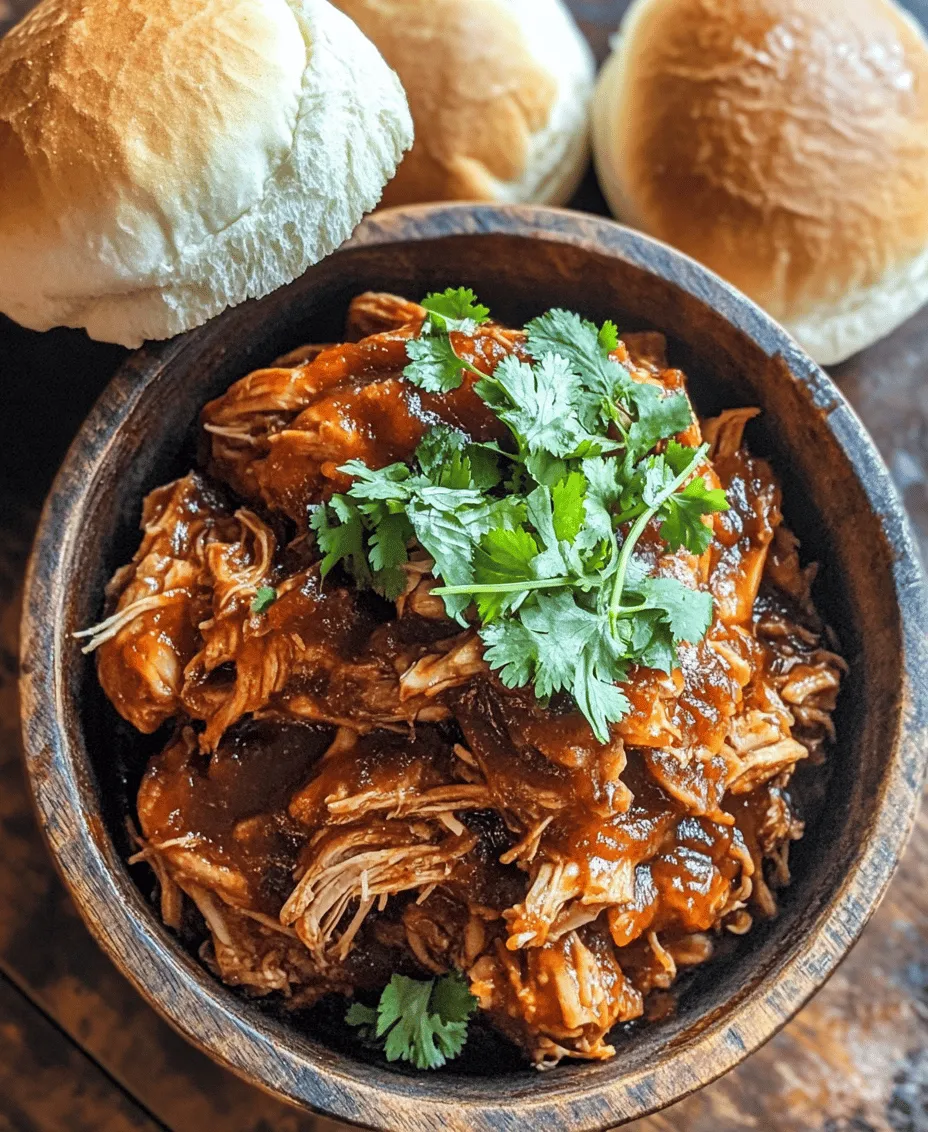
– Cilantro or Parsley: Sprinkle freshly chopped cilantro or parsley over the pulled chicken just before serving. This adds a pop of color and a burst of freshness that complements the rich flavors of the dish.
– Lime Wedges: Serve with lime wedges on the side for diners to squeeze over their chicken. The acidity brightens the dish and balances the richness.
– Hot Sauce: For those who enjoy a kick, a drizzle of hot sauce can take the flavor profile to the next level.
Nutritional Information and Benefits
Dutch Oven Pulled Chicken is not only delicious but also provides several nutritional benefits. Here’s what you need to know:
Balanced Meal Components
– High-Quality Protein: Chicken, especially thighs, is a great source of lean protein, essential for muscle repair and overall health.
– Vegetables and Spices: The addition of vegetables like onions and garlic not only enhances the flavor but also contributes vitamins and minerals. Spices like paprika and cumin offer antioxidants and anti-inflammatory benefits.
Customization for Dietary Preferences
This recipe can easily be customized to fit various dietary needs:
– Low-Carb Options: To make a low-carb version, serve the pulled chicken on lettuce wraps instead of buns or tortillas. Adding avocado can also increase healthy fats while keeping the meal low in carbs.
– Gluten-Free: Ensure that you use gluten-free buns or tortillas if you are gluten-sensitive. Many brands offer excellent gluten-free options that pair well with pulled chicken.
Storing and Reheating Dutch Oven Pulled Chicken
If you find yourself with leftovers, storing and reheating properly is crucial to maintaining the quality of the dish.
Proper Storage Techniques
1. Refrigeration: Allow the pulled chicken to cool completely before transferring it to an airtight container. It can be stored in the refrigerator for up to 3-4 days.
2. Freezing: For longer storage, you can freeze the pulled chicken. Place it in a freezer-safe container or resealable bag, ensuring to remove as much air as possible. It can last up to 3 months in the freezer.
Reheating Tips
When it’s time to enjoy your leftovers, reheating properly ensures that the chicken remains moist:
– Stovetop Method: For best results, reheat the chicken in a saucepan over low heat. Add a splash of chicken broth or water to keep it moist as you heat.
– Microwave Method: If you’re short on time, you can use the microwave. Place the chicken in a microwave-safe bowl, cover it with a damp paper towel, and heat in short intervals to prevent drying out.
Conclusion: Enjoying Your Dutch Oven Pulled Chicken
In summary, Dutch Oven Pulled Chicken is a delightful and versatile dish that combines tender, flavorful chicken with a rich sauce. The technique of low and slow cooking ensures that every bite melts in your mouth, making it a perfect choice for family meals or gatherings with friends.
With the myriad of serving options, from classic sandwiches to creative tacos and salads, this recipe can easily adapt to suit any occasion. Plus, its nutritional benefits and ease of preparation make it a standout dish in any kitchen.
We encourage you to try your hand at this comforting recipe and enjoy the delightful flavors of Dutch Oven Pulled Chicken. Whether you’re feeding a crowd or simply treating yourself to a comforting meal, this recipe will surely impress. Happy cooking!