Introduction
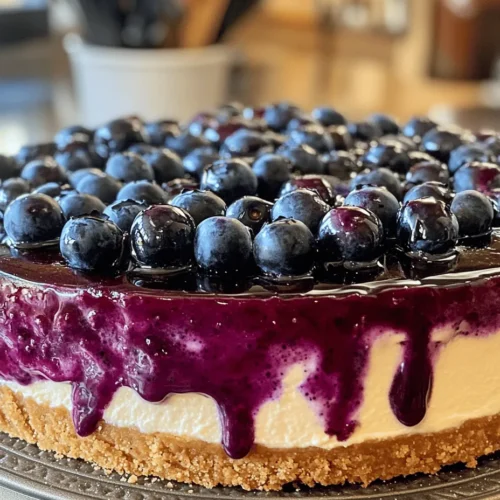
Cheesecake is a timeless dessert that has captivated taste buds around the world for centuries. Its popularity can be attributed to its creamy texture, rich flavor, and the endless possibilities for flavor combinations. From classic New York-style cheesecakes to exotic fruit-infused variations, this versatile dessert has something for everyone. Among the many flavors that have graced the humble cheesecake, blueberry cheesecake stands out as a favorite for many. The harmonious blend of rich, creamy cheesecake with the sweet and tangy notes of fresh blueberries creates an irresistible dessert that delights the senses.
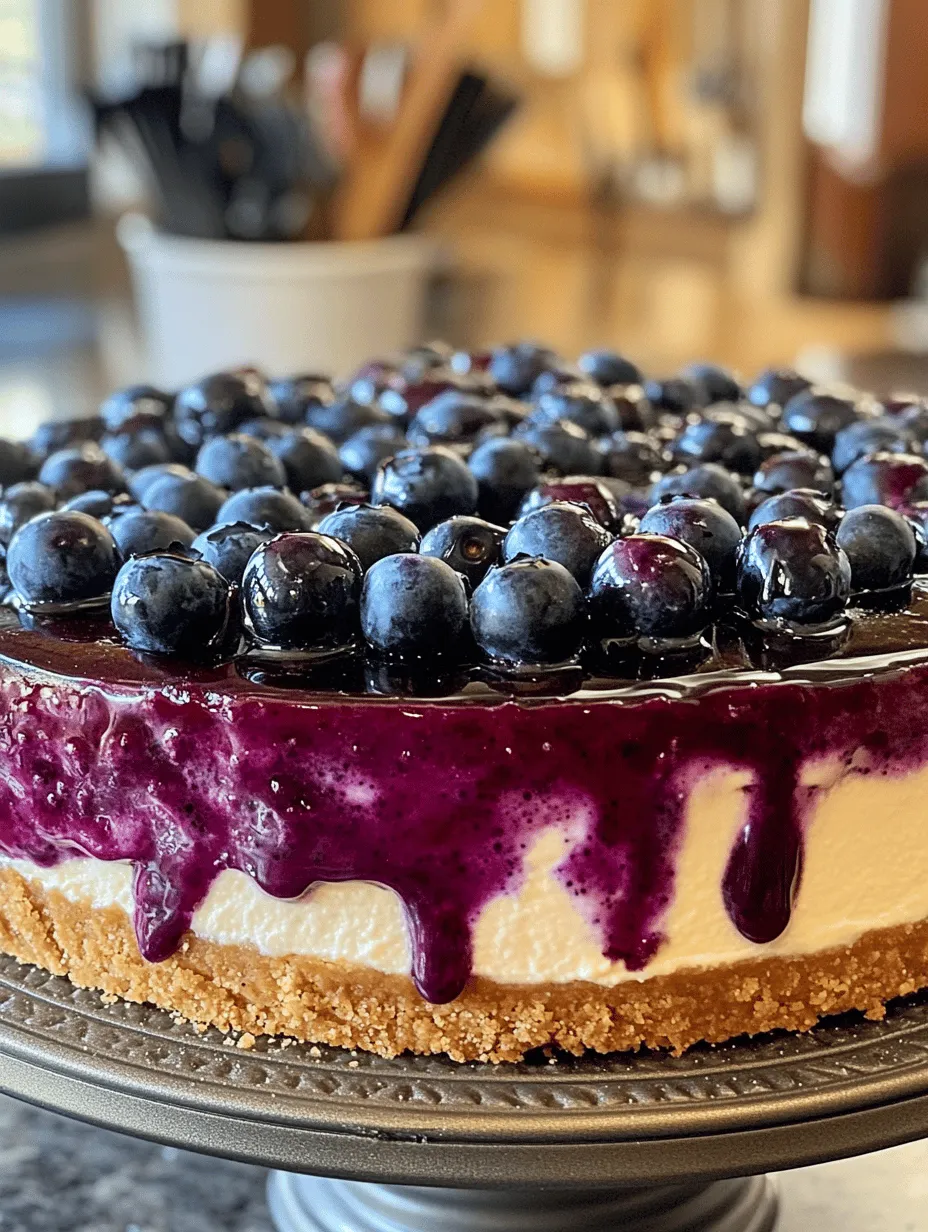
This article will guide you through the process of making the best blueberry cheesecake you’ve ever tasted. Using fresh, high-quality ingredients is crucial for achieving optimal flavor and texture. The promise of this article is a comprehensive, step-by-step recipe that will help you craft a blueberry cheesecake that’s not only delicious but also visually stunning. Whether you’re preparing for a special occasion or simply craving a sweet treat, this blueberry cheesecake is sure to impress.
Understanding the Ingredients
To create the best blueberry cheesecake, it’s essential to understand the key ingredients and their roles in the recipe. Each component contributes to the overall flavor and texture, ensuring that your cheesecake is nothing short of perfection.
Cream Cheese
At the heart of any cheesecake is cream cheese, which provides the rich, creamy base that defines this dessert. It’s important to use full-fat cream cheese for the best results, as it yields a smoother and more decadent filling. Be sure to let the cream cheese sit at room temperature before mixing; this will help avoid lumps in your batter and ensure a velvety texture.
Sour Cream
Sour cream is another critical ingredient that adds richness and a subtle tang to the cheesecake filling. Its acidity complements the sweetness of the blueberries and balances the overall flavor profile. Using sour cream also contributes to a creamy texture, making your cheesecake even more indulgent.
Fresh Blueberries
Fresh blueberries are the star of this recipe, imparting a burst of flavor and natural sweetness. When selecting blueberries, look for plump, firm berries with a deep blue color. Avoid any that are shriveled or have a dull appearance. If fresh blueberries are unavailable, you can opt for frozen blueberries, but be sure to thaw and drain them before use to prevent excess moisture in the cheesecake.
Graham Cracker Crust
The graham cracker crust provides a delightful crunch and serves as a perfect contrast to the smooth cheesecake filling. Made from crushed graham crackers, sugar, and melted butter, this crust is easy to prepare and adds a delicious flavor to the dessert. The buttery richness of the crust complements the creamy filling beautifully, creating a well-rounded dessert experience.
When it comes to selecting ingredients for your blueberry cheesecake, quality matters. Fresh, organic blueberries, high-quality cream cheese, and pure vanilla extract will elevate your cheesecake to the next level. By choosing the best ingredients, you’ll ensure that your cheesecake not only tastes amazing but also showcases the vibrant flavors of its components.
Preparing the Crust
Now that you understand the importance of each ingredient, it’s time to dive into the first step of the cheesecake-making process: preparing the crust. A well-made graham cracker crust will set the foundation for your cheesecake, providing the perfect balance of texture and flavor.
Step-by-Step Instructions for the Crust
1. Gather Your Ingredients: For the graham cracker crust, you will need:
– 1 ½ cups graham cracker crumbs
– ½ cup granulated sugar
– ½ cup unsalted butter, melted
2. Preheat the Oven: Preheat your oven to 350°F (175°C). This will ensure that the crust bakes evenly and achieves a golden color.
3. Mix the Dry Ingredients: In a medium-sized mixing bowl, combine the graham cracker crumbs and granulated sugar. Stir until well combined, ensuring that the sugar is evenly distributed throughout the crumbs.
4. Add the Melted Butter: Pour the melted butter into the graham cracker mixture. Use a fork or your fingers to blend the ingredients together until the mixture resembles wet sand. The butter should be thoroughly mixed in, with no dry patches remaining.
5. Press the Crust into the Pan: Transfer the graham cracker mixture into a 9-inch springform pan. Using the bottom of a measuring cup or your hands, press the mixture firmly and evenly across the bottom and slightly up the sides of the pan. This step is crucial, as an evenly pressed crust will hold its shape during baking and provide a solid base for the cheesecake.
6. Bake the Crust: Place the crust in the preheated oven and bake for 8-10 minutes, or until it turns a light golden brown. Keep a close eye on it to prevent over-baking, as a perfectly baked crust will enhance the overall flavor of your cheesecake.
7. Cool the Crust: Once baked, remove the crust from the oven and allow it to cool completely in the pan. This step is essential before adding the cheesecake filling, as a hot crust can lead to a soupy filling.
Baking Tips for Achieving the Perfect Golden Crust Texture
– Use Fresh Ingredients: Fresh graham crackers and unsalted butter will yield the best flavor. Make sure your butter is melted but not too hot, as excessive heat can alter the texture of the crust.
– Pack it Firmly: Pressing the crust mixture firmly into the pan will prevent it from crumbling when you cut into the cheesecake. Aim for an even thickness of about ¼ inch.
– Monitor Baking Time: Keep an eye on the crust while it bakes. Ovens can vary, so yours might bake faster or slower than the suggested time. Look for a light golden color as an indicator of doneness.
– Let it Rest: Allowing the crust to cool completely before adding the filling is crucial. A hot crust can affect the setting of the cheesecake and may lead to a less-than-ideal texture.
With your graham cracker crust prepared and cooled, you’re now ready to move on to crafting the creamy cheesecake filling. This filling will be the heart of your blueberry cheesecake and requires careful attention to detail to achieve the perfect consistency and flavor.
Crafting the Cheesecake Filling
The cheesecake filling is where the magic happens. It’s essential to use room temperature ingredients for a smooth batter that incorporates seamlessly. Follow these step-by-step instructions to create a luscious filling that will elevate your blueberry cheesecake to new heights.
Step-by-Step Guide to Mixing the Filling
1. Gather Your Ingredients: For the cheesecake filling, you will need:
– 16 oz (two packages) full-fat cream cheese, softened to room temperature
– ½ cup granulated sugar
– 2 large eggs, at room temperature
– 1 cup sour cream, at room temperature
– 1 teaspoon pure vanilla extract
– 1 tablespoon lemon juice (freshly squeezed is best)
2. Beat the Cream Cheese: In a large mixing bowl, use an electric mixer to beat the softened cream cheese on medium speed until it becomes smooth and creamy. This process should take about 2-3 minutes. Be sure to scrape down the sides of the bowl to ensure even mixing.
3. Incorporate Sugar: Once the cream cheese is smooth, add the granulated sugar. Continue to beat the mixture on medium speed until the sugar is fully incorporated and the mixture is fluffy.
4. Add Sour Cream and Vanilla: Next, add the sour cream and vanilla extract. Mix on low speed until combined, being careful not to over-mix at this stage.
5. Incorporate Eggs: Add the eggs one at a time, beating gently after each addition. It’s important to mix just until incorporated and avoid overmixing, as this can introduce air bubbles that may lead to cracks in your cheesecake.
6. Balance with Lemon Juice: Finally, add the freshly squeezed lemon juice. This ingredient enhances the flavor of the cheesecake, providing a bright, tangy contrast to the sweetness of the filling. Mix just until the lemon juice is combined.
Techniques for Beating Cream Cheese to Avoid Lumps
– Soften Thoroughly: Make sure your cream cheese is at room temperature before mixing. If it’s too cold, it will not blend well and can create lumps in your filling.
– Use a High-Speed Mixer: An electric mixer is ideal for achieving a smooth consistency, but if you don’t have one, a whisk can work; just be prepared for a bit more effort.
– Scrape the Bowl: Regularly scrape down the sides of the mixing bowl to ensure all ingredients are well incorporated. This will help prevent lumps from forming during mixing.
Properly Incorporating Eggs Without Overmixing
– Add One at a Time: Introducing the eggs one at a time allows for better incorporation and reduces the risk of overmixing.
– Mix on Low Speed: Use the lowest speed setting on your mixer when adding eggs and mix just until combined. This minimizes the amount of air introduced into the batter.
– Check for Smoothness: Once all ingredients are combined, take a moment to check for any visible lumps. If you notice any, you can give the batter a gentle stir with a spatula to smooth it out.
The creamy cheesecake filling is now ready to be combined with the fresh blueberries, creating a delectable dessert that is both visually appealing and mouthwateringly delicious. Stay tuned for the next steps, where we will explore how to incorporate the blueberries and bake the cheesecake to perfection.
Assembling and Baking the Cheesecake
Once you’ve prepared your crust and the creamy filling, it’s time to bring these two components together to create the perfect blueberry cheesecake.
Pouring and Smoothing the Filling
Begin by pouring the cheesecake filling over the cooled crust. Use a spatula to gently spread the filling evenly across the surface, ensuring it fills all corners of the crust. Smoothing the top is crucial for an aesthetically pleasing presentation, so take your time here.
To avoid air bubbles, which can create an uneven texture, gently tap the sides of the springform pan against your kitchen counter. This action allows any trapped air to rise to the surface and escape. Additionally, you can use a toothpick to swirl through the filling, which will further help in breaking up any bubbles.
Baking Process Explained
Preheat your oven to 325°F (163°C). Once your oven reaches the desired temperature, carefully place the cheesecake into the center of the oven. The ideal baking time for a cheesecake of this size is typically 50 to 60 minutes.
As the cheesecake bakes, keep an eye on it. A perfectly baked cheesecake will have a slight jiggle in the center when you gently shake the pan. This jiggle indicates that the cheesecake is still moist and creamy, which is what you want. If the edges appear set and firm, but the center is still wobbly, it’s a good sign that your cheesecake is nearing doneness.
Cooling Tips
Once baked, allow the cheesecake to cool in the oven with the door slightly ajar for about an hour. This gradual cooling process helps to prevent cracks from forming on the surface of the cheesecake. After the hour has passed, remove the cheesecake from the oven and let it cool at room temperature for an additional 30 minutes before transferring it to the refrigerator. Cooling it in the oven initially and then at room temperature helps to maintain the creamy texture without sudden temperature changes.
Creating the Blueberry Sauce
While your cheesecake is cooling, it’s time to prepare the luscious blueberry sauce that will crown your dessert.
Step-by-Step Guide
Start by rinsing 2 cups of fresh blueberries under cold water. In a small saucepan, combine the blueberries with 1/4 cup of sugar and 1 tablespoon of lemon juice. Over medium heat, bring the mixture to a gentle simmer. Stir occasionally to help the sugar dissolve and to prevent the blueberries from sticking to the bottom of the pan.
Simmering is essential as it allows the flavors to meld and intensify. After about 5-10 minutes, the blueberries will begin to break down, creating a beautiful syrupy consistency.
Techniques for Thickening Sauce
If you prefer a thicker sauce, you can use cornstarch. In a small bowl, mix 1 tablespoon of cornstarch with 2 tablespoons of cold water to create a slurry. Once the blueberry mixture is simmering, slowly pour in the cornstarch slurry while stirring continuously. Allow the sauce to simmer for an additional 1-2 minutes until it thickens.
If you want to avoid cornstarch, simply continue to simmer the sauce until it reaches your desired thickness. This method may take a bit longer, but it results in a rich, concentrated sauce without any added thickeners.
Tips for Achieving the Right Consistency
The key to a perfect blueberry sauce is balancing the sweetness with acidity. Taste the sauce after simmering and adjust the flavor as needed. If it’s too sweet, add a splash more lemon juice; if it’s too tart, sprinkle in a bit more sugar. Once the sauce has thickened, remove it from the heat and allow it to cool slightly before using.
Chilling and Serving the Cheesecake
After the cheesecake has cooled to room temperature, it’s crucial to chill it in the refrigerator. This chilling period allows the flavors to meld and the texture to set perfectly.
Importance of Chilling Time
Ideally, you should chill your cheesecake for at least 4 hours, although overnight is best for optimal flavor. This extended time in the fridge allows the cheesecake to firm up and makes it easier to slice.
Tips for Removing the Cheesecake
To remove the cheesecake from the springform pan, run a thin knife around the edge between the cheesecake and the pan. This will help detach the cheesecake from the sides. Carefully unclasp the springform pan and lift it off. If the cheesecake sticks to the bottom, gently slide a spatula underneath to release it.
Creative Garnishing Ideas
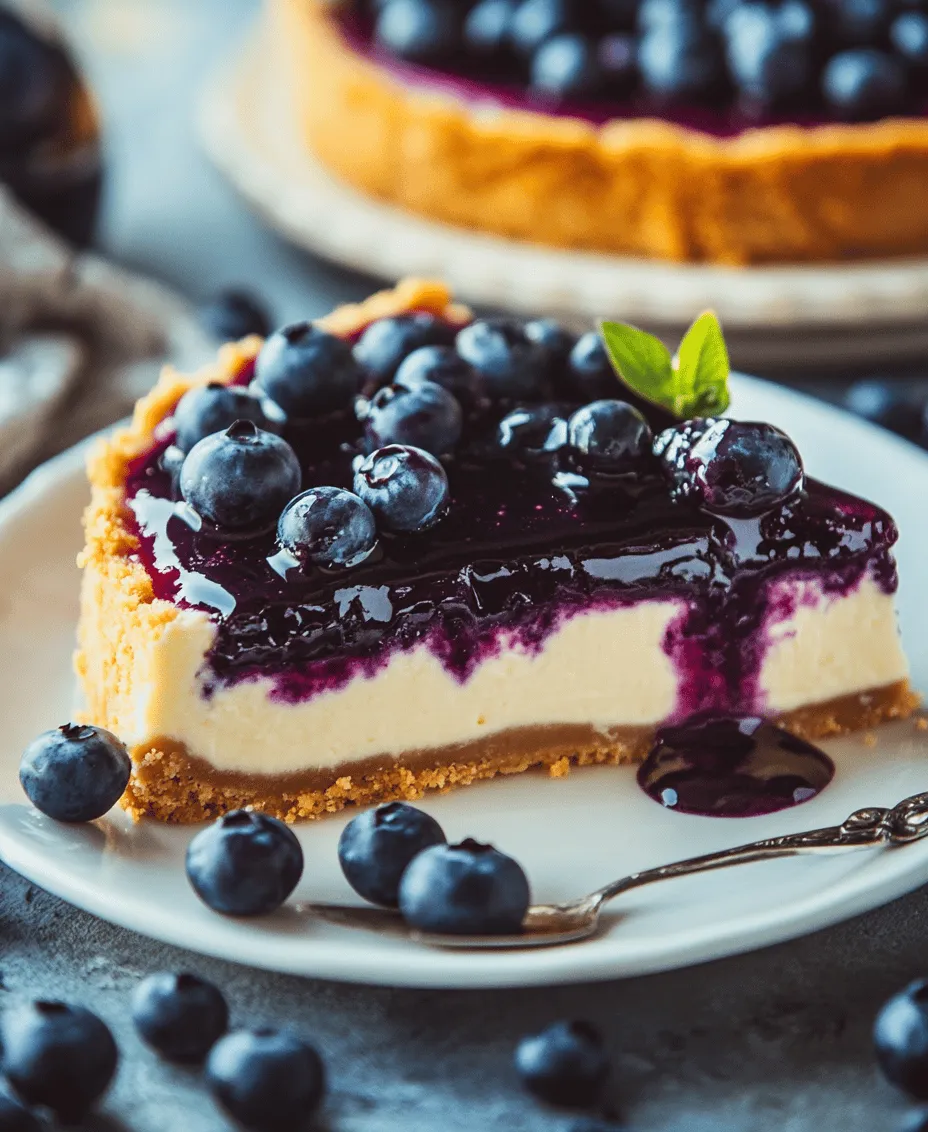
Once your cheesecake is beautifully set, it’s time to garnish! Drizzle the cooled blueberry sauce generously over the top. For an extra touch, scatter some fresh blueberries and a sprinkle of lemon zest on top. This not only adds a pop of color but also enhances the flavor.
Suggestions for Serving
Pair your blueberry cheesecake with a cup of freshly brewed coffee or a glass of dessert wine for a delightful experience. The rich creaminess of the cheesecake combined with the tartness of the blueberry sauce creates a well-rounded dessert that is perfect for any occasion.
Storing Leftovers
If you happen to have any cheesecake leftovers (which is rare!), proper storage is key to maintaining its deliciousness.
Best Practices for Storing Leftover Cheesecake
Cover the cheesecake with plastic wrap or aluminum foil to keep it fresh. It can be stored in the refrigerator for up to 5 days. If you prefer to save it for a longer period, consider freezing it.
Discussion on Freezing Options
To freeze your cheesecake, first, ensure it is fully chilled and set. Wrap it tightly with plastic wrap, followed by a layer of aluminum foil to prevent freezer burn. When stored properly, a cheesecake can last in the freezer for up to 3 months.
When you’re ready to enjoy your frozen cheesecake, transfer it to the refrigerator to thaw for several hours or overnight. Avoid thawing it in the microwave, as this can alter the texture.
Conclusion
Creating the best blueberry cheesecake involves several delicious steps, from assembling and baking the cheesecake to creating a luscious blueberry sauce. Remember to bake it gently, cool it properly, and allow ample time for chilling to achieve that perfect texture and flavor.
Homemade desserts bring joy not only to those who make them but also to those who share them with loved ones. This blueberry cheesecake is not just a treat; it’s a celebration of flavors that can brighten any occasion. We encourage you to try making this delightful cheesecake for your next gathering or as a special indulgence for yourself. Enjoy the process and savor every creamy bite!