
Introduction
Naan bread is a beloved flatbread that has found its way into kitchens around the world, particularly in South Asian cuisine. Its origins can be traced back centuries, with roots in the Middle East and Central Asia. Traditionally baked in a tandoor, naan is celebrated for its soft, pillowy texture and ability to complement a variety of dishes—from rich curries to fragrant stews. Its cultural significance extends beyond mere sustenance, often serving as a staple during communal meals and festive occasions.
In recent years, the culinary landscape has seen a surge in interest surrounding no-yeast variants of traditional recipes. No-yeast naan bread is a fantastic solution for those who may not have the time or inclination to wait for yeast to rise. This simplified version offers the same delightful texture and flavor, but can be prepared in a fraction of the time. Imagine sinking your teeth into a piece of warm, fluffy naan, ready to scoop up your favorite curry or serve as a base for a creative sandwich. This recipe promises to deliver just that, making it a perfect addition to any meal.
Understanding Naan Bread
Naan’s history is as rich as its flavor. The word “naan” is derived from the Persian word for bread, and it has been enjoyed in various forms for centuries. The traditional preparation involves a simple but effective combination of flour, water, and salt, often enriched with yogurt or milk. The dough is then rolled out and slapped onto the walls of a tandoor, where it puffs up beautifully, resulting in a slightly charred exterior and a soft, chewy interior.
In traditional naan recipes, yeast plays a crucial role in creating the airy texture that naan is known for. Yeast fermentation requires time and patience, making the preparation process a bit lengthy. This is where no-yeast naan comes into play. Instead of relying on yeast to leaven the dough, this recipe utilizes baking powder and baking soda as leavening agents. This substitution not only cuts down on preparation time but also makes the recipe accessible for those who may be sensitive to yeast or simply looking for a quicker alternative to enjoy this delectable bread.
Why Choose No-Yeast Naan?
Choosing no-yeast naan comes with a myriad of benefits. The most apparent advantage is the significant reduction in preparation time. With no need for rising, you can whip up a batch of soft and fluffy naan in under an hour. This makes it a perfect option for weeknight dinners or spontaneous gatherings.
Additionally, making naan without yeast caters to those who prefer to avoid yeast for dietary reasons. Some individuals may experience digestive discomfort when consuming yeast, making this no-yeast recipe a suitable alternative. The simplicity of the recipe, combined with the ability to create a delicious side dish in no time, makes it an appealing choice for both novice and experienced cooks alike.
Versatility is another key feature of no-yeast naan. This delightful bread can be paired with a variety of dishes. Whether you’re serving it alongside a fragrant chicken tikka masala, a rich lentil dal, or using it as a wrap for grilled vegetables, no-yeast naan adapts seamlessly to different culinary adventures. You can even enjoy it slathered with butter and garlic or topped with herbs for a flavorful twist.
Ingredients Breakdown
To create the perfect no-yeast naan, it’s essential to understand the role each ingredient plays in achieving that coveted soft and fluffy texture. Here’s a detailed breakdown of the ingredients you’ll need:
– All-Purpose Flour: The primary base for the naan, all-purpose flour lends structure to the bread while contributing to its light texture. The protein content in the flour helps develop gluten, which is crucial for achieving the desired chewiness of the naan.
– Baking Powder and Baking Soda: These leavening agents are the stars of the no-yeast approach. Baking powder releases carbon dioxide when mixed with liquid, causing the dough to rise. Baking soda, when combined with an acidic ingredient like yogurt, creates additional lift, ensuring that your naan is light and airy.
– Salt and Sugar: Salt enhances the flavor of the naan, making it more palatable, while sugar aids in the browning process during cooking. A touch of sugar also balances the flavors, ensuring a delightful taste with every bite.
– Yogurt: Adding moisture to the dough, yogurt lends a slight tangy flavor that complements the naan beautifully. Its acidity also reacts with baking soda, further aiding in the rising process.
– Olive Oil: A source of richness, olive oil contributes to the softness of the naan. It helps to keep the bread tender and adds a subtle flavor that enhances the overall experience.
– Warm Water: The binding agent in the recipe, warm water is necessary for bringing the dry ingredients together to form a cohesive dough. The warmth of the water encourages the activation of the leavening agents.
– Optional Additions: For those looking to elevate their naan experience, consider adding crushed garlic, fresh herbs, or spices to the dough. These additions can create a variety of flavors, from garlic naan to herb-infused variations, offering something unique to suit every palate.
Step-by-Step Instructions
Mixing Dry Ingredients
The first step in making your no-yeast naan is to prepare the dry ingredients. Begin by measuring out the all-purpose flour and placing it into a large mixing bowl. The flour will serve as the foundation for your naan, so ensure you use a good quality brand for the best results.
Next, it’s essential to whisk together the dry ingredients thoroughly. Begin by adding the baking powder and baking soda to the flour. These leavening agents are crucial for achieving that soft and fluffy texture, so it’s important to distribute them evenly throughout the flour. Whisking not only combines the ingredients but also aerates the flour, helping to create a lighter naan.
Once the baking powder and baking soda are well incorporated, add in the salt and sugar. Again, whisk these ingredients together until they are evenly mixed. The visual cue to look for is a uniform color throughout the flour mixture. You want to ensure that no pockets of salt or sugar remain, as this will impact the flavor of your naan.
By taking the time to properly mix your dry ingredients, you set the foundation for a successful naan bread. This step is crucial, as it ensures that the leavening agents work effectively during cooking, resulting in a beautifully risen and soft bread that you will be proud to serve.
As you prepare to move on to the next steps of the recipe, keep in mind the importance of precision and care in each stage of the process. The joy of homemade naan bread lies not only in its taste but also in the love and attention you invest in its preparation.

Combining Wet Ingredients
To start your no-yeast naan bread, the first step is to combine your wet ingredients: yogurt and water. Use plain yogurt for the best results, as it provides a creamy texture and rich flavor that enhances the naan. In a mixing bowl, measure out 1 cup of plain yogurt and add approximately 1/4 cup of warm water. The warmth of the water helps to create a smoother mixture.
Tips for Achieving a Smooth Consistency
To ensure a smooth consistency in your yogurt and water mixture, it’s important to whisk the ingredients together thoroughly. A fork or a small whisk works well for this purpose. If your yogurt is too thick, you can gradually add more water, a tablespoon at a time, until you reach a pourable consistency. Aim for a mixture that is creamy but not overly runny.
Forming the Dough
Once your wet ingredients are well combined, it’s time to mix in the dry ingredients. In a separate bowl, combine 3 cups of all-purpose flour with 1 teaspoon of baking powder and 1/2 teaspoon of salt. The baking powder is your key leavening agent, providing the lightness and fluffiness you desire in naan without using yeast.
Desired Texture When Mixing Wet and Dry Ingredients
Pour the wet mixture into the bowl with the dry ingredients. Use a wooden spoon or spatula to gently mix the ingredients until they begin to come together. The dough should be a bit shaggy at this point. Do not overmix; you want just enough blending to incorporate all the flour. The dough will come together more as you knead it.
Kneading the Dough
Now, it’s time to knead your dough. Lightly flour your work surface to prevent sticking. Transfer the shaggy dough onto the floured surface and begin kneading it with the palms of your hands. Knead for about 5 to 7 minutes, until the dough is smooth and elastic.
Technique for Kneading
To knead the dough properly, push it down and away from you with the heel of your palm, then fold it back over itself and give it a quarter turn. Repeat this process, adding a little flour as needed if the dough is sticky. The goal is to develop gluten, which gives the naan its structure without overworking the dough, which can result in a tougher texture.
Importance of Flour on the Surface
Flouring your surface is crucial to prevent the dough from sticking. However, be careful not to add too much flour while kneading; this could make the naan dense. The dough should be soft and slightly tacky but not overly wet.
Resting the Dough
Once kneaded, shape the dough into a ball and place it in a lightly oiled bowl. Cover the bowl with a damp cloth or plastic wrap to prevent it from drying out. Allow the dough to rest for at least 30 minutes at room temperature.
Benefits of Resting the Dough
Resting the dough allows the gluten to relax, which makes it easier to roll out later. This resting period also helps the naan become softer and fluffier. The dough will not rise significantly since there’s no yeast, but it will become more pliable.
Dividing and Shaping
After the dough has rested, it’s time to divide it into portions. Using a sharp knife or dough cutter, divide the dough into 6 to 8 equal pieces, depending on your desired naan size.
Visual Guidance on Portion Sizes and Thickness
Each portion should weigh around 100-120 grams (about the size of a golf ball). Roll each piece between your palms to form a smooth ball. Then, on a lightly floured surface, flatten each ball into a disc about 1/4 inch thick. The thickness can be adjusted based on personal preference; thinner naan will be crispier, while thicker naan will be soft and chewy.
Cooking the Naan
To cook the naan, you can use a heavy skillet or cast-iron pan, which mimics the traditional tandoor cooking method. Heat your skillet over medium-high heat for several minutes until it’s hot.
Optimal Heat Settings for Perfect Cooking
A properly heated pan is crucial for good naan. If the pan is too cool, the naan will turn out doughy, while too high heat can burn the bread. A drop of water should sizzle when the pan is ready.
Indicators for When to Flip the Naan
Place a naan disc in the skillet and cook for about 1-2 minutes or until bubbles form on the surface. This indicates it’s time to flip it over. Cook for an additional 1-2 minutes on the other side until golden brown spots appear. If you prefer a charred flavor, you can finish cooking it directly over a flame for a few seconds.
Instructions for Making Garlic Naan Variant
For garlic naan, simply mix minced garlic and chopped fresh cilantro into a small bowl with melted butter. Brush this mixture on the naan immediately after cooking. This adds flavor and aroma, making your naan even more delicious.
Garnishing and Serving Suggestions
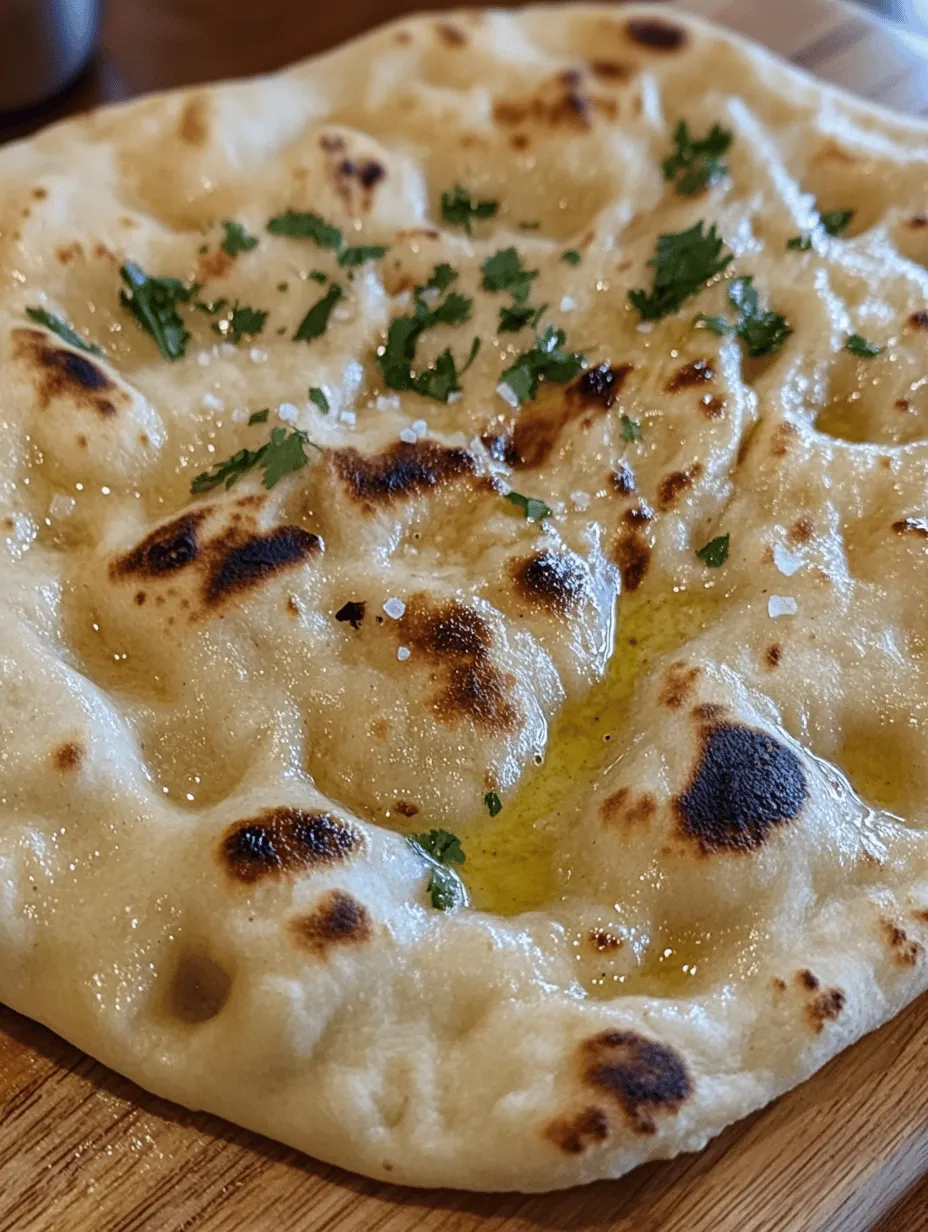
Once your naan is cooked, it’s time to garnish and serve. A simple brush of melted butter or a drizzle of olive oil enhances the flavor and gives it a beautiful sheen. For added flavor, sprinkle fresh herbs like cilantro or parsley on top.
Recommendations for Garnishing
– Garlic Butter: Mix melted butter with garlic and herbs before brushing on the naan.
– Sesame Seeds: A sprinkle of sesame seeds adds a nutty crunch and visual appeal.
Ideas for Serving with Side Dishes
Naan is incredibly versatile and pairs well with a variety of dishes. Here are some suggestions for serving:
– Dips: Serve with hummus, tzatziki, or a spicy chutney.
– Curries: Naan is perfect for scooping up rich, creamy curries like butter chicken or paneer tikka masala.
– Salads: Pair with a fresh cucumber and tomato salad for a light meal.
Creative Uses for Leftover Naan
If you have any naan left, don’t let it go to waste! Use it creatively:
– Wraps: Fill with grilled vegetables, meats, or falafel for a delicious wrap.
– Pizzas: Top naan with sauce, cheese, and your favorite toppings for a quick pizza.
– Croutons: Cut leftover naan into cubes, season, and bake for homemade croutons.
Nutritional Information
Homemade naan has several nutritional benefits over store-bought options. By using simple ingredients like flour, yogurt, and water, you can control the quality and avoid preservatives.
Overview of Nutritional Benefits
– Yogurt: Provides probiotics for digestive health and adds protein.
– Whole Wheat Flour Option: Using whole wheat flour increases fiber content, making it more filling.
– Customizable: You can add herbs or spices to boost the nutritional profile based on your preferences.
Discussion on Serving Sizes
Typically, a serving size for naan is one piece, but you can adjust this based on personal appetite and meal composition. Homemade naan is generally healthier than store-bought varieties, often containing fewer additives and preservatives.
Conclusion
Making soft and fluffy no-yeast naan at home is a simple and rewarding experience. This recipe allows you to enjoy freshly baked naan without the need for yeast or extensive preparation time. The satisfaction of creating your own bread adds to the meal experience, making it perfect for gatherings or family dinners.
Don’t hesitate to experiment with different flavors, such as adding herbs or spices to the dough, or trying out various toppings. The versatility of naan means it can be paired with a multitude of dishes, and it’s a delightful accompaniment to any meal.
Finally, sharing homemade naan with friends and family brings a sense of joy and connection, transforming any dining experience into something special. Embrace the process, enjoy the delicious results, and celebrate the art of homemade cooking!